Operate switchgear from the single-line diagram
On a single-line diagram you operate a switch from its control panel. A command is sent in two steps, select and confirm, and only after YTCC has checked it against the topological interlocks: it calculates the network as if the command were carried out and refuses an operation that would, for example, open a disconnector under load or close onto earth.
The SCADA interlock is an additional layer. The electrical and mechanical interlocks of the switchgear and your switching instructions remain binding. Never use Force send to save time.
Before you begin
- You are signed in with your own account, and your user has the Field writes permission. Without a sign-in the panel only shows the state, with Sign in to send commands and a Sign in button. See Open the runtime screen and sign in.
- The page with the single-line diagram is open on the run screen.
Steps
1. Open the control panel
Click the switch on the diagram. The control panel shows the name and type of the device, the Control and Notes tabs, the state (Position, Trip, and where the device has them, Truck and Control location), and the command buttons.
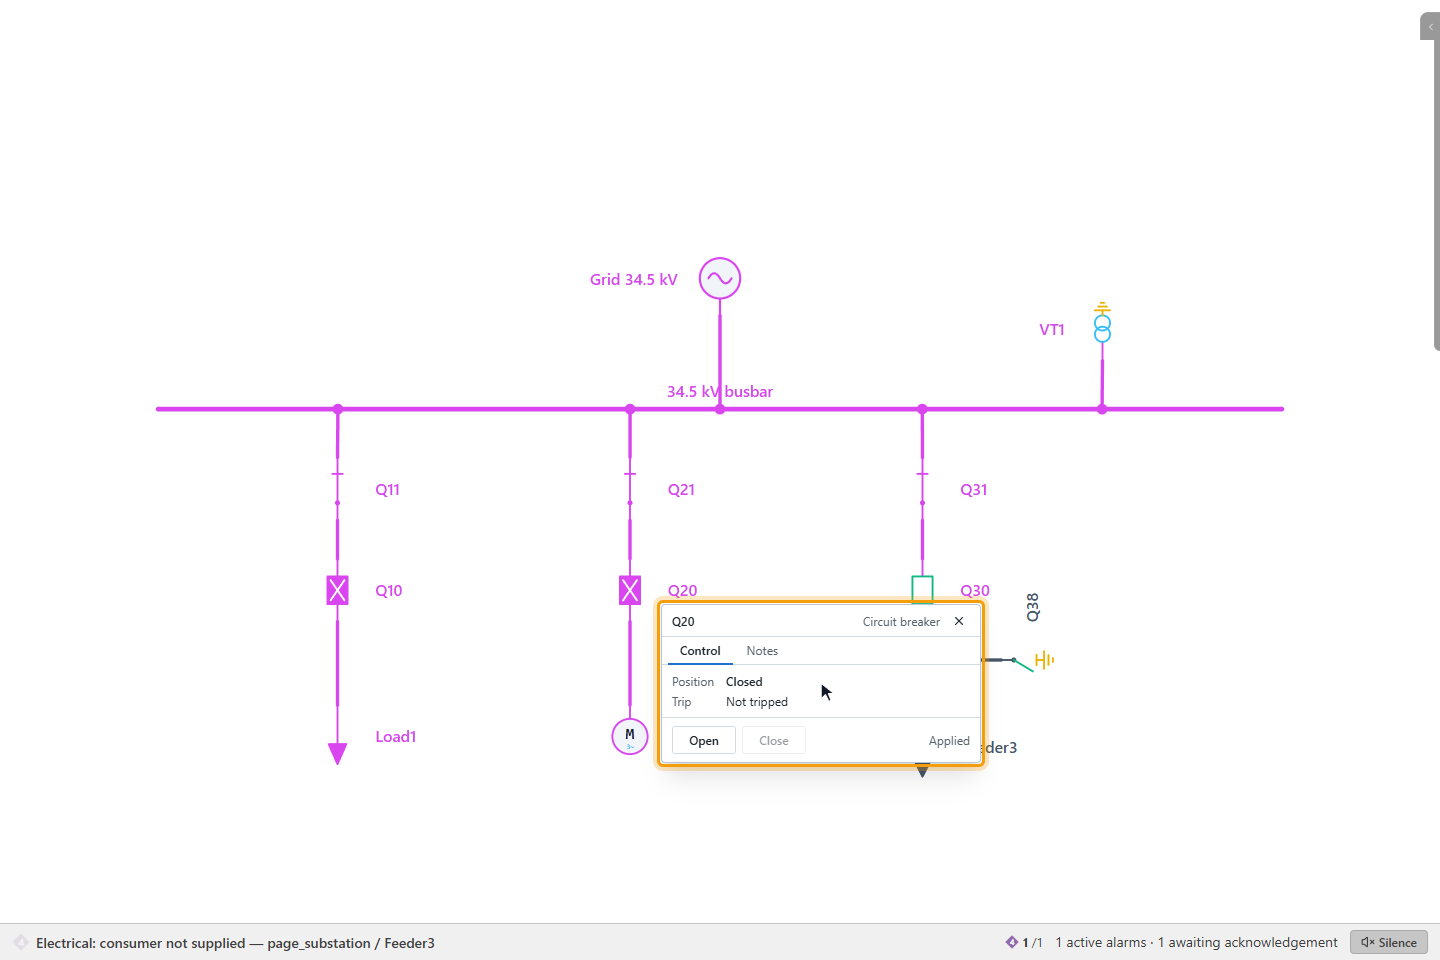
A button that cannot be used is grey; its tooltip says why, for example Already closed, In local control: no remote command possible, Device is tagged — commands blocked or Interlocks could not be checked: no command can be sent. A value with bad quality shows as Position unknown, and no command is possible.
2. Select the command
Click the command, for example Open. The device is reserved for you, and a strip shows the selection with a countdown, for example Open · selected 8 s, with Send command and Cancel.
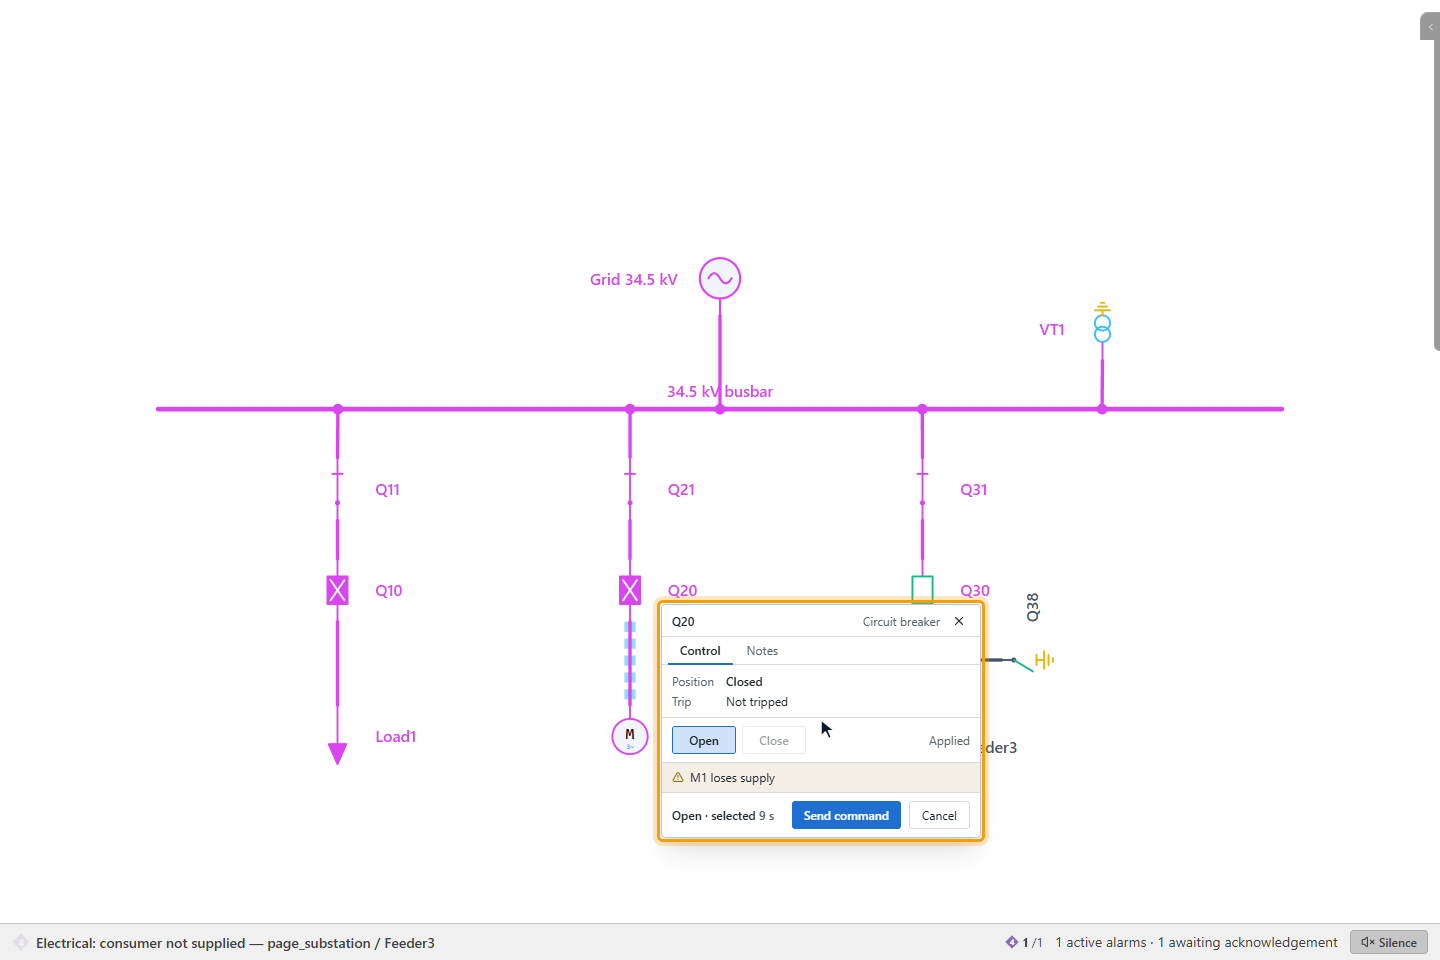
While the command is selected, the diagram shows what would change: sections that would lose supply, be energized, earthed or become undefined are marked with a dashed overlay. Another operator cannot select the same device at the same time (Selected by another operator: …). If you do not confirm within the selection time, 10 seconds by default, the selection is dropped.
3. Send the command
Click Send command. The interlocks are checked again, on your screen and on the server. If the command is accepted, the panel closes and the result appears at the bottom right: Command applied, Command sent (no device confirmation), Command rejected or Command result not received. The diagram follows the new position.
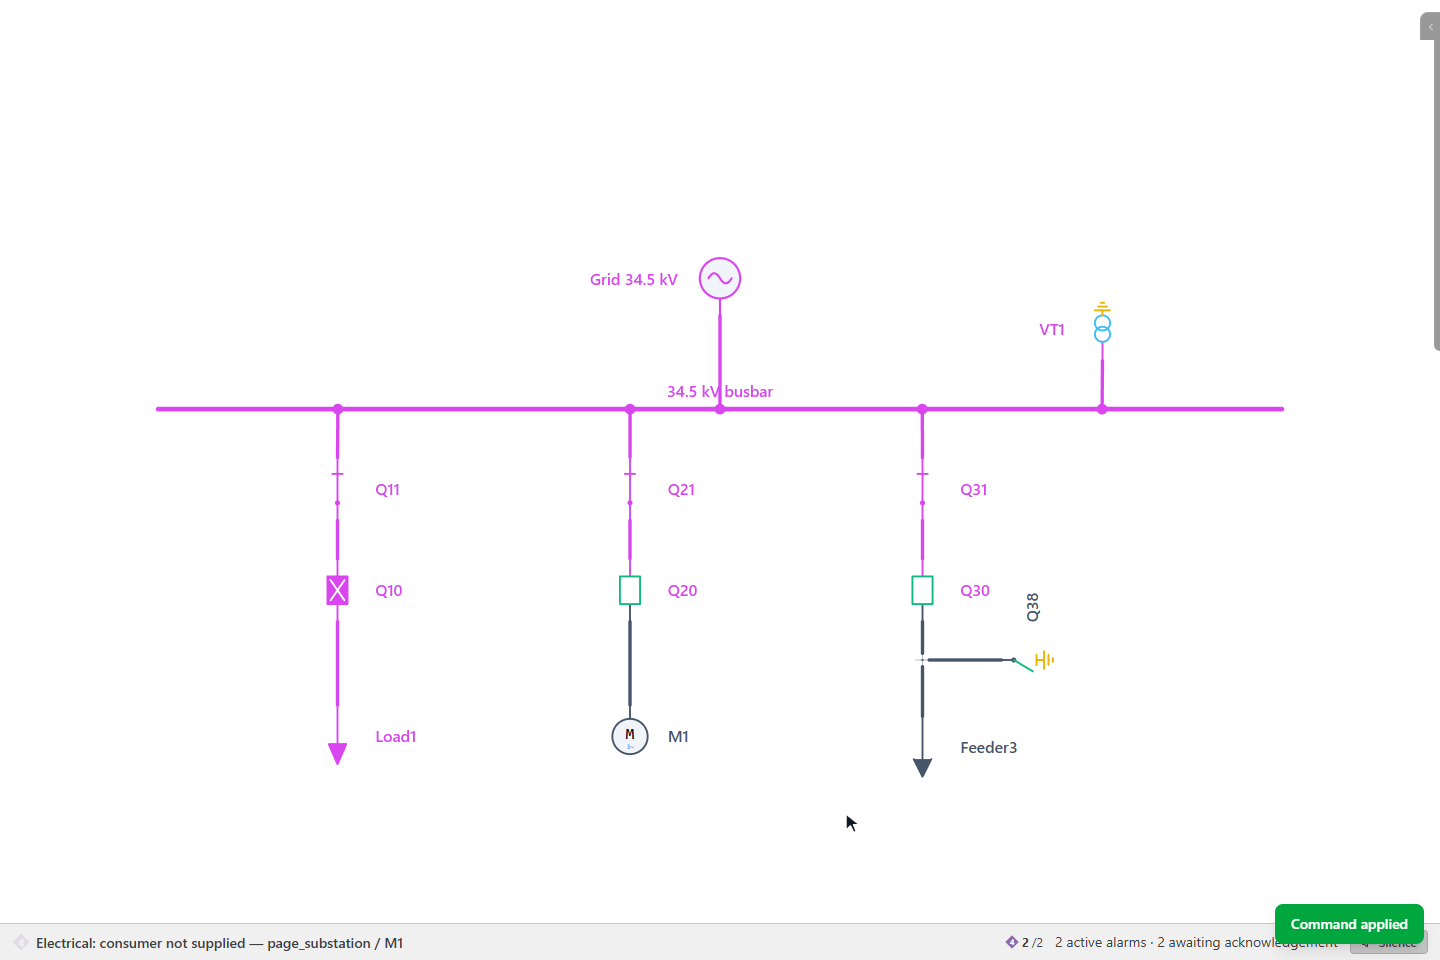
If the device's command is a critical command, the usual approval window asks for a reason or a second user before the command goes; see Send commands. If the command is rejected, the panel stays open and shows the reason.
4. When an interlock blocks the command
If the command would break a rule, the panel lists the rule and the reason under the buttons, for example Open: Disconnector under load · The disconnector cannot be opened under load (open the breaker first). Do what the reason says, here: open the breaker first.
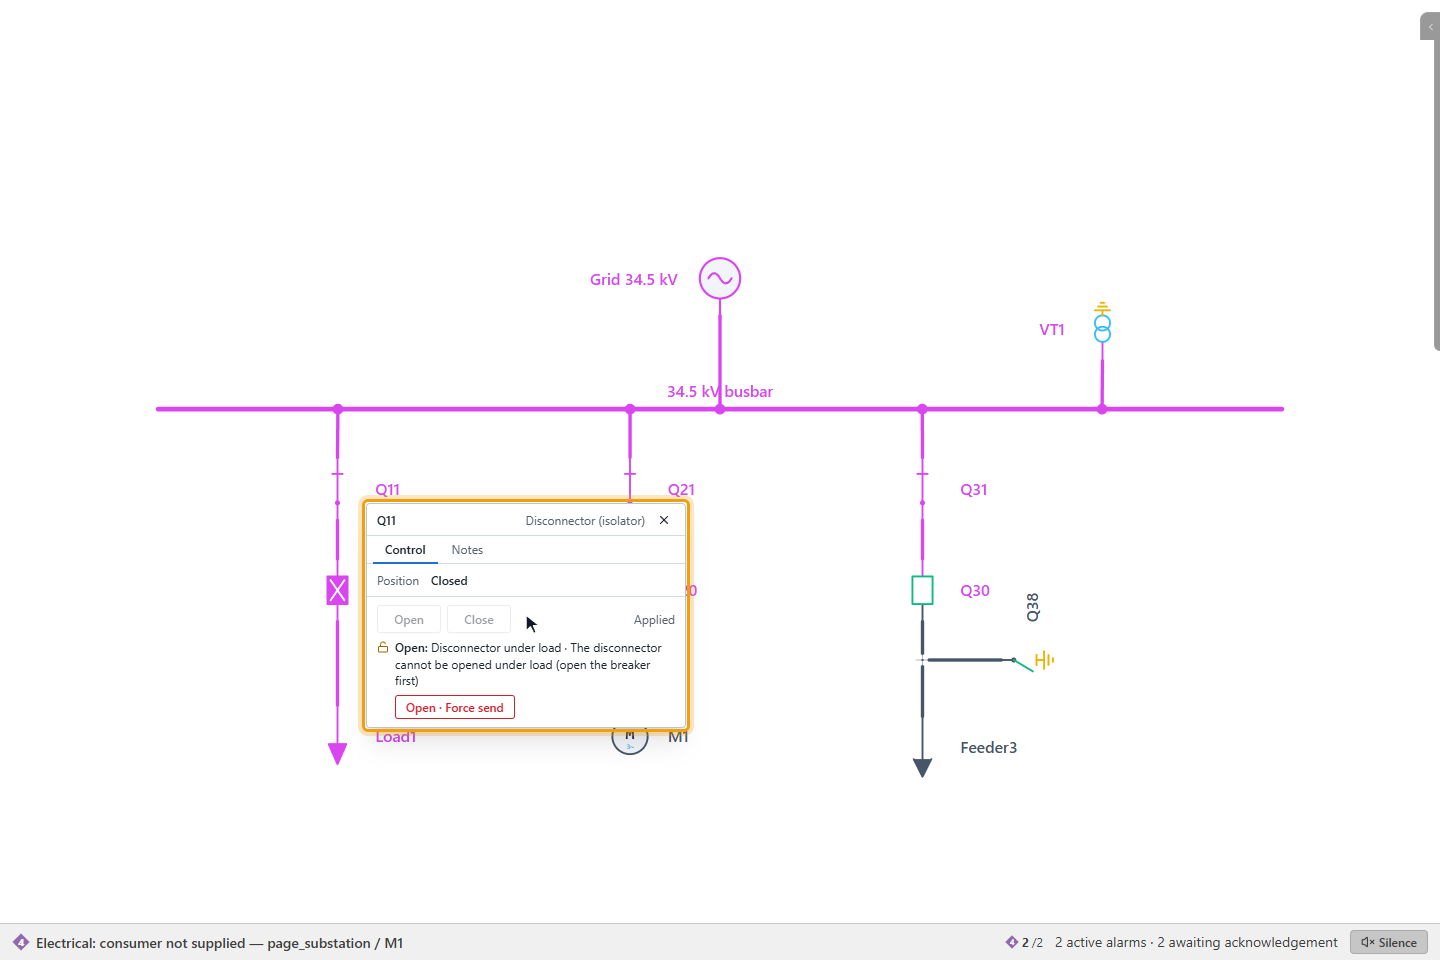
When every violated rule is Unlockable, a red button such as Open · Force send is shown. A Locked rule and the internal locks (position unknown, tripped, local control…) cannot be overridden by anyone. For the rules, see Topological interlocking.
5. Override an interlock
Only when the operation is required and its consequences are under control, click Force send. The window Override interlock and force send shows the violated rules and If the command is sent:, the consequences. Enter a Reason and Your password. With second-user approval (the default), the approver, for example the shift supervisor, enters their user name and password: they approve exactly these interlocks and this reason.
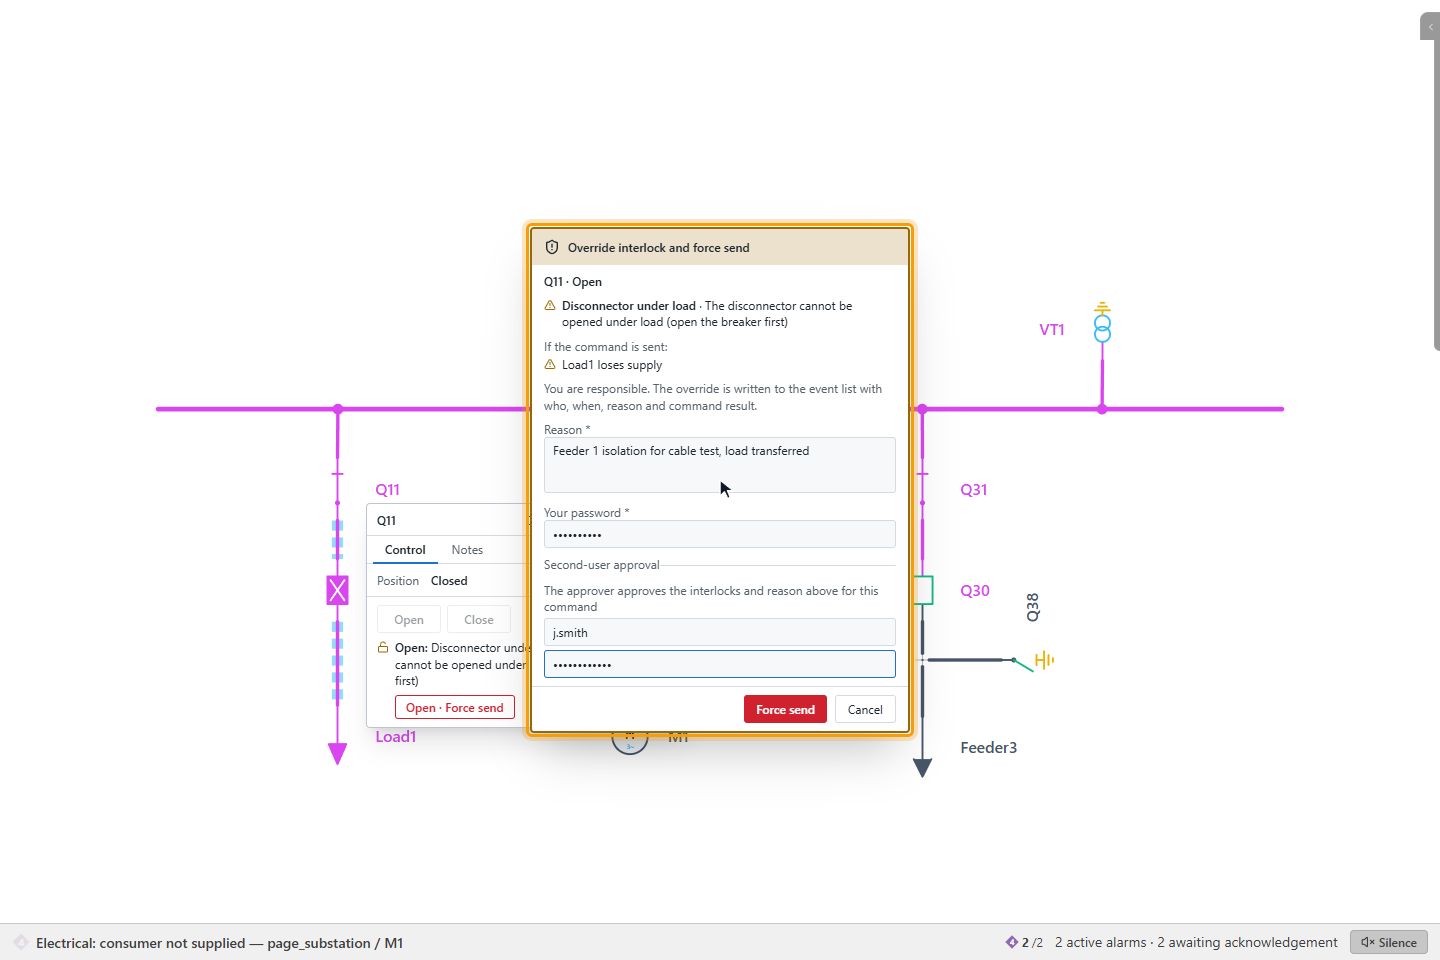
Click Force send. The override is written to the event list as Interlock overridden, with who, when, the device, the rules, the reason, the approver and the command result; a refused override as Interlock override refused.
- When closing would connect an energized section to an earthed one, the window shows a red DANGER strip.
- The approver must be another user with the Override electrical interlock and Approve commands (four eyes) permissions.
- The override is valid for one command and a short time (60 seconds by default). If the interlock state changes in the meantime, the command is refused with Interlock state changed: check the interlocks again.
- After ten wrong attempts within ten minutes, further attempts are refused for a while.
6. Add a note
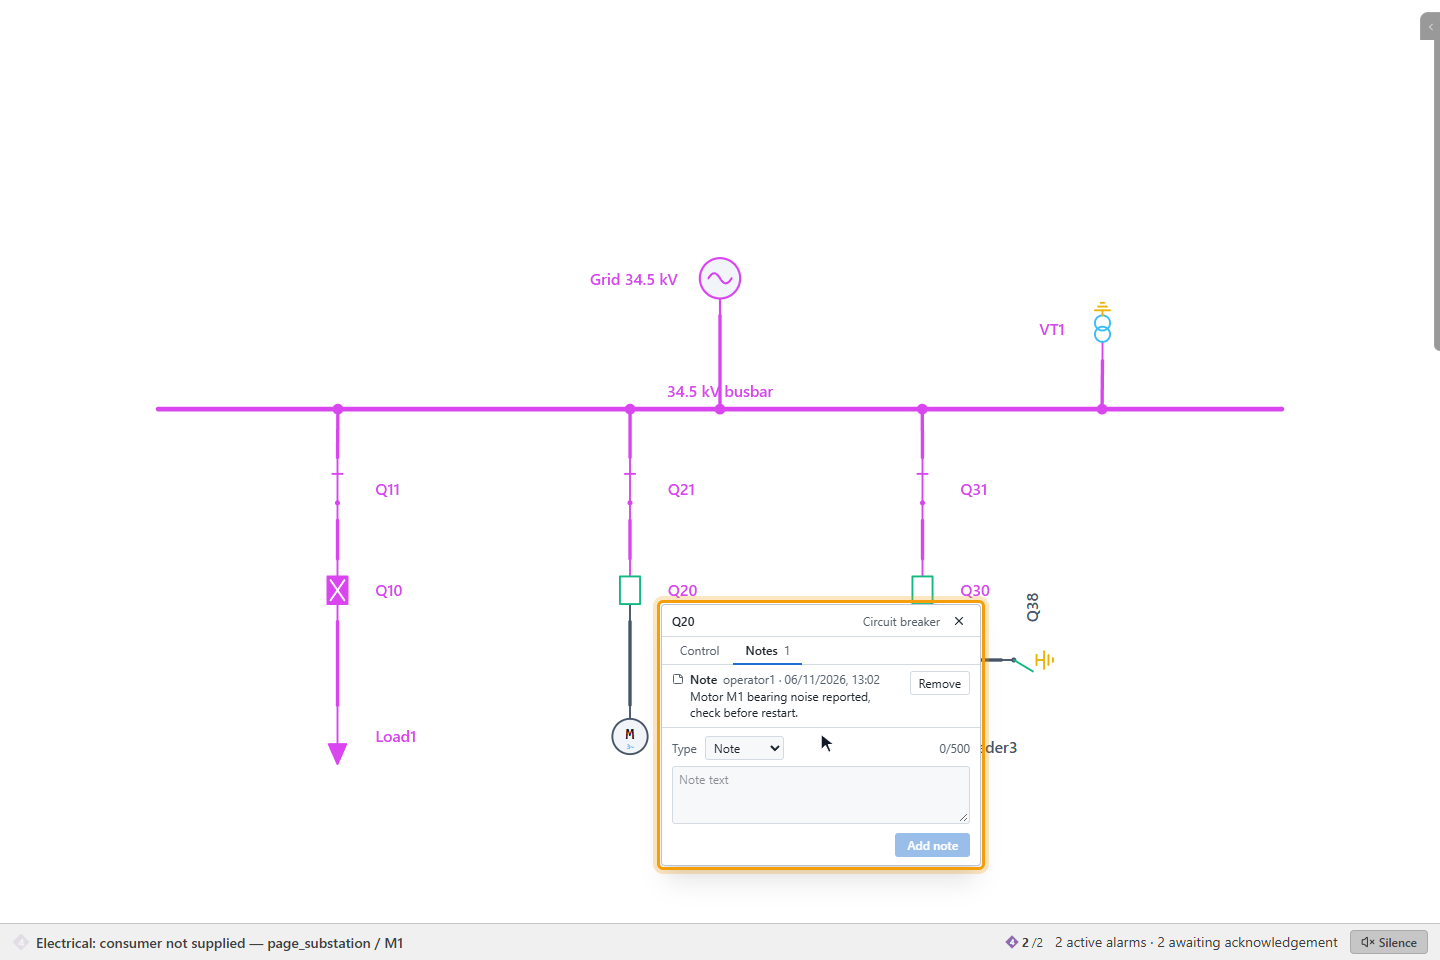
On the Notes tab, enter information for the next shift or for maintenance, for example "Oil leak, maintenance pending", and click Add note. A note does not block commands. The Control tab shows the last note in one line; the Notes tab shows the number of entries.
7. Place a work tag
For maintenance or a work permit, choose Type Work tag, enter the reason, for example the work permit number, and click Place tag. As long as the tag is there, no command can be sent to the device by any route. The Control tab shows a red line Work tag: … — commands blocked with who and when, and the symbol on the diagram shows a tag mark.
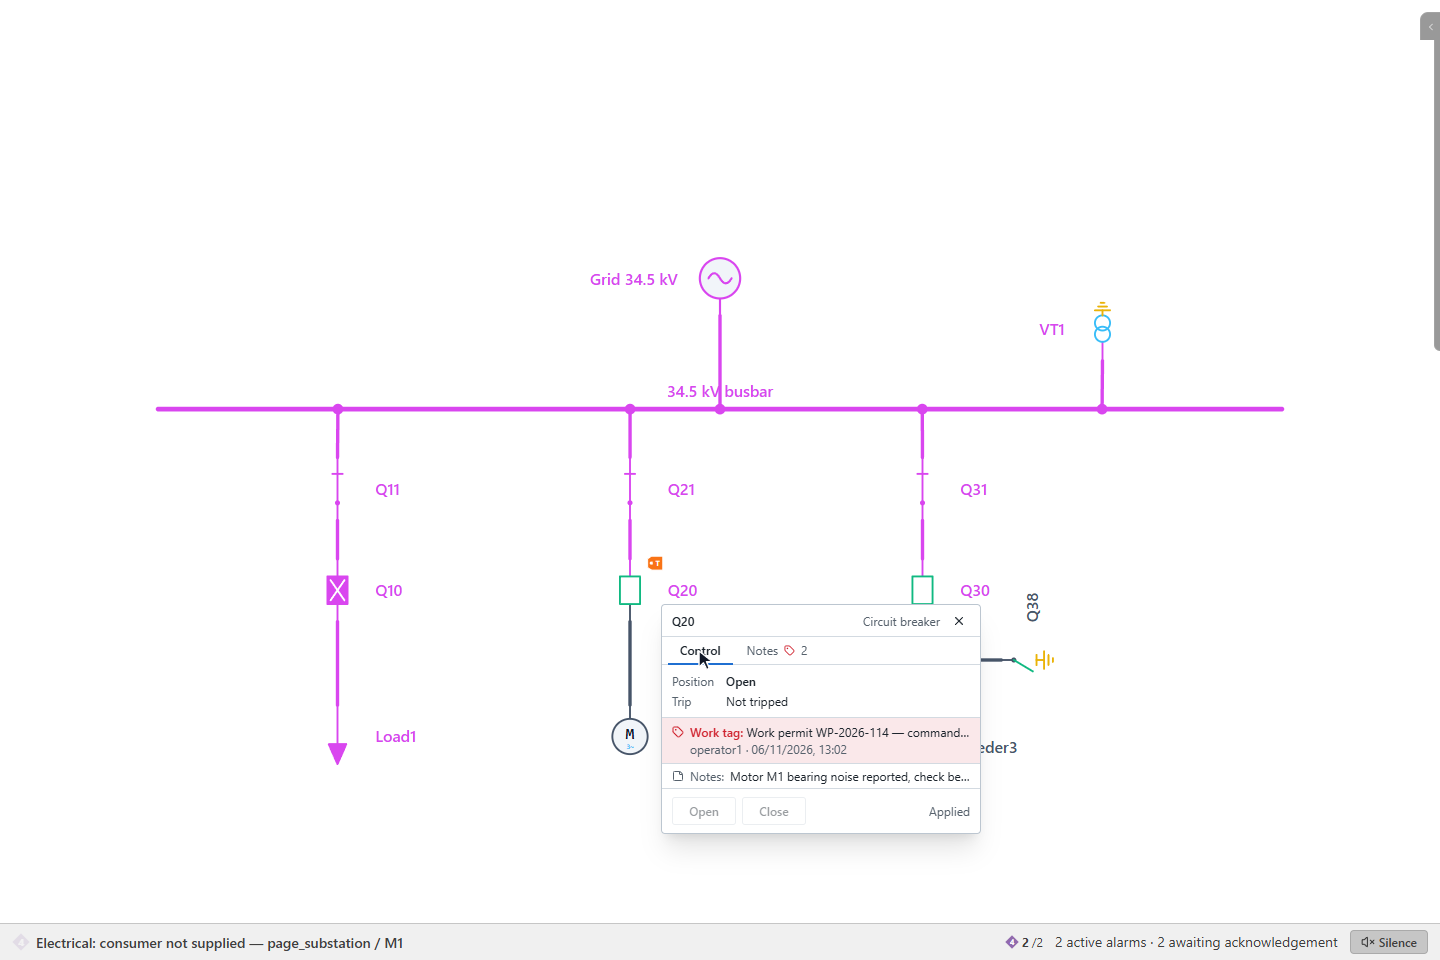
To remove it, click Remove tag on the Notes tab. You can remove your own entries; an administrator can remove other users' entries.
Result
The command has been carried out or refused with a reason, and every step is in the event list: commands, overrides, Tag placed, Tag removed, Note added and Note removed.
Good to know
- Opening a breaker is always allowed. Opening a circuit breaker, load break switch or contactor is never blocked by an interlock rule or by an unknown position, so that a breaker can be opened in an emergency. Only local control and "already open" stop it.
- Notes need Field writes; work tags need Tag out devices. A note may have up to 500 characters; a work tag's reason is optional.
- Switching to the Notes tab drops a pending selection, and a work tag cannot be placed while a command is selected.
- For a sequence of operations prepared in advance and approved by a second person, use a switching program.