Acknowledge alarms
Acknowledging an alarm tells YTCC and your colleagues that you have seen it. It does not change the plant: an alarm whose condition is still present stays active until the condition clears.
Before you begin
- You are signed in with a user that may acknowledge alarms. If the acknowledge buttons stay grey with the tip No permission, ask your project engineer for the permission. See Open the runtime screen and sign in.
- You can read the alarm list. See Read the alarm list and the alarm bar.
Steps
1. Acknowledge one alarm with a comment
Click the row, here T-101 level off setpoint, to select it. A second click clears the selection. Ctrl + click adds or removes a row and Shift + click selects a range. The tip of Acknowledge selected (n), the check mark in the toolbar, counts the selected rows.
If you want to say what you did, type it into Acknowledge comment (optional), here Level checked on site. Click Acknowledge selected (1).
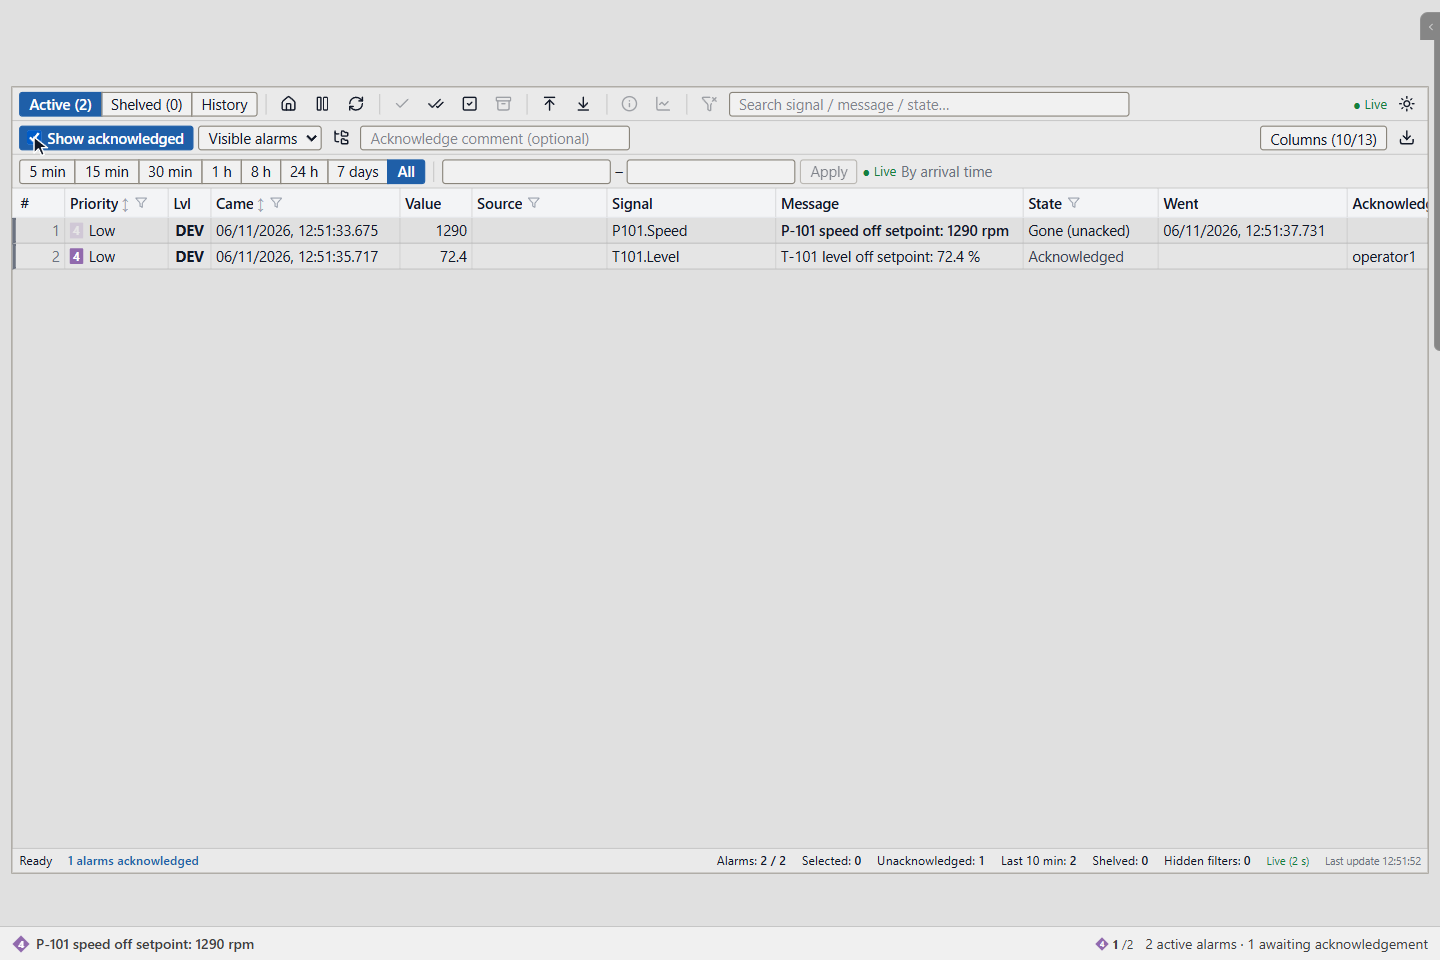
The status bar confirms that the alarm was acknowledged. The row leaves the list, because Show acknowledged is off by default. Here Show acknowledged is turned on: the row is no longer bold, stops blinking and shows Acknowledged, with your user name under Acknowledged by. The alarm bar now shows the next alarm that waits for acknowledgement.
Acknowledge visible (n), the double check mark, acknowledges the unacknowledged alarms on the screen.
2. Acknowledge an alarm that has gone
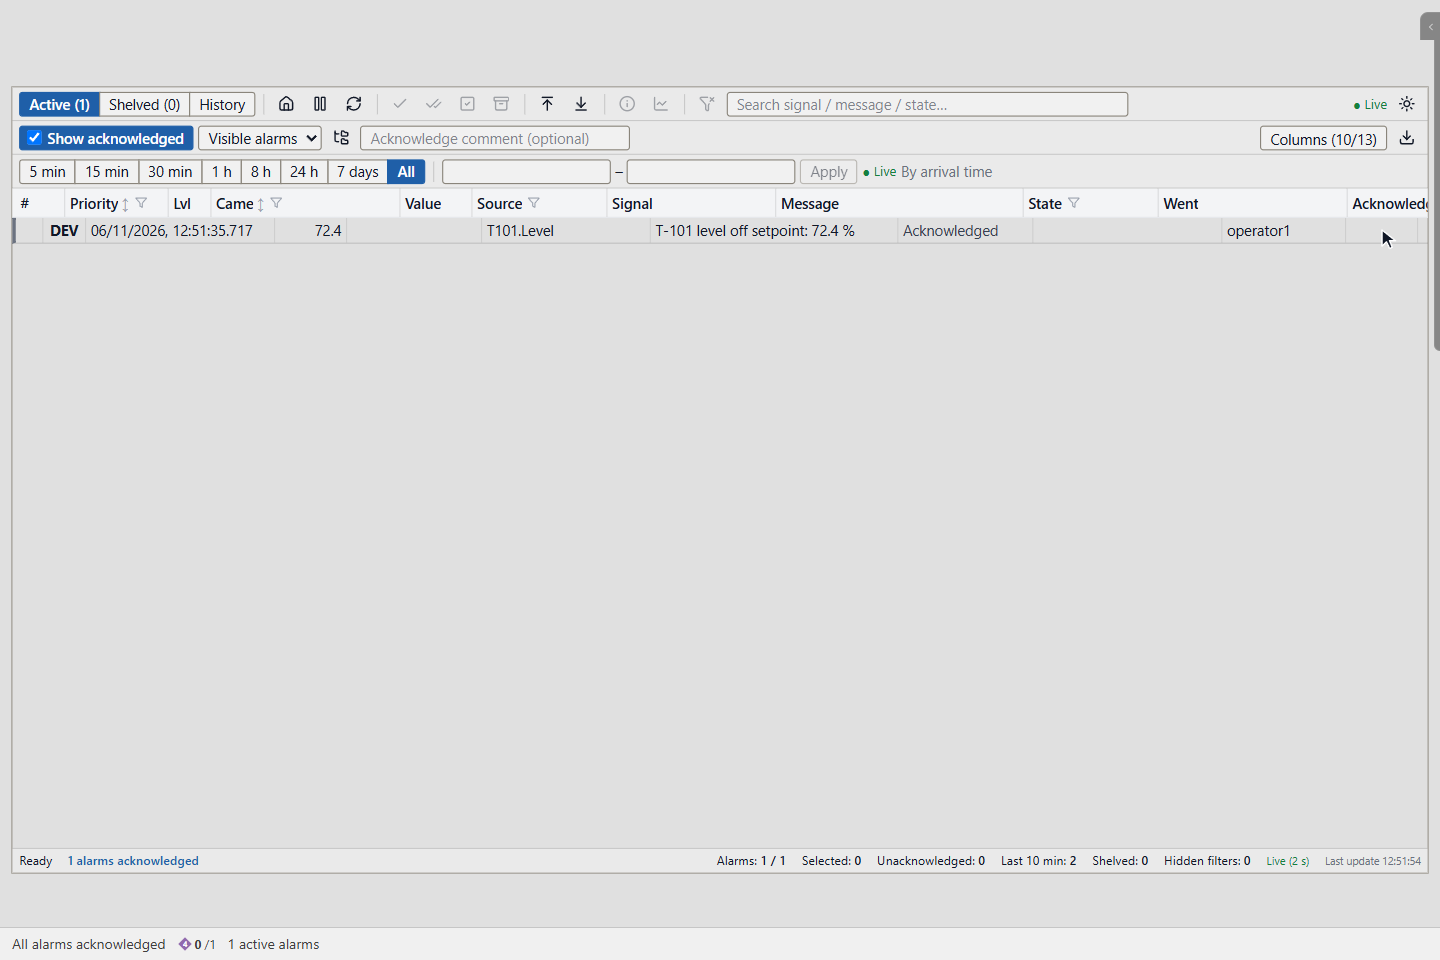
An alarm in state Gone (unacked), here P-101 speed off setpoint, has cleared but nobody has acknowledged it. Click Acknowledge at the end of its row. The alarm leaves the list, because nothing is left to watch.
3. Acknowledge all alarms
Click Acknowledge all (n), the checked square. YTCC asks how many alarms will be acknowledged, here 1 alarms to acknowledge?, because the button acknowledges every unacknowledged alarm of the project, also the ones that the filter hides. Click Yes, or Cancel to keep them.
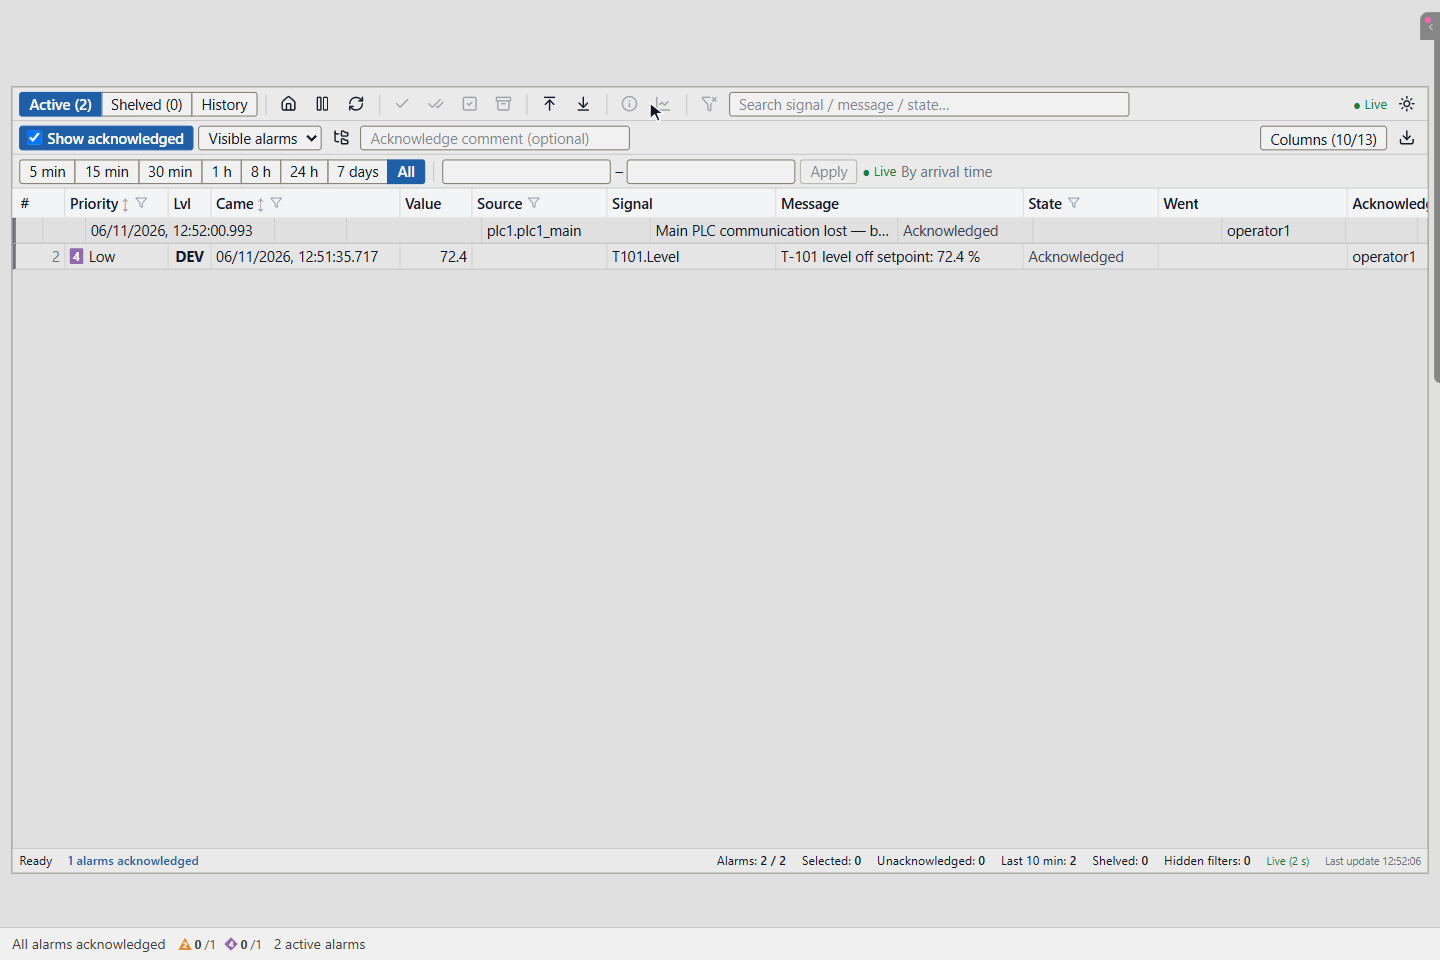
The alarm bar shows All alarms acknowledged. The alarms whose condition is still present, here the level of T-101 and the communication of Main PLC, stay active as Acknowledged until they clear.
4. Check who acknowledged
Click History. Each acknowledgement is an Acknowledged event with its time. The Operator and Description columns show who acknowledged and the comment that was typed.
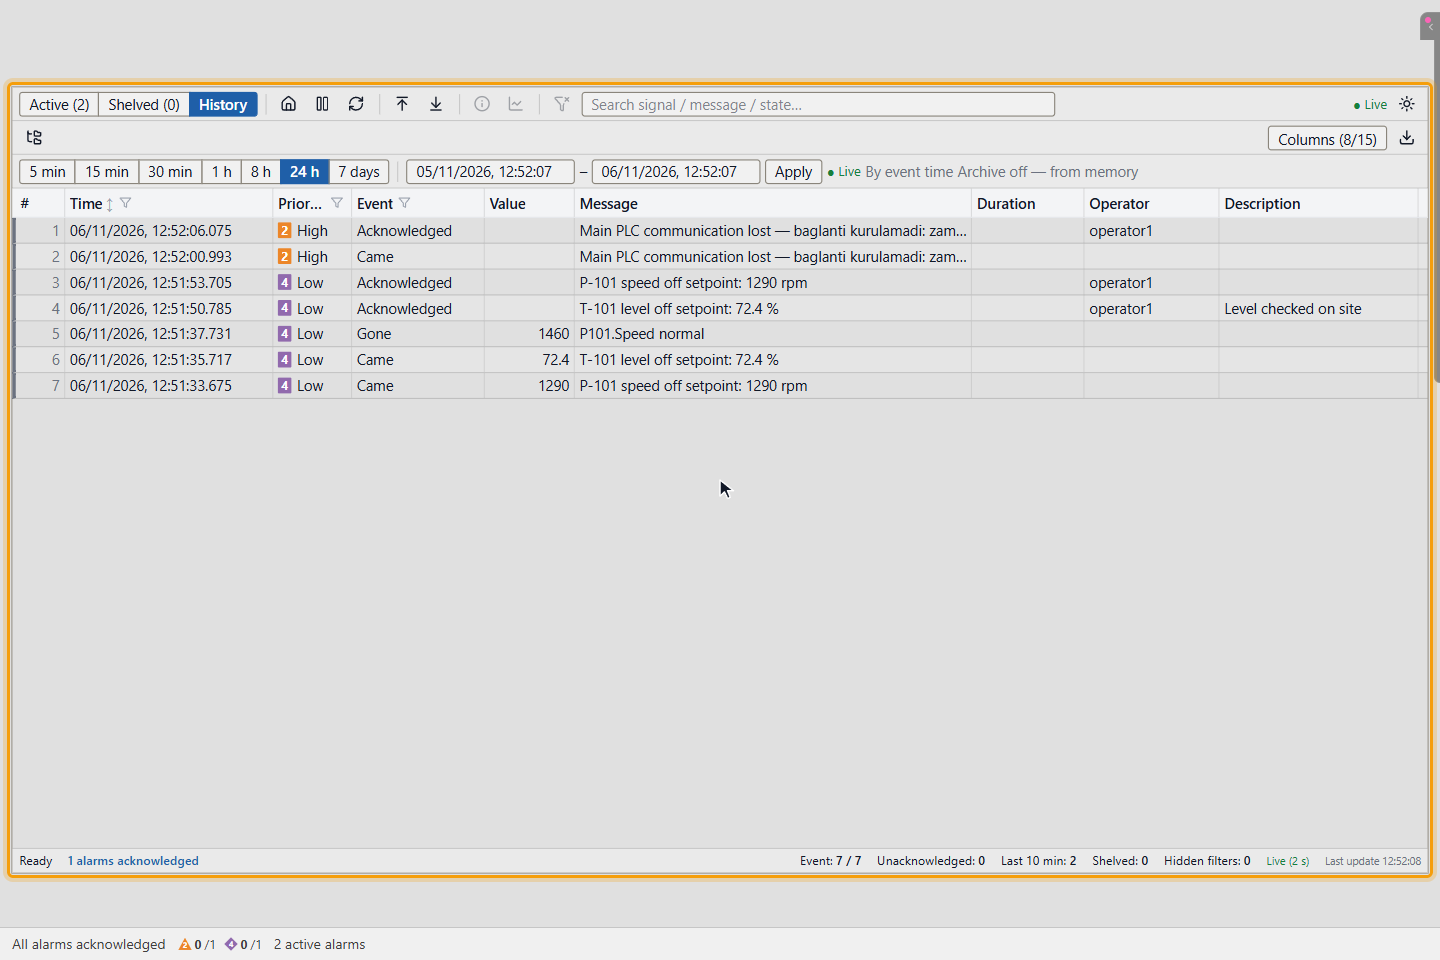
If a list is too narrow to show these columns, use Columns to hide the columns you do not need.
Result
The alarms you acknowledged no longer wait for acknowledgement, and the history keeps who acknowledged them and when.
Good to know
- Some alarms are set up differently by your project engineer. An alarm marked No ack cannot be acknowledged. For some alarms, acknowledging removes them from the list at once; for others, the coming and the going are acknowledged separately. Point at the Acknowledge button to see how the alarm behaves.
- Silence stops the horn only. It does not acknowledge anything.
- Acknowledge only what you have looked at. Acknowledge all during an alarm flood also marks the alarms that you have not read as seen.
- Ctrl+C copies the selected rows. Esc clears the selection.
- The event list and the alarm band can acknowledge alarms too. See Use the event list and Put alarm objects on a screen.