Signal types and instances
A plant has many pieces of the same equipment: twenty pumps, forty feeders. A signal type describes the signals of one such piece once, its elements, for example running, fault, start command and discharge pressure, with their data types, roles, units, alarms, archives and address templates. Each pump is then an instance of the type: a folder with one signal per element. A change to the type can be passed on to all instances.
Before you begin
- The configuration editor is open. The project has a signal type, your own or one taken from the type library, here Pump; see Use the type library.
Steps
1. Open the type
In the Application explorer, expand Signal types and open the type with a double-click or Enter. The type page shows the version, the number of elements and signals, the description and, for a library type, its source (Library Pump v1). The Elements tab lists each element with its role, data type, source, unit, alarm and archive.
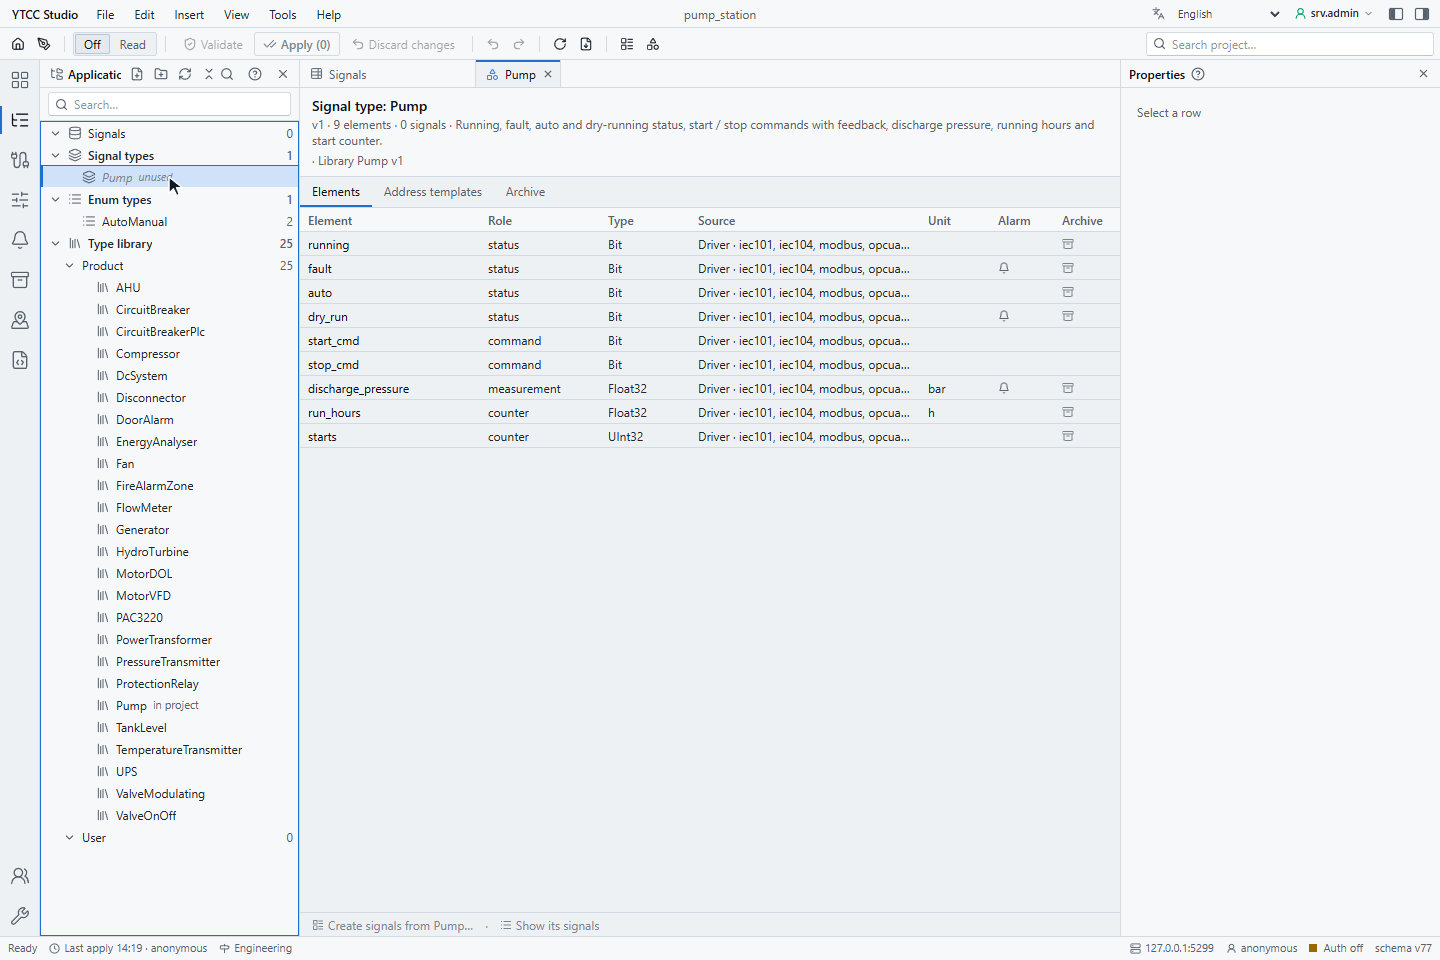
Right-click an element for New element…, Edit…, Copy element, Paste element and Delete element. Deleting an element also removes its signals in all instances, after Apply.
2. Check the address templates
The Address templates tab holds the address of each element for each protocol. Under Modbus addressing, Modbus addresses are set as register kind, word and bit offset; under Other drivers, the address is a text with placeholders:
| Placeholder | Is replaced by | Example |
|---|---|---|
{name} | The value of the parameter name of the instance | ns={ns};s=… |
{name+n}, {name-n} | The parameter plus or minus a whole number | {ioa+3}, DB{db}.DBX{off+0}.1 |
{InstanceName} | The name of the instance folder | ns={ns};s={InstanceName}.running |
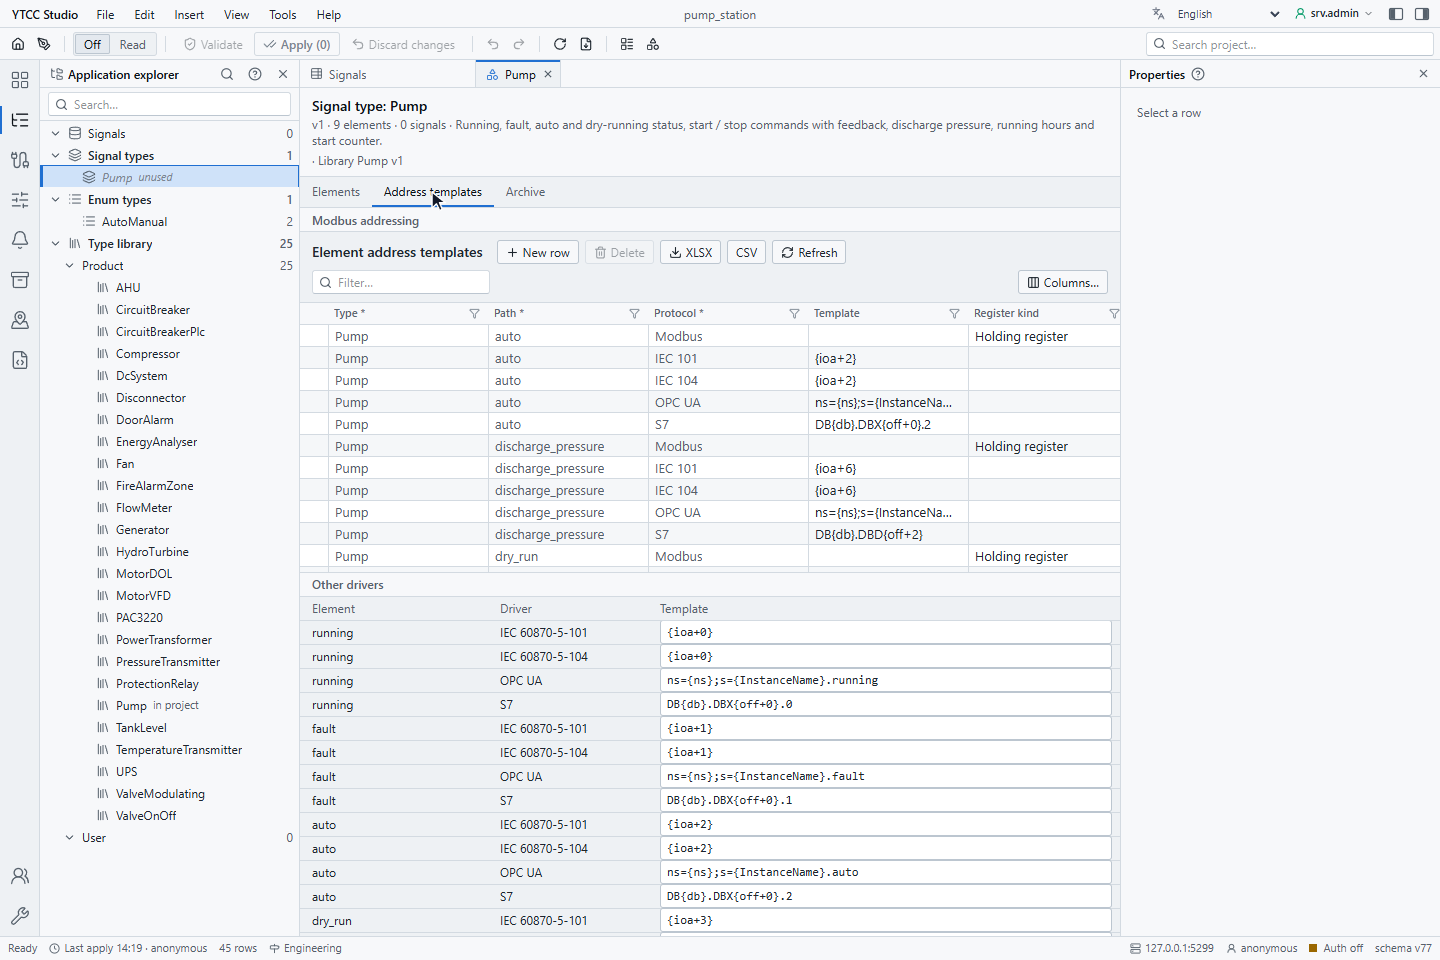
The parameters, for example the first information object address ioa or the S7 data block db, are set per instance.
After a template change, the signals of the type have to be resolved again.
3. Create instances
Right-click the type in the explorer and choose New from type… (in the signal list: New from signal type…). In the window New from signal type, enter the Folder, the Name of the first instance and the Count, here Pump1 and 3. The Preview shows the instances to be created, here Pump1 to Pump3, 3 signals with 27 points.
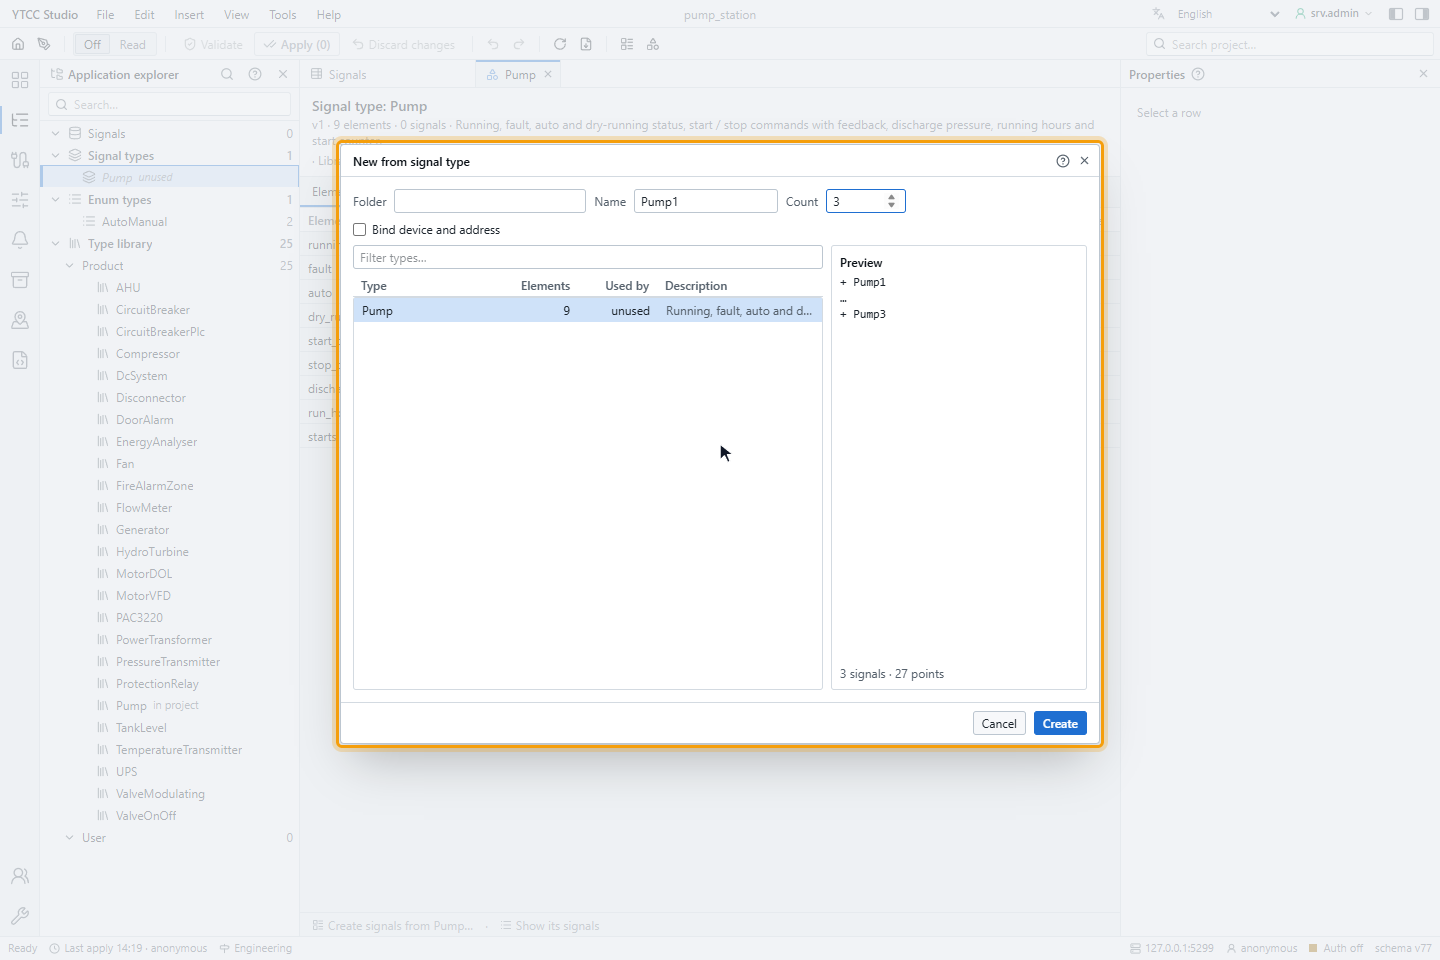
The number at the end of the name is the first number; without a number the instances are numbered from 1. Click Create and apply the configuration; see Validate and apply. Unless you bind them while creating them (see Bind devices and addresses while creating), new instances have no device yet: the validation warns that their signals run as internal memory until a device is chosen.
4. Look at an instance
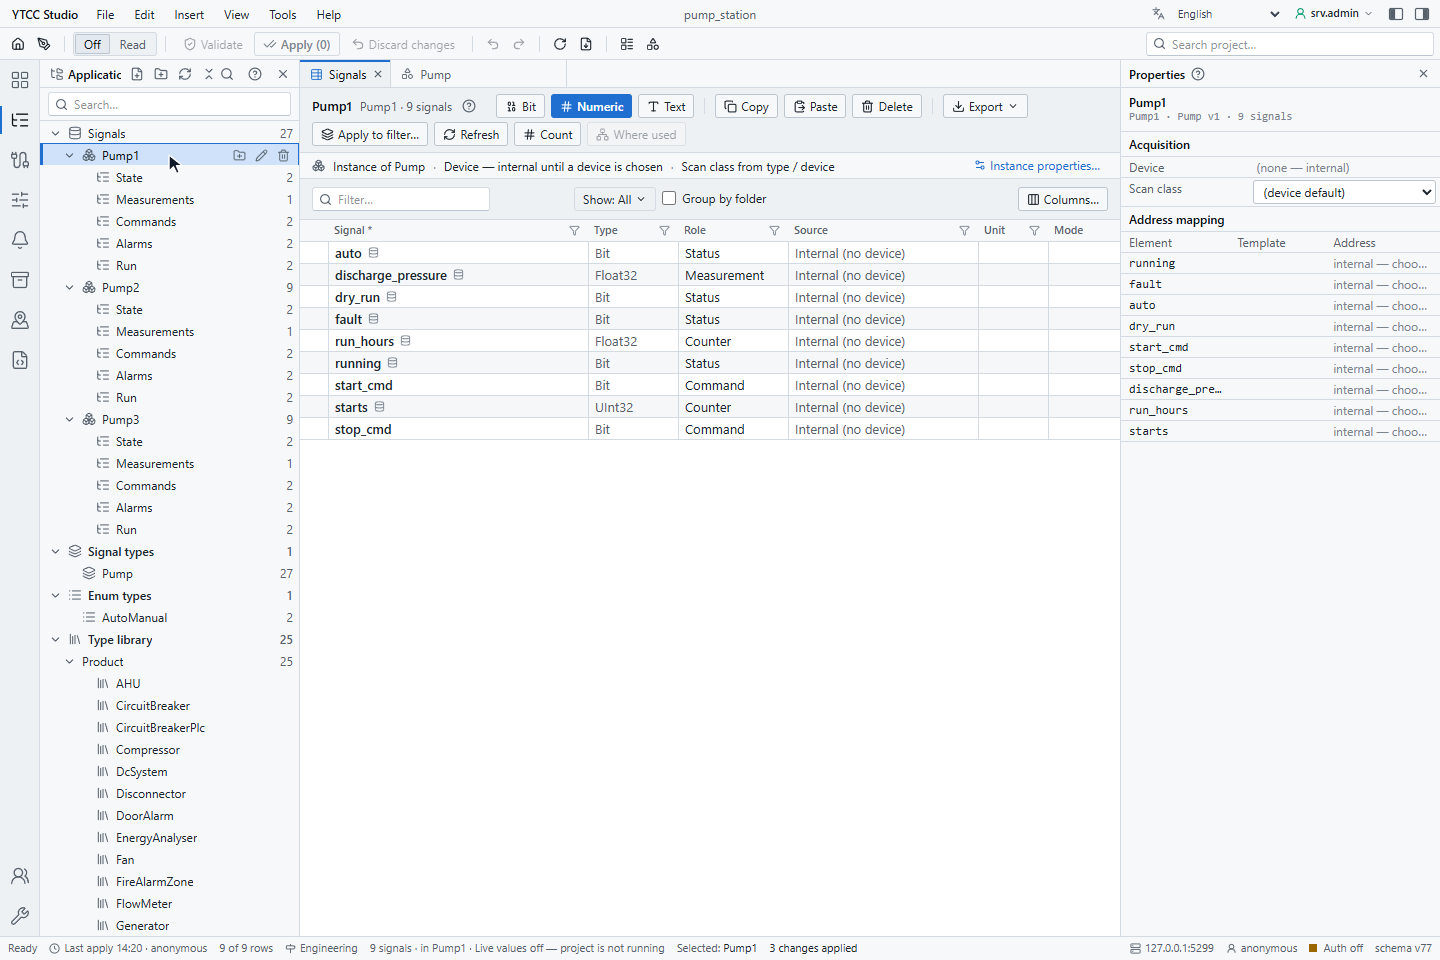
Select an instance folder, here Pump1. Its signals are grouped by category, and the instance bar above the list shows the type, the device and the scan class: Instance of Pump · Device — internal until a device is chosen · Scan class from type / device. Instance properties… shows the device, the scan class and the address of each element in the Properties panel.
Bind devices and addresses while creating
In the window New from signal type, tick Bind device and address to give every new instance a device and its address parameters in the same step. The address templates of the type are then resolved with these parameters.
| Field | Enter |
|---|---|
| Driver | The key of the driver, for example iec101_1 |
| Device(s) | Empty: the only device of the driver. One key: the same device for all instances. As many keys as the Count, separated by commas: one device per instance, in order |
| Parameter, start, step | A parameter of the templates, for example ioa, with its value for the first instance and the step between instances. Add more parameters with + |
Instance number i, counting from 0, gets start + i × step. For 14 RTUs whose objects start at 1000 and
are 10 apart, enter ioa, 1000 and 10. A parameter name has letters, digits and _ only; Instance and
InstanceName are reserved, and start and step are whole numbers.
When the job is staged, the status bar shows the resolved addresses of the first and the last instance. Nothing is written until you apply the configuration; Discard changes drops it together with the other pending changes. If a template cannot be resolved or a device is wrong, the job is refused, nothing is staged, and the window keeps the first error, for example Number of devices must be 1 (same for all) or equal to the number of instances. If the type has no address template for the driver, YTCC warns that there is nothing to bind.
Own values and Revert to type
Each setting of an instance signal comes from its type until you change it. A changed setting is an own value: it shows an own mark, with the tooltip Own value — differs from type. Settings that the type locks show a lock and cannot be changed in the instance.
- Revert to type in the menu of a cell returns that setting to the value of the type.
- Revert all fields to type in the menu of a row returns all settings of the signal.
An element of an instance cannot be deleted on its own. Disable it with Disable element, or detach the instance.
Detach an instance
Detach from type… (row or folder menu) turns the instance into ordinary signals: they keep their current values but no longer follow the type, and template addresses become manual addresses.
Pass type changes on
When you change the type and apply it, the type gets a new version. Its instances are marked outdated until the change is passed on to them. YTCC asks right after the change, or you click Update… in the instance bar. The window Propagate shows what will change:
- Only outdated signals (default) or All signals of this type (re-apply defaults);
- how many signals and values change, and how many own values are kept.
Locked settings and settings without an own value take the type's value; own values are kept. Click Continue and apply the configuration. The Type outdated filter of the signal list shows instances that are behind.
Other ways to use types
| Action | Where | Result |
|---|---|---|
| Apply signal type… | Menu of a folder (or of several folders) | The folder becomes an instance; missing elements are added. A folder that is not empty or belongs to another type is skipped |
| Re-apply type (add missing) | Menu of an instance folder | Adds elements that were added to the type later |
| Create type from signals… | Menu of a folder or of selected signals | Makes a new type from existing signals; optionally the folder becomes its first instance. Addresses stay manual |
| New type… | Menu of Signal types | Creates an empty type to which you add elements |
| Copy type / Paste type | Menu of a type | Creates a copy under a new name |
| Import type from project… | Tools menu | Copies a type from another project; later changes there are not followed |
A type that is used by signals cannot be deleted; change or detach the signals first.