Bind objects to signals
A binding makes a property of an object, such as a tank's level or a rectangle's fill color, follow the value of a
signal. This page shows how to create, change and remove bindings. The example colors a rectangle green while the bit
signal Pump_Running is on.
Before you begin
- The page is open in the screen editor and has the object to bind. See A tour of the screen editor.
- The signal exists in the project. See Create signals.
- To see live values in the editor, start the project before you open the screen editor.
Steps
1. Open the signal picker
Select the object. In the PROPERTIES panel, point at the property row and click the chain icon, Bind to tag, that appears at its right. The Signal picker opens.
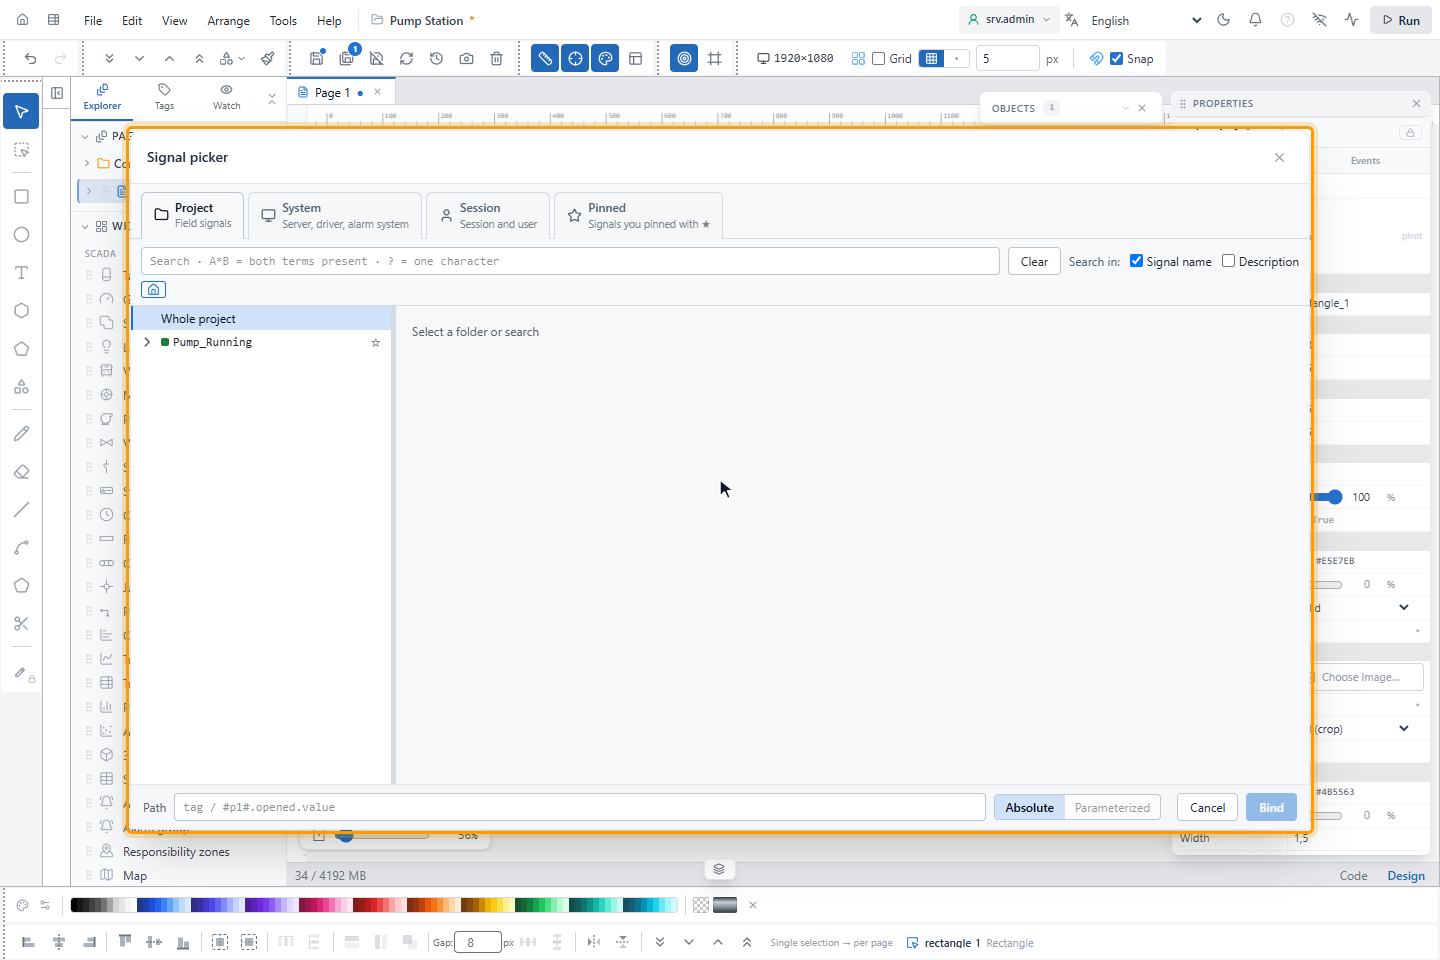
Most properties can be bound: values such as a level or a position, colors, texts, visibility, and the animation settings such as Blink.
2. Choose the signal
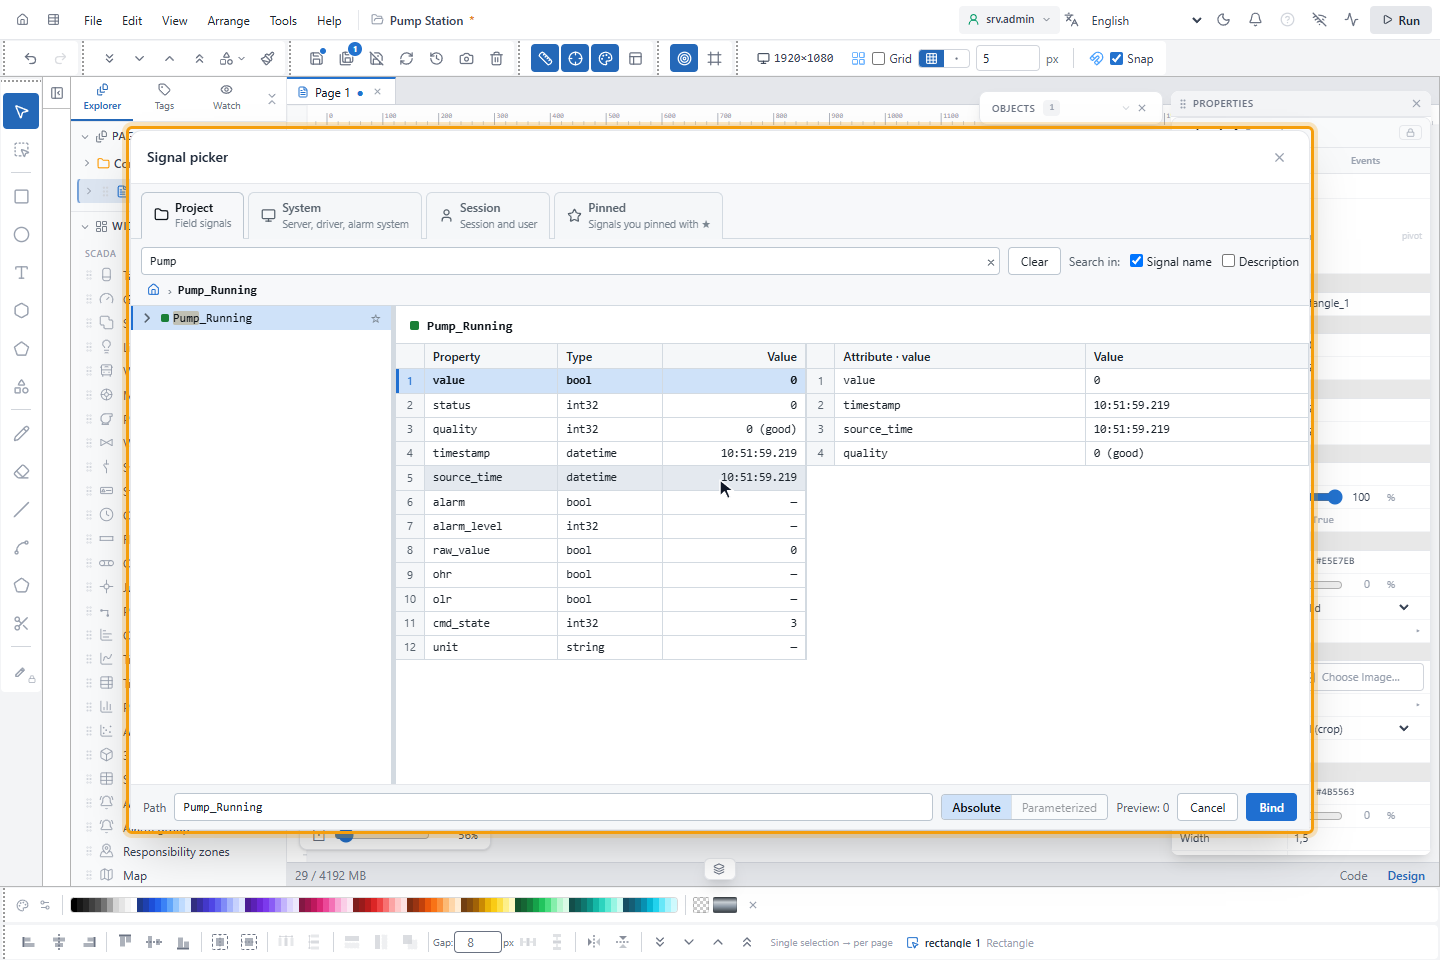
Type part of the name in the search box, click the signal in the tree and click Bind. The property is now bound with
the Direct mapping: it takes the signal's value as it is. The picker also binds a single property of a signal, such
as .quality or .timestamp, and takes a path that you type into its Path box; see
Signal picker.
3. Map the values
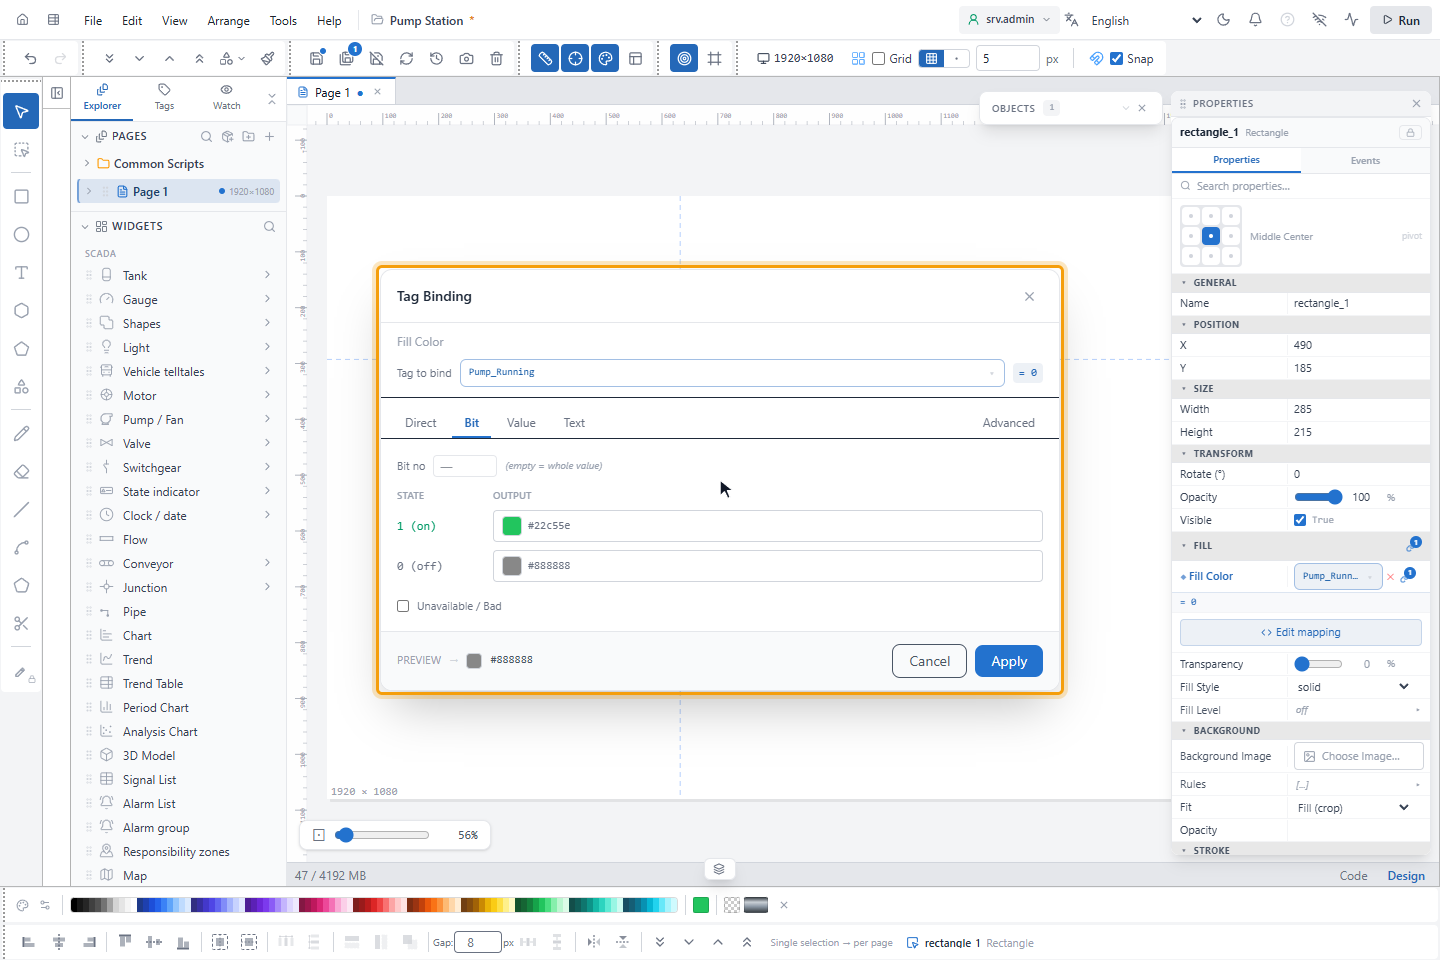
Click Edit mapping below the property row. The Tag Binding window opens with the name of the property at the top. Its tabs decide how the signal's value becomes the property's value:
| Tab | Use it when |
|---|---|
| Direct | The property takes the value as it is, for example a tank level from a percentage. |
| Bit | The property depends on one bit or on an on/off signal: an output for 1 (on) and one for 0 (off). Bit no (0–31) picks one bit of a number; empty uses the whole value. |
| Value | The property depends on a number: Equality maps exact values, Range maps ranges, one row each (+ Add row). |
| Text | The property depends on a text value, one row per text. |
| Advanced | An expression returns the output, for example if(Tags.get('Reactor.Temp') > 80, '#ef4444', '#22c55e'). |
For the example, choose Bit and set the color of 1 (on) to green. Unavailable / Bad adds a separate output for a missing value or a bad quality. On the Value and Text tabs, If no match (default) sets the output for values that no row covers. Preview at the bottom shows the result for the current value.
4. Apply the binding
Click Apply. In the PROPERTIES panel the bound property is marked with a blue dot and shows the signal name. Edit mapping below it, and the marker at the right of the row, open the Tag Binding window; with several objects selected, the marker shows how many of them are bound. The current value is shown under the row while live values are on.
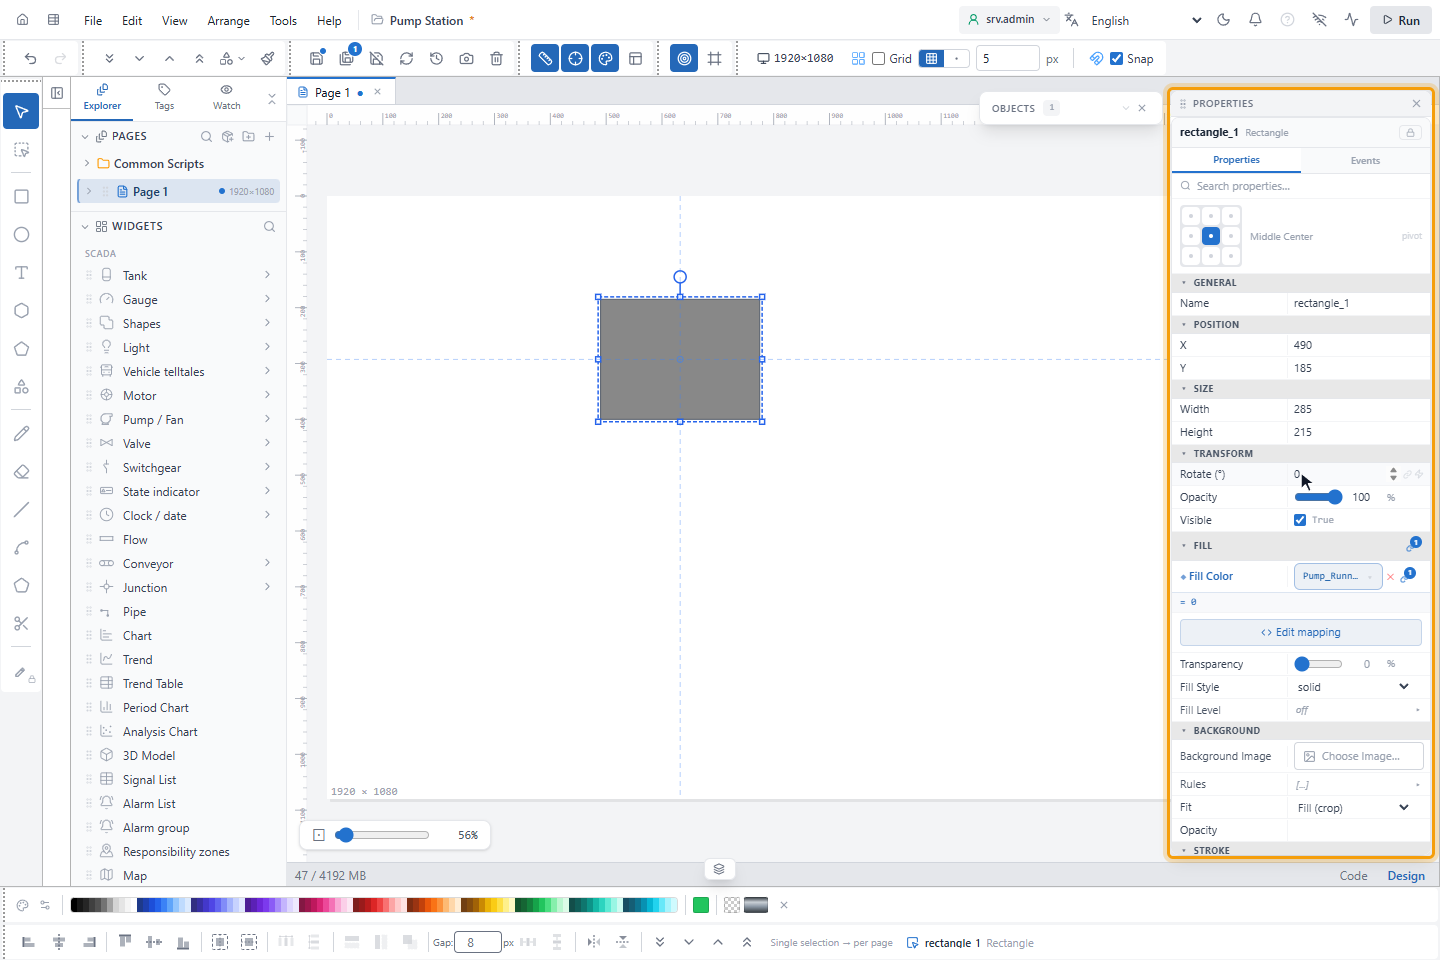
On the canvas the object shows its design value until Live preview in the toolbar is on. In a test run and on the runtime screen it always follows the signal.
5. Remove a binding (optional)
Click ×, Remove binding, next to the signal name. The property gets back the value it had before it was bound. Ctrl+Z undoes the removal.
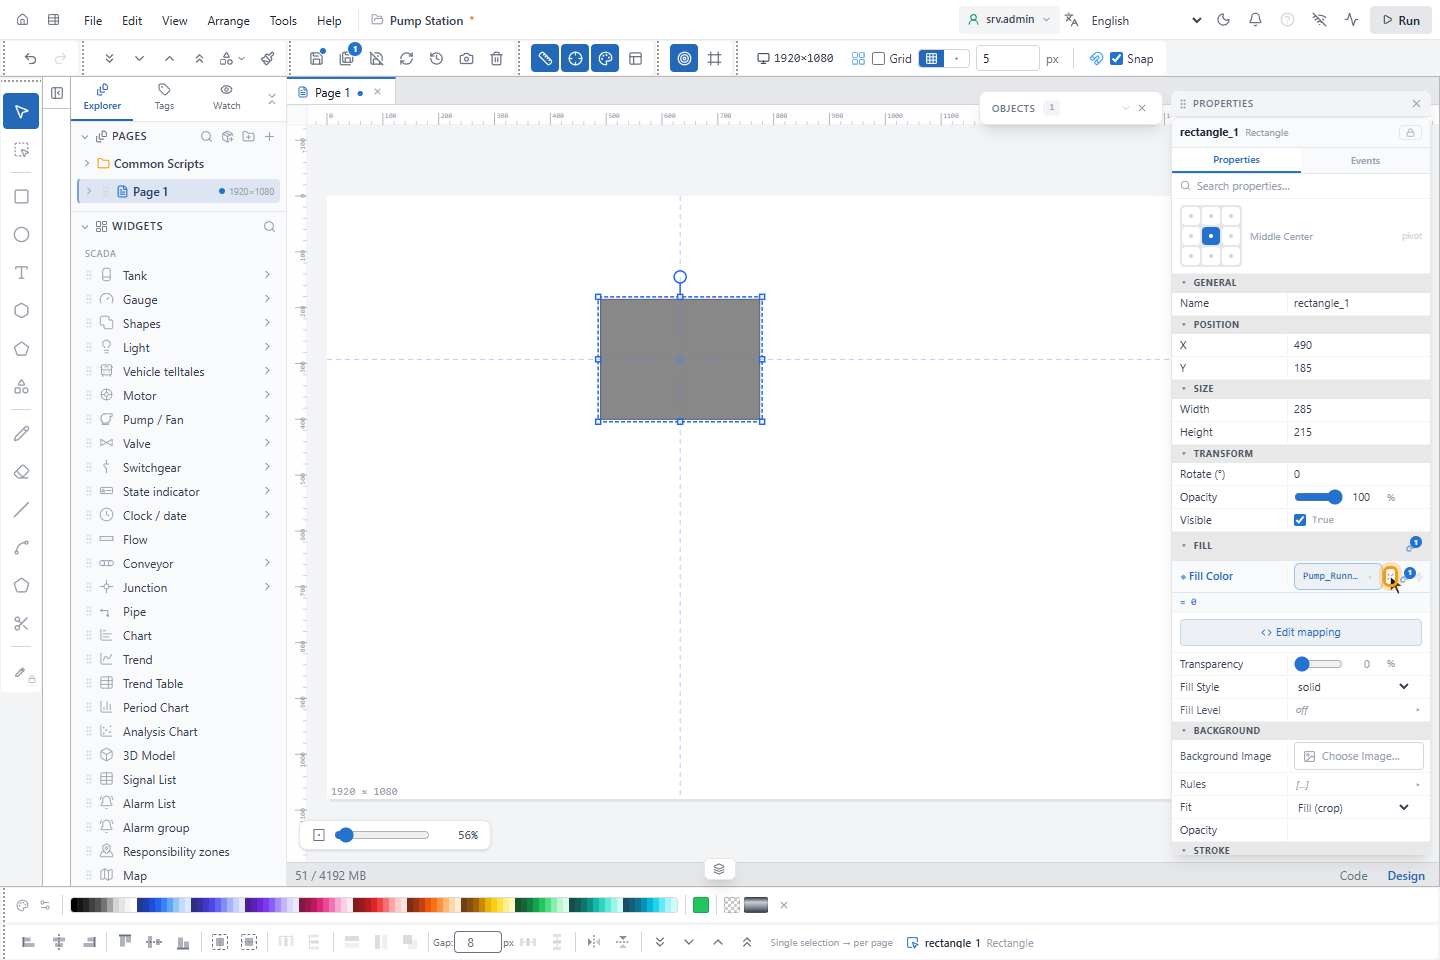
Result
The property follows the signal through the mapping you chose. Save the page to keep it.
Good to know
- A path that you type yourself must exist in the project; a path that does not exist shows no value (
—). - In a symbol or a popup, the picker also offers the parameters such as
#p1#; see Use a parameter, Symbols and Popups.