Signal picker
The Signal picker is the window in which the screen editor asks you for a signal. It shows the signals of the project with their live values, finds a signal by name or description, and gives the path that is written into the object.
Before you begin
- The project is open in the screen editor. See A tour of the screen editor.
- The signals exist in the project. See Create signals.
- To see live values in the picker, start the project before you open the screen editor.
Steps
1. Open the signal picker
Click the signal box of the field that needs a signal:
| Where | You click |
|---|---|
| PROPERTIES panel, a property that is not bound | The chain icon, Bind to tag |
| Tag Binding window, Tag to bind | Select tag... |
| PROPERTIES panel, signal fields such as Bound Tag or the pens of a trend | — tag — or — select tag — |
| Events tab, signal field of an action, and the bindings of a 3D model | The … button, Pick from catalog |
The Path box at the bottom shows the current value of the field. If the value is a signal of the project, the tree opens on it.
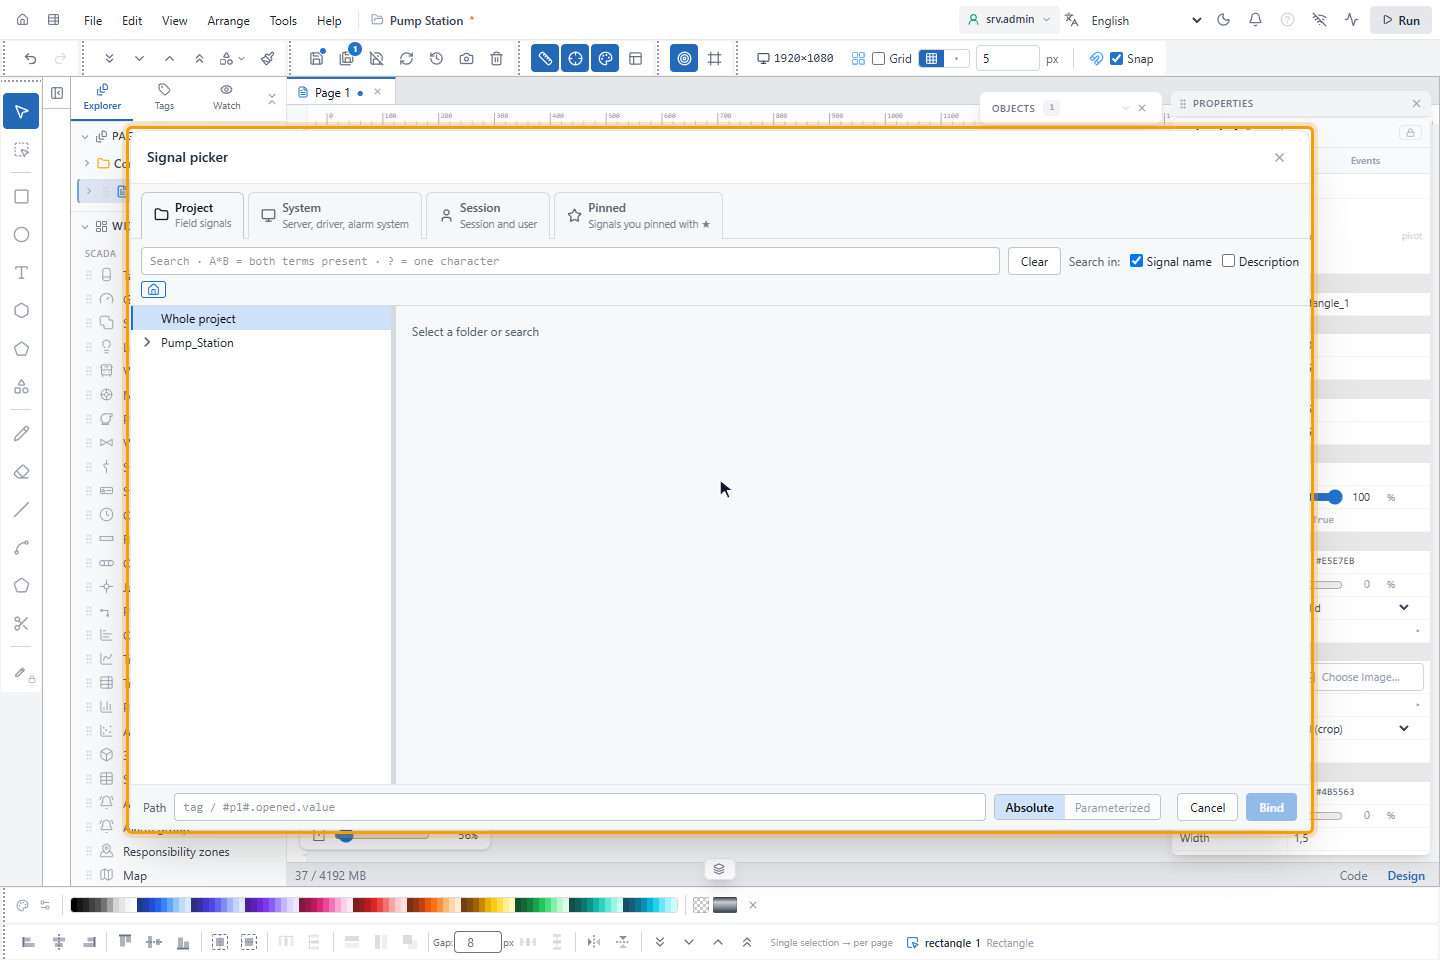
2. Choose a tab
| Tab | Shows |
|---|---|
| Project | Field signals: the signals of your project |
| System | The System and Alarms folders: server, driver and alarm system values |
| Session | The Session folder: values of the session and the signed-in user |
| Pinned | The signals that you pinned with ★ |
Your selection stays when you change the tab.
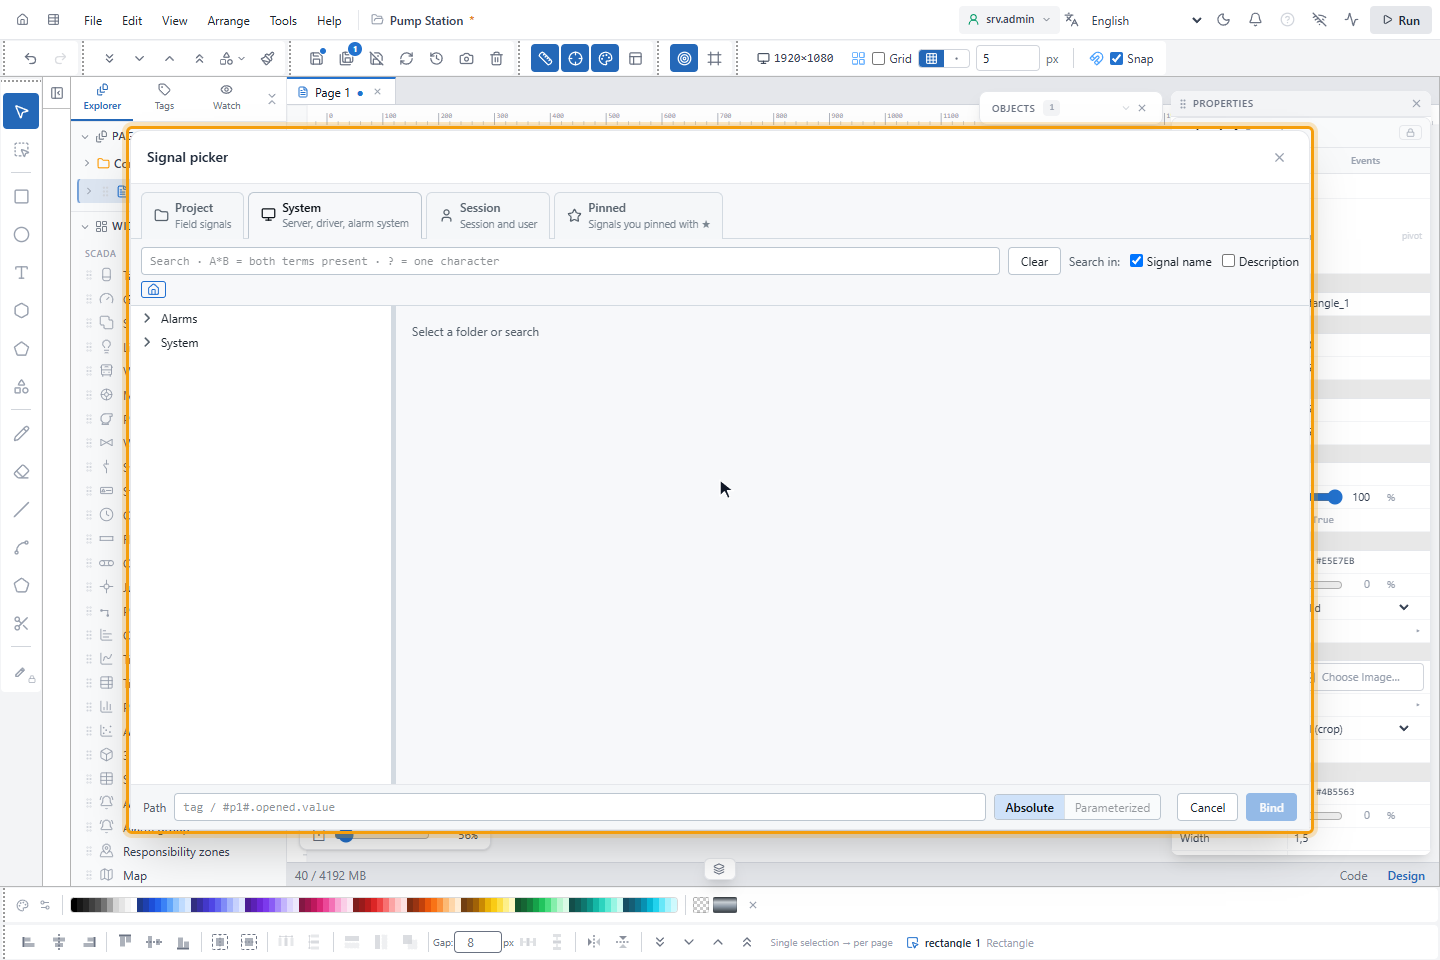
3. Browse the tree
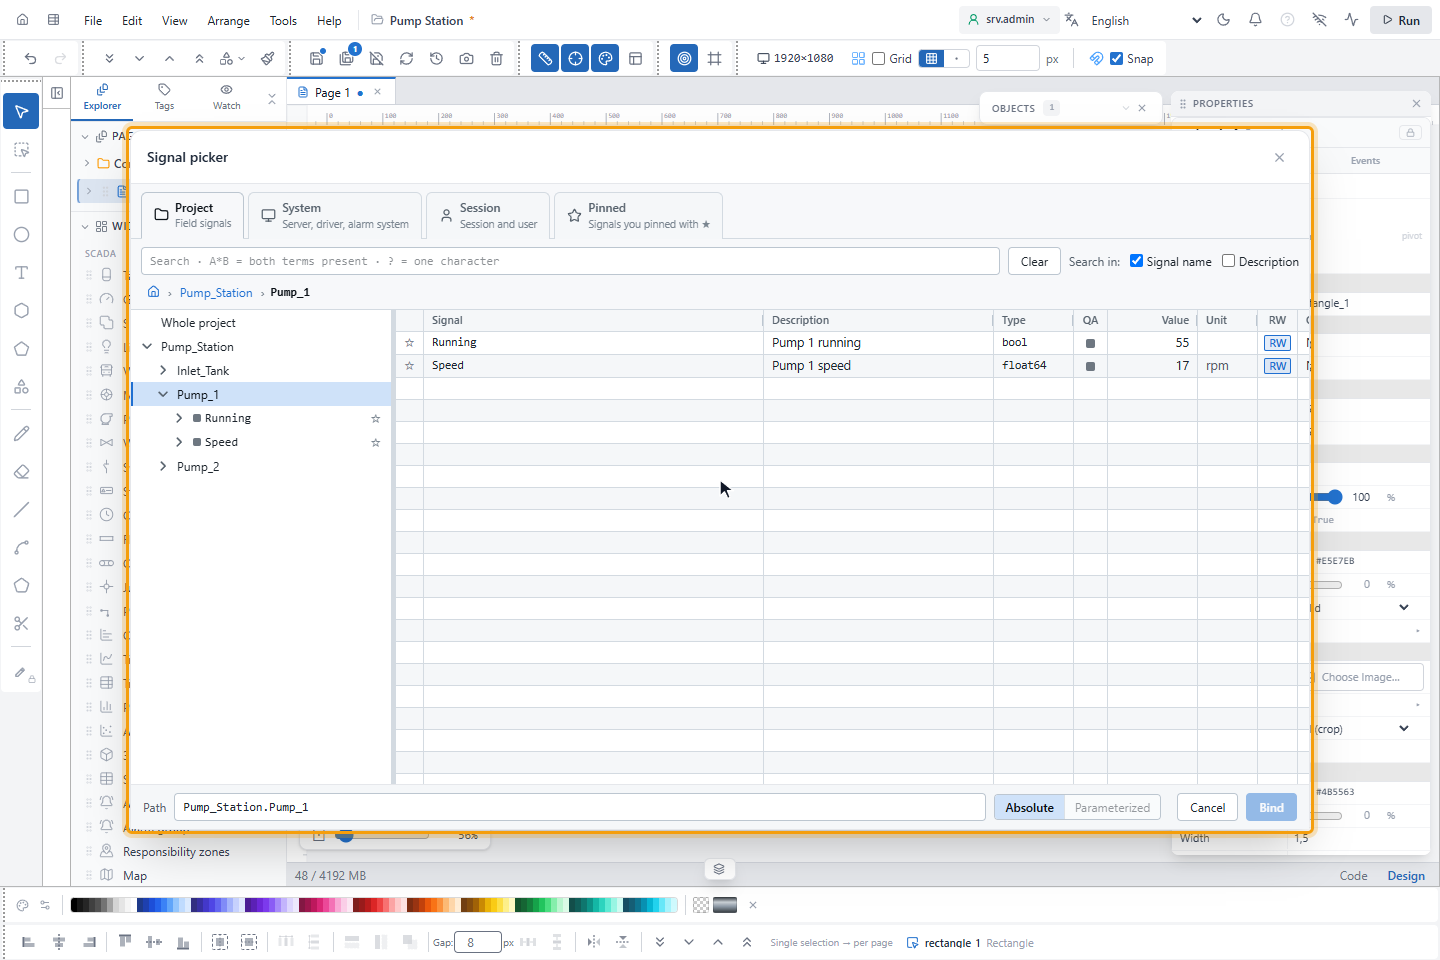
Click a folder in the tree: it opens, and the table at the right lists the signals directly in that folder.
| Column | Shows |
|---|---|
| ☆ / ★ | Pins or unpins the signal |
| Signal | The path relative to the folder |
| Description | The description of the signal |
| Type | The data type |
| QA | A square in the color of the quality |
| Value | The live value |
| Unit | The unit |
| RW | RW for a signal that can be read and written, R for read only |
| Quality | The quality as text |
The line above the tree shows where you are. Click a part of it to go to that folder; the house icon, Remove scope, returns to the whole project. These clicks do not change the selection.
A folder loads 200 items at a time; Load more brings the next ones. In the tree, ↑ and ↓ move, → and ← open and close, and Enter or Space selects. Drag the edge of a column or the border between the tree and the table to change the width; double-click it for the default width. YTCC remembers the widths for each user and project.
4. Search for a signal
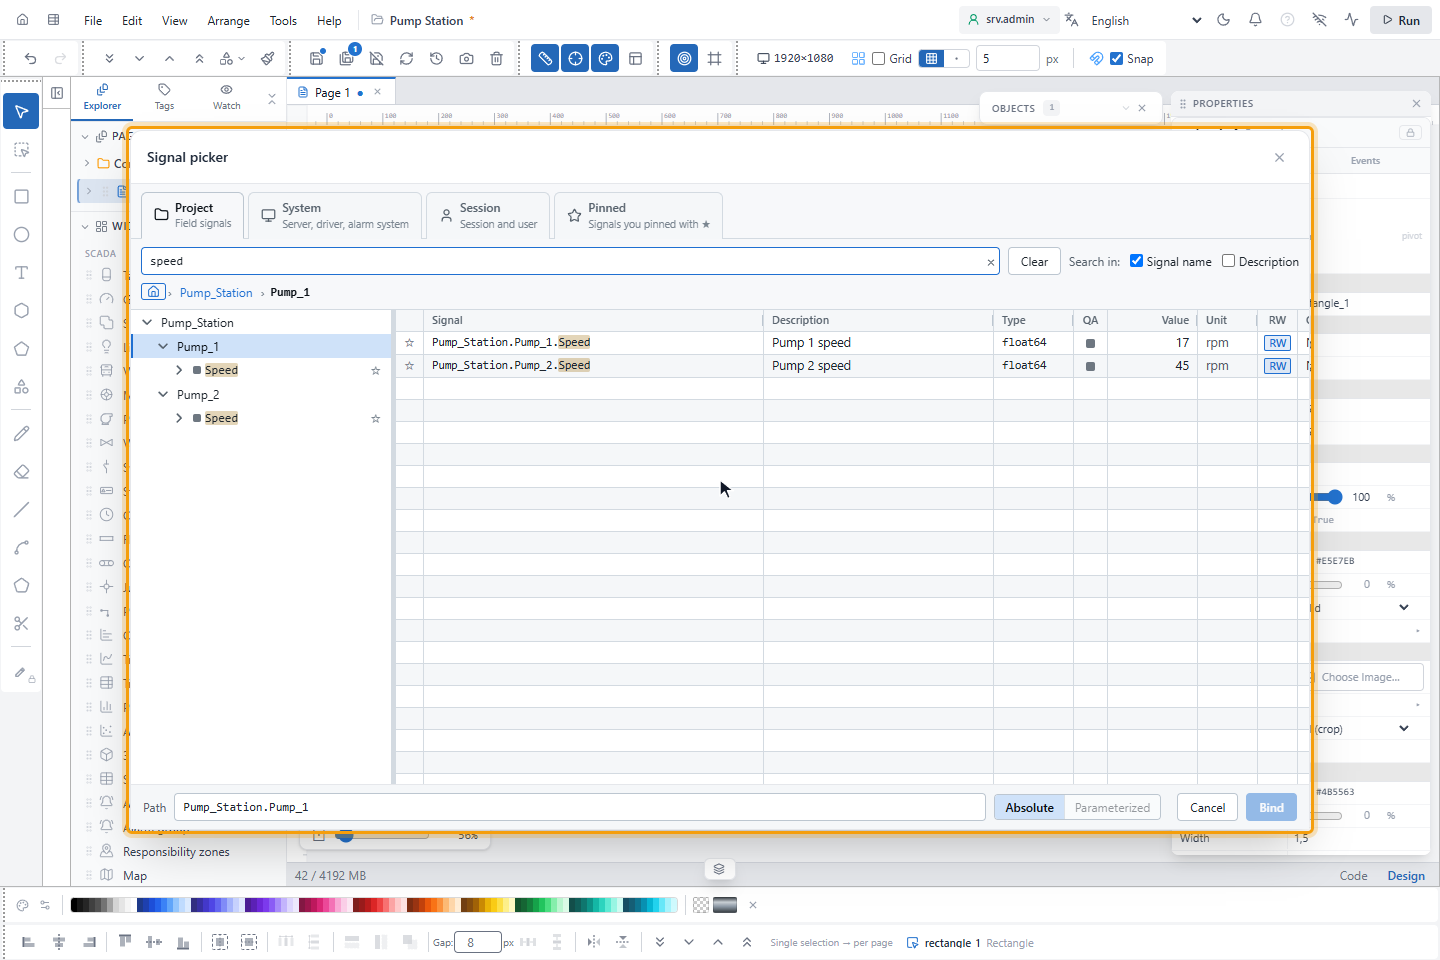
Type in the search box. The tree and the table show the results while you type, with the matching text marked.
| You type | YTCC finds |
|---|---|
pump speed or pump*speed | Names that contain both terms, in any order |
pu?p | ? stands for exactly one character: pump, pulp |
tank_1 | _ and % are ordinary characters |
- Upper and lower case do not matter, and
I,ı,iandİcount as the same letter. *and spaces only separate the terms, so a search never needs a*at the start or the end.- A search takes up to 8 terms of up to 64 characters.
- Search in: chooses the fields: Signal name (default), Description or both. All terms must be in the same field. One box always stays ticked.
- The search covers the current folder, or the folder of the selected signal. To search the whole project, click the house icon first.
- The results stop at 200: First 200 results — narrow the search appears at the end of the tree. With no result, the tree shows No matching signals.
The × in the box, or Esc while the box has the focus, clears the search. Clear also sets Search in: back to Signal name. The selection and the current folder stay.
5. Choose a property of the signal (optional)
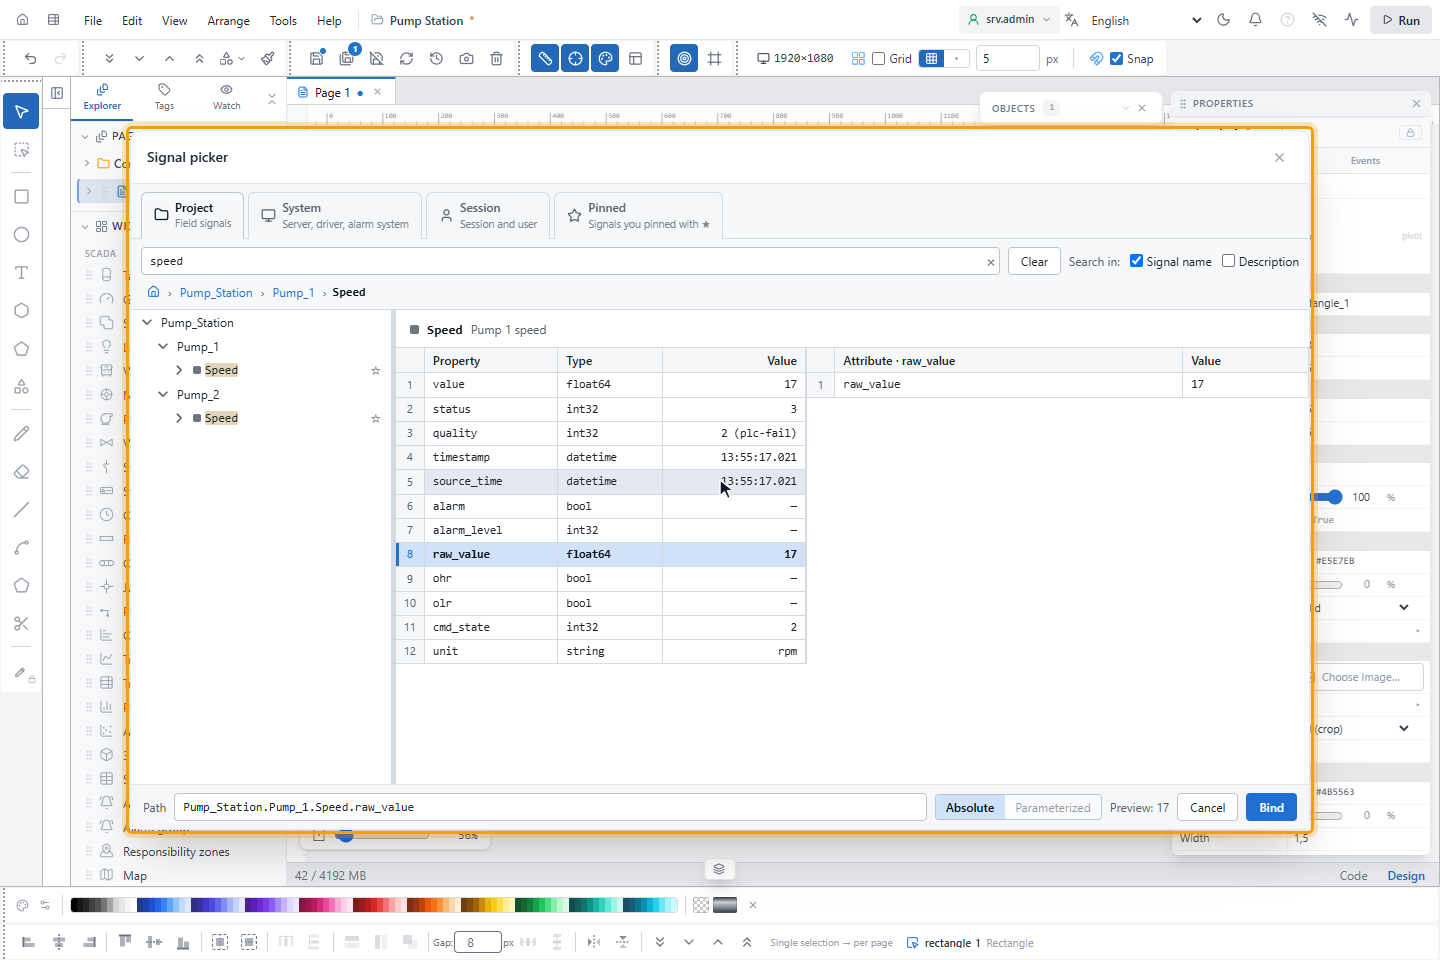
Click a signal in the tree. The right side shows two tables: Property, with the parts of the signal that you can bind
on their own, and Attribute, with the live values of the selected property. Click a row of Property, or open the
signal in the tree and click the property there. The path in the Path box gets the suffix, for example
Pump_Station.Pump_1.Speed.raw_value.
| Property | Gives |
|---|---|
value | The value, the same as the signal itself |
status | The status code |
quality | The quality of the value |
timestamp | The time the value changed |
source_time | The time from the device |
alarm | Whether an alarm is active |
alarm_level | The active threshold level |
raw_value | The value before scaling |
ohr | The value is above the valid high limit |
olr | The value is below the valid low limit |
cmd_state | The state of the last command; see Quality and command codes |
unit | The unit |
6. Pin the signals you use often (optional)
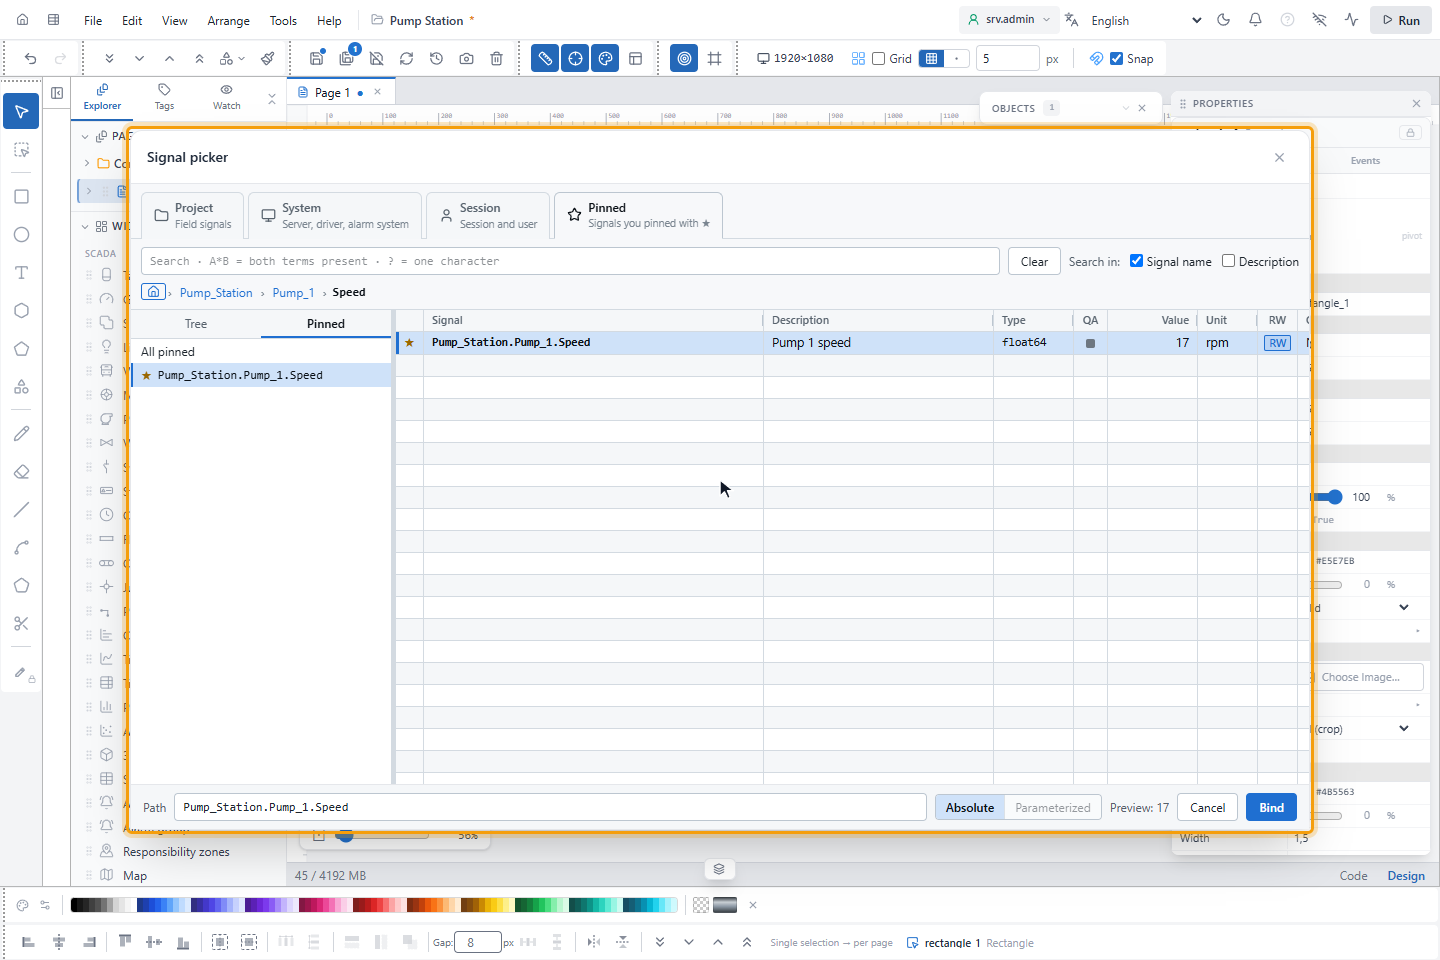
Click ☆ in a tree row or at the start of a table row. On the Pinned tab, the left side has two parts: Pinned lists the pinned signals, and Tree shows the normal tree. All pinned at the top of the list shows all of them in the table. Search on this tab filters the pinned list only.
Pins are kept for each user and project, up to 200 signals; beyond that, the oldest one goes. A pinned signal that the project no longer has is marked not found and cannot be selected. Click ★ to unpin.
7. Bind the signal
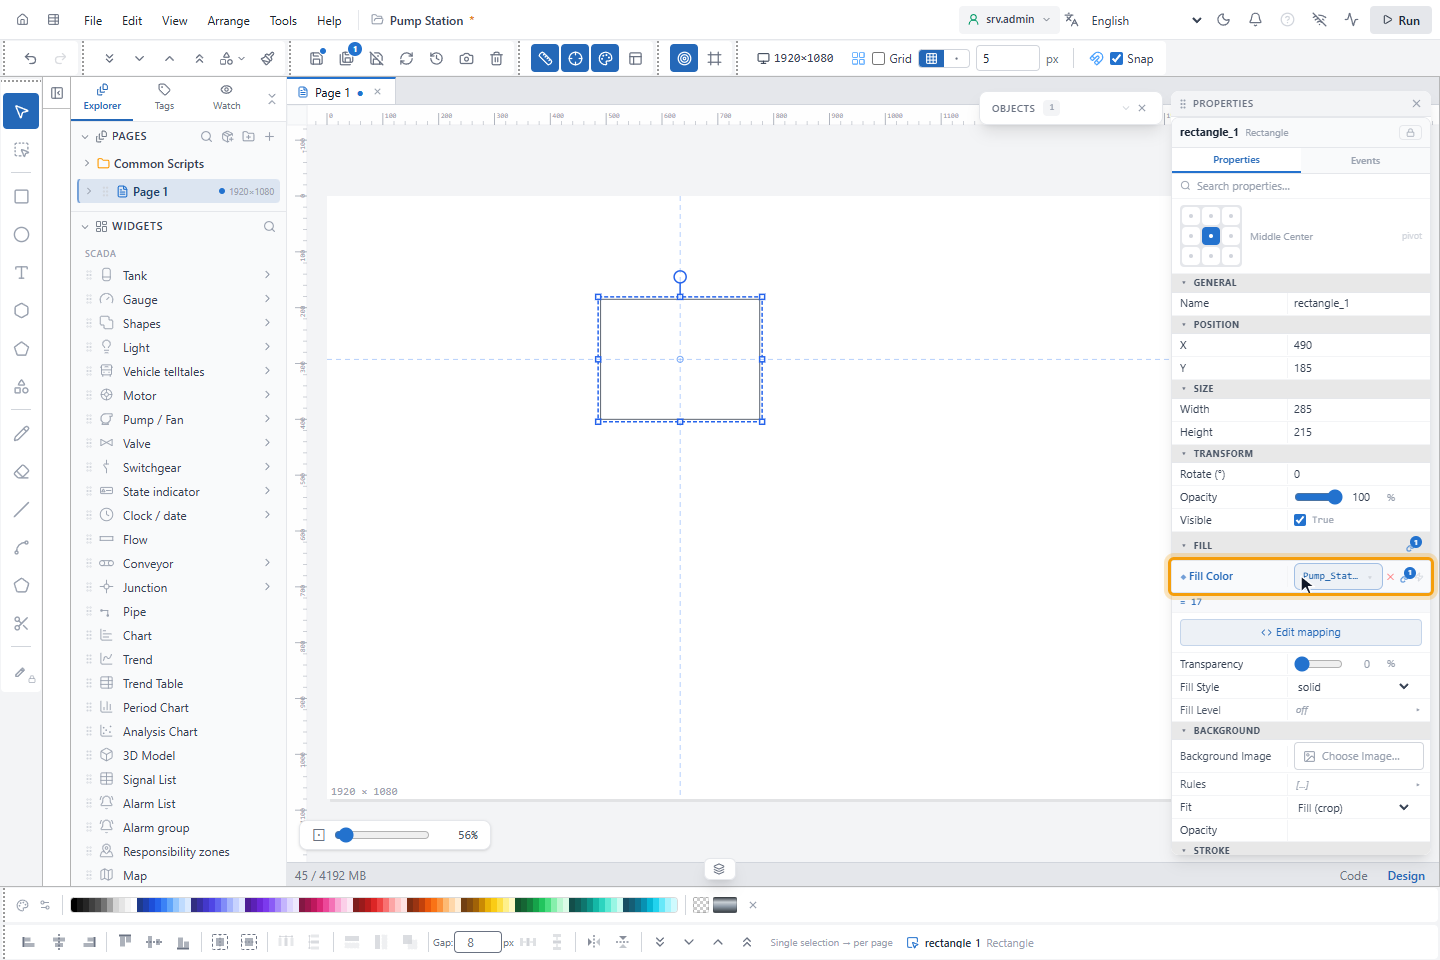
Click Bind. The value of the Path box is written into the field, and you can edit it before you click. You can also:
- double-click a signal or property in the tree, or a row of the signal table;
- press Enter in the Path box.
Preview at the bottom shows the live value of the selection. Cancel or Esc closes the window without a change. A folder can be bound only to a symbol parameter of type Tag.
8. Use a parameter in a popup or symbol (optional)
While you edit a popup or a symbol that has parameters, the bottom row offers more:
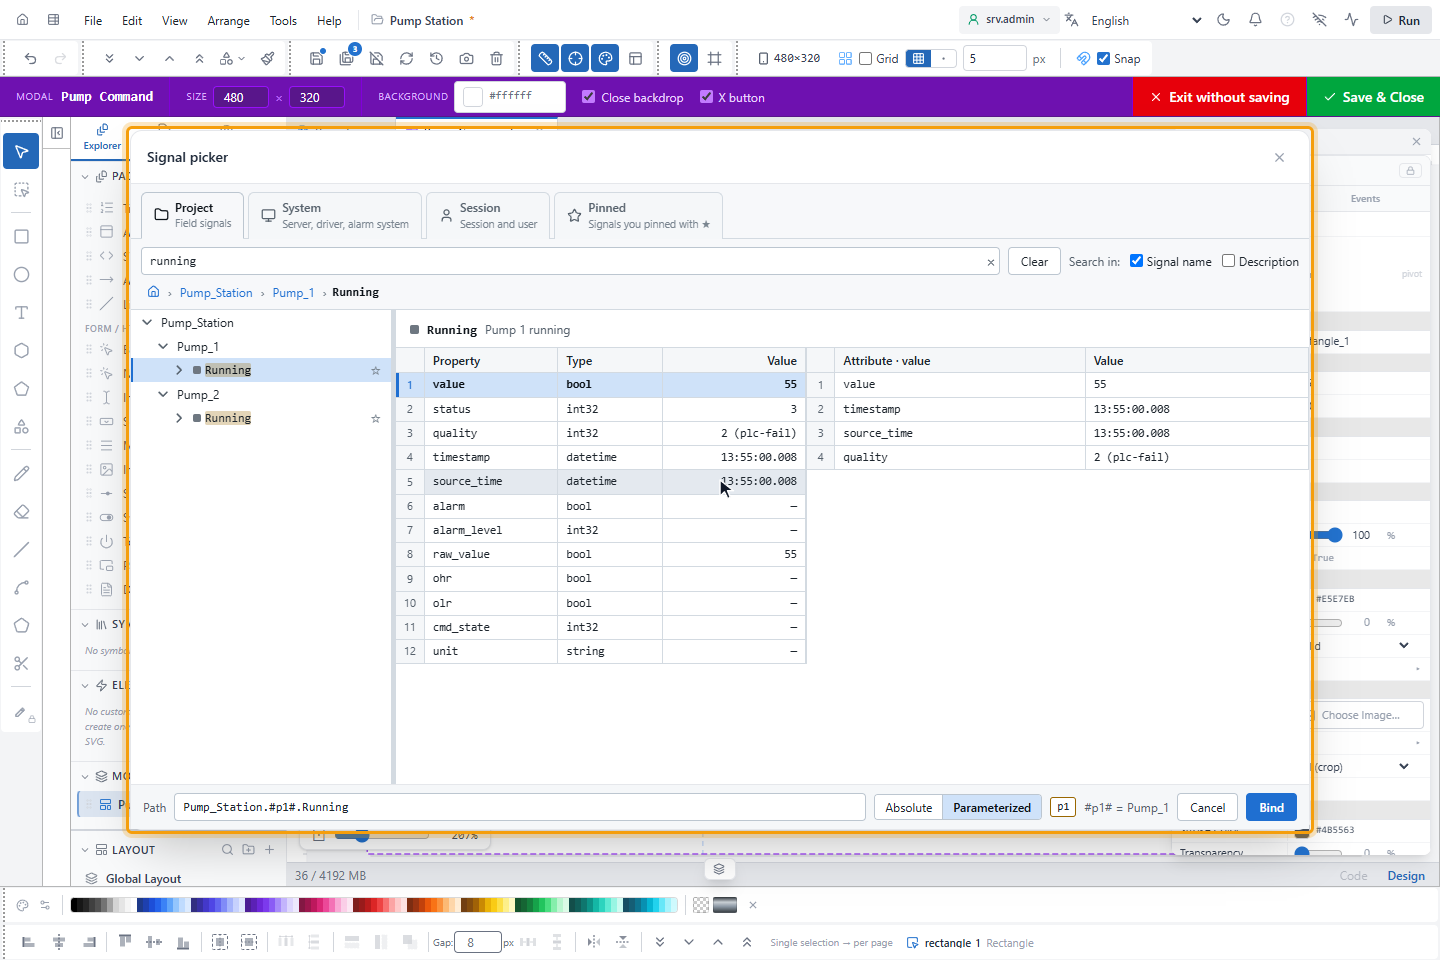
- Parameterized replaces the second part of the path with the first parameter:
Pump_Station.Pump_1.RunningbecomesPump_Station.#p1#.Running, and the preview shows#p1# = Pump_1, the value that belongs to this parameter. Absolute writes the full path again. - A button for each parameter inserts it at the cursor in the Path box and replaces any selected text.
If a path starts with the plain name of a parameter, Bind writes it in the # form: p1.Running becomes
#p1#.Running. Outside popups and symbols, Parameterized is off with the hint No parameters (only inside a symbol /
modal).
Result
The field holds the path of the signal or property. If you opened the picker from the Tag Binding window, close that window with Apply. Save the page.
Good to know
- A path that you type yourself must exist in the project; a path that does not exist shows no value.
- A value with a parameter, such as
#p1#.Running, is shown in the Path box as it is.
Next steps
- Map the values of the signal to the property: Bind objects to signals.
- Give a popup its parameters: Popups.