Create signals
A signal is a named value of the project: a measurement, a state, a command or a setpoint. This page shows how to add signals and set their properties. See Signal for what a signal is.
Before you begin
- The project is open in the configuration editor, on the Signals list. See A tour of the configuration editor.
- Your user may edit the configuration. Without that right, the add, paste and delete buttons are not available.
Steps
1. Add signals quickly
The toolbar of the Signals list has three buttons that add a signal at once:
| Button | Type | Role | Value source | Start value |
|---|---|---|---|---|
| Bit | Bit | Status | Internal (memory) | false |
| Numeric | Float64 | Measurement | Internal (memory) | 0.0, range 0 to 100 |
| Text | Text | Parameter | Internal (memory) | empty |
Click a button: a new row appears at the top under New — not applied, with the name selected for typing. The
suggested names are NewBit, NewNumeric and NewText, with _1, _2 and so on when the name is taken. Type the
name and press Enter. The signal goes into the folder that is selected in the explorer, or into the folder of
the selected row.
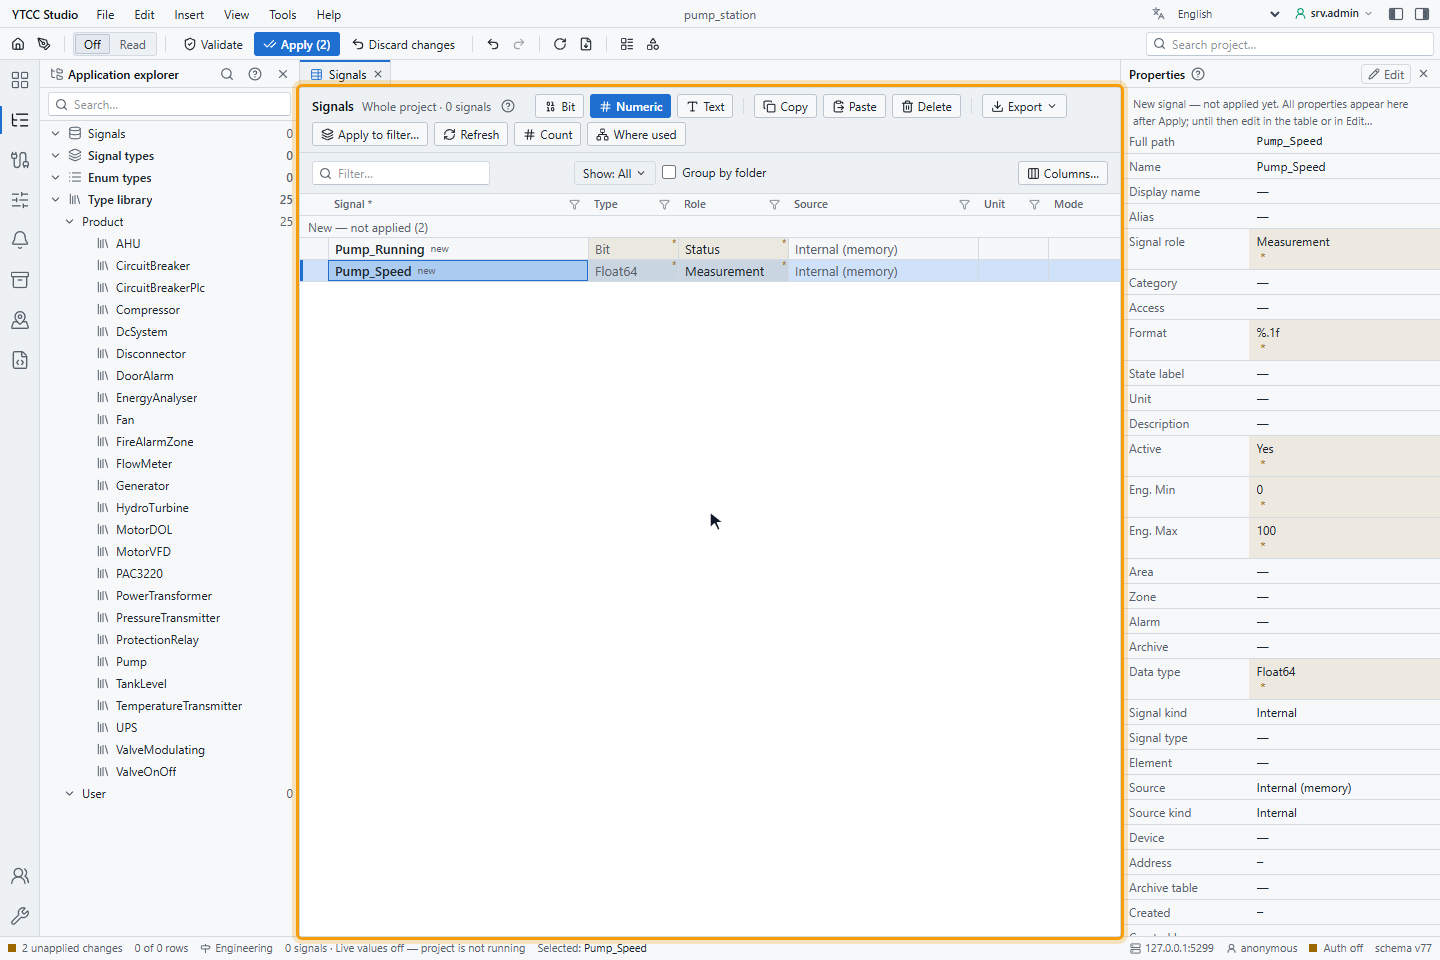
A quick-added signal is an internal signal. To read it from a device, change its value source afterwards (step 4).
2. Use the Insert menu (optional)
The Insert menu has the same three commands, Bit signal, Numeric signal and Text signal, and two more: Signal… opens the New signal window for a signal in the open folder, and Signals from type… creates a group of signals from a signal type, for example all the signals of a pump.
The right-click menu of a folder in the explorer, and of a row or an empty part of the list, also has New bit signal, New numeric signal and New text signal.
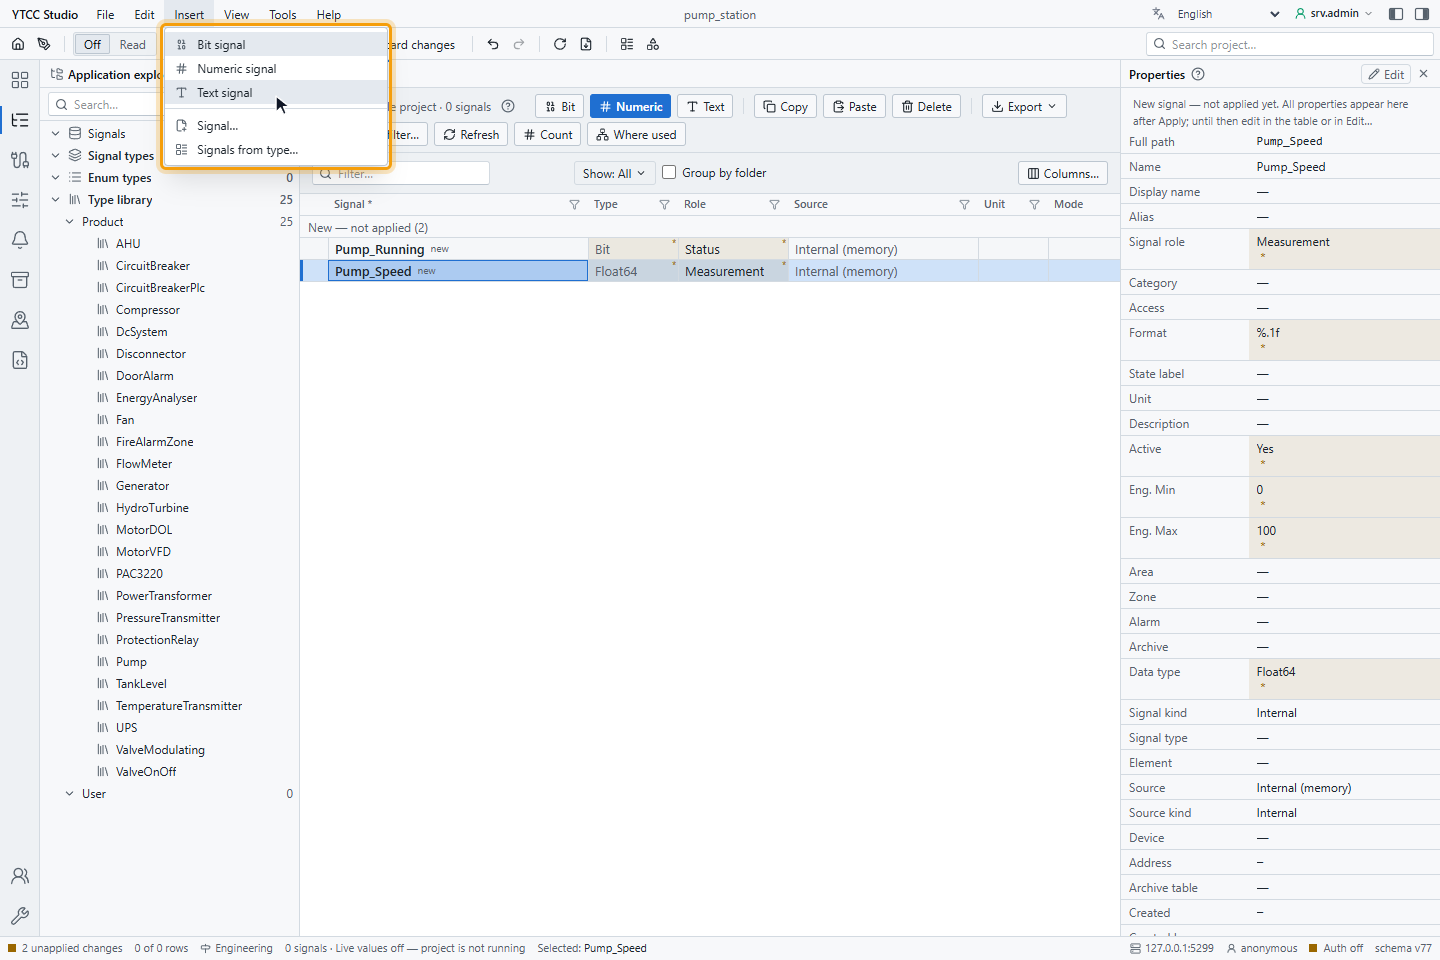
Apply the new signals before you open their properties: click Apply (n) and then Apply in the Validate changes window. The Signal properties window opens only for signals that have been applied.
3. Set the general properties
Select the signal's row and press Enter, or double-click it, to open Signal properties. A strip at the top shows the live value, quality, mode and time stamps while the project is running. The General tab holds:
- Folder, Signal name, Display name, Alias and Description, with the resulting full path.
- Signal role: Measurement, Status, Command, Setpoint, Counter, Totalizer, Parameter, Calculated or Derived.
- Type: Bit, Integer, Unsigned Integer, Real, Text, Date/Time or Enum.
- Area, Zone, Category, Access (Read only, Read / Write, Write only) and Active.
- For numbers: Ranges (Eng. Min, Eng. Max, Unit, Write outside range: Reject, Clamp to range or Write + warn), Scaling (None, Linear (raw → engineering), Factor (raw × factor + offset)), Valid low (OLR) and Valid high (OHR) with raise out-of-range alarm, Display format (decimals, notation, thousands separator) and Allowed values.
- For text: the maximum length and the allowed values. For an enum: the set of values.
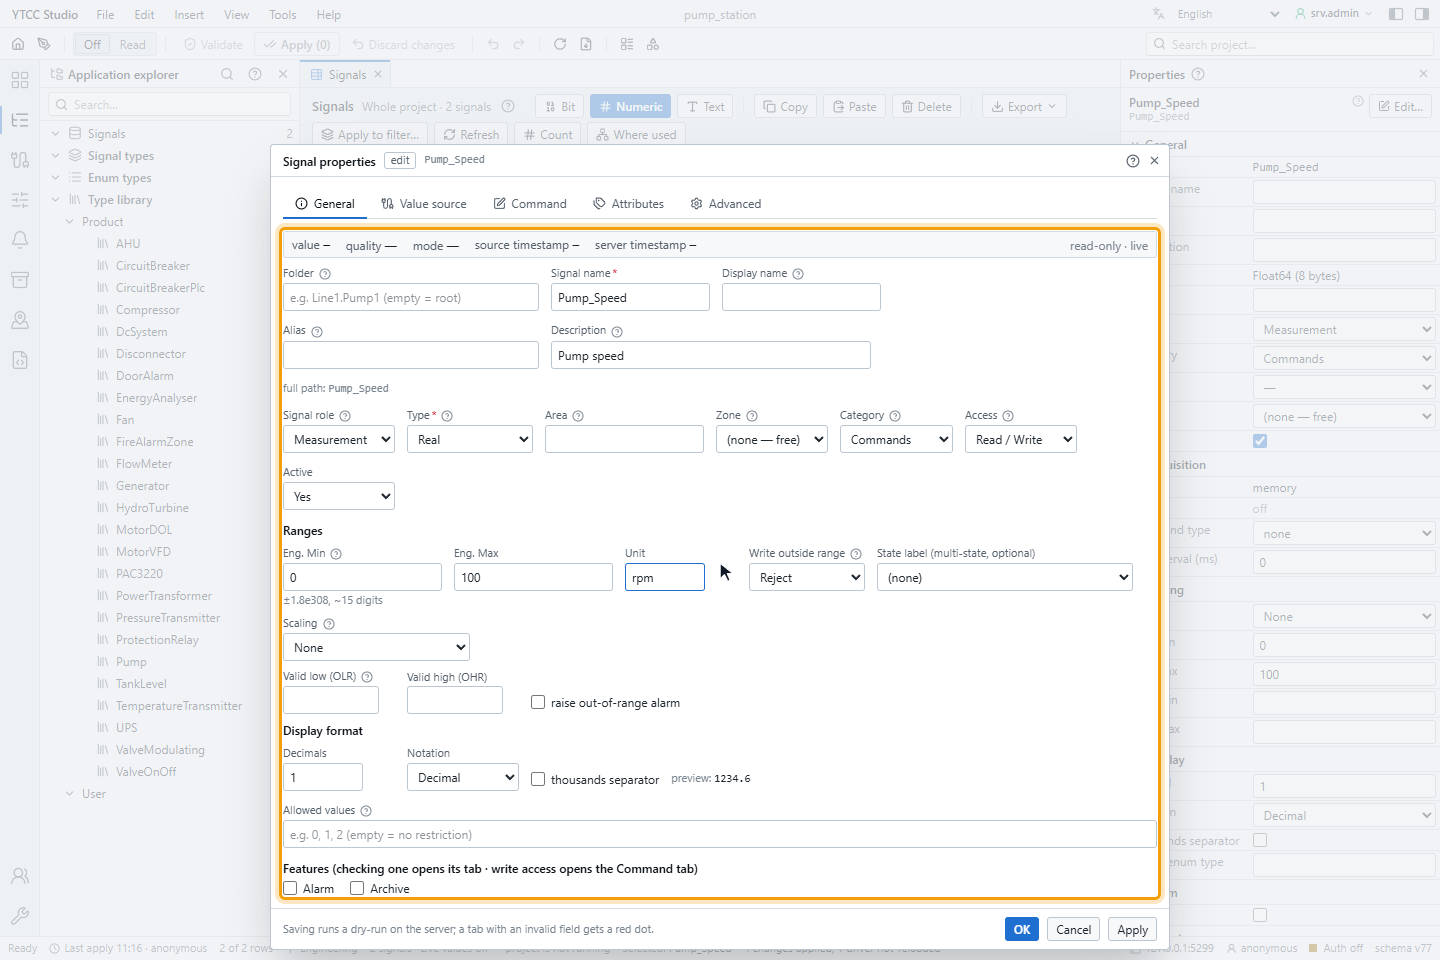
The ? icon next to a field explains it.
4. Choose where the value comes from
On the Value source tab, Value source (kind) sets where the value comes from:
| Value source | The value comes from |
|---|---|
| Device (driver) — read from a field device | A device of a driver, at the address you give. Read now reads it once to test. |
| Memory — holds a value (operator/script writes) | YTCC keeps it. On startup: Keep last value, Fixed initial value or Unknown (no value until written). |
| Expression | A formula of other signals, for example {Line1.Pump1.Current} + {Line1.Pump2.Current}. |
| Counter | Counts the changes of an input signal, with an optional reset signal. |
| Runtime (hours) | Counts the running hours of an input signal. |
| Threshold | Switches when an input signal rises above the high limit. |
| Timer | An on delay (TON), off delay (TOF) or pulse on an input signal. |
| totalizer (integrates a rate over time) | Adds up a rate signal over time, for example flow into volume; see Internal signals. |
| Bit of another signal (derived) | One bit (0 to 63) of another signal. |
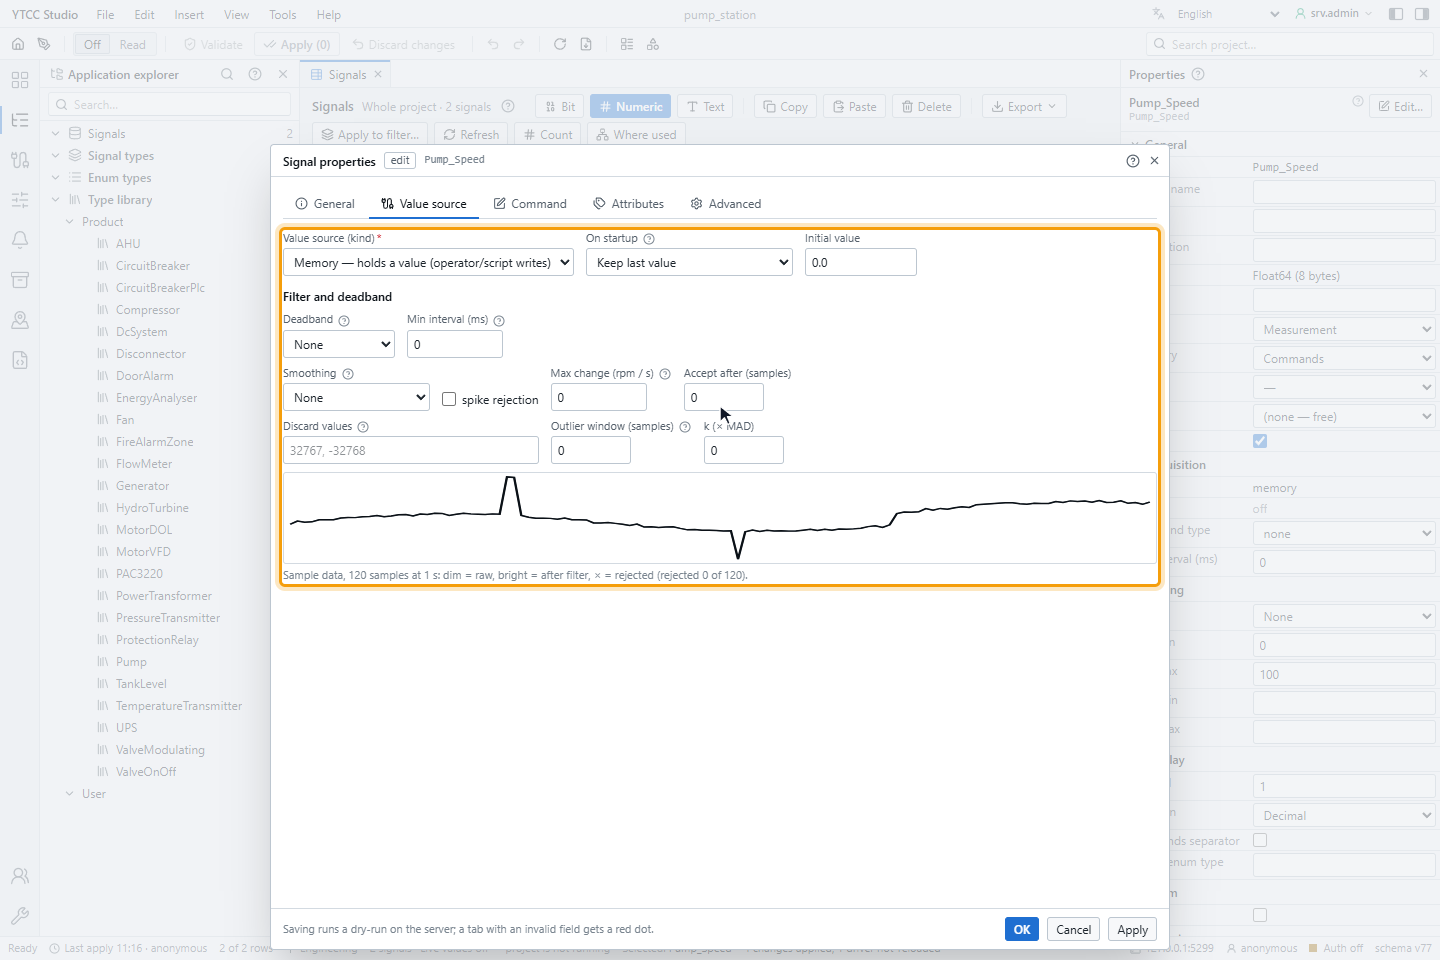
For numbers, the Filter and deadband group sets a deadband, a minimum interval, smoothing, spike rejection and values to discard. The sample chart shows the effect on example data.
5. Turn on alarm, archive and commands (optional)
At the bottom of the General tab, Features turns on further tabs:
- Alarm opens the Alarm tab, where you set the alarm limits or states. See Define alarms.
- Archive opens the Archive tab: the history table and the deadband for storing values.
- Access set to Read / Write or Write only opens the Command tab: the write permission, critical command approval, read-back and the failure alarm.
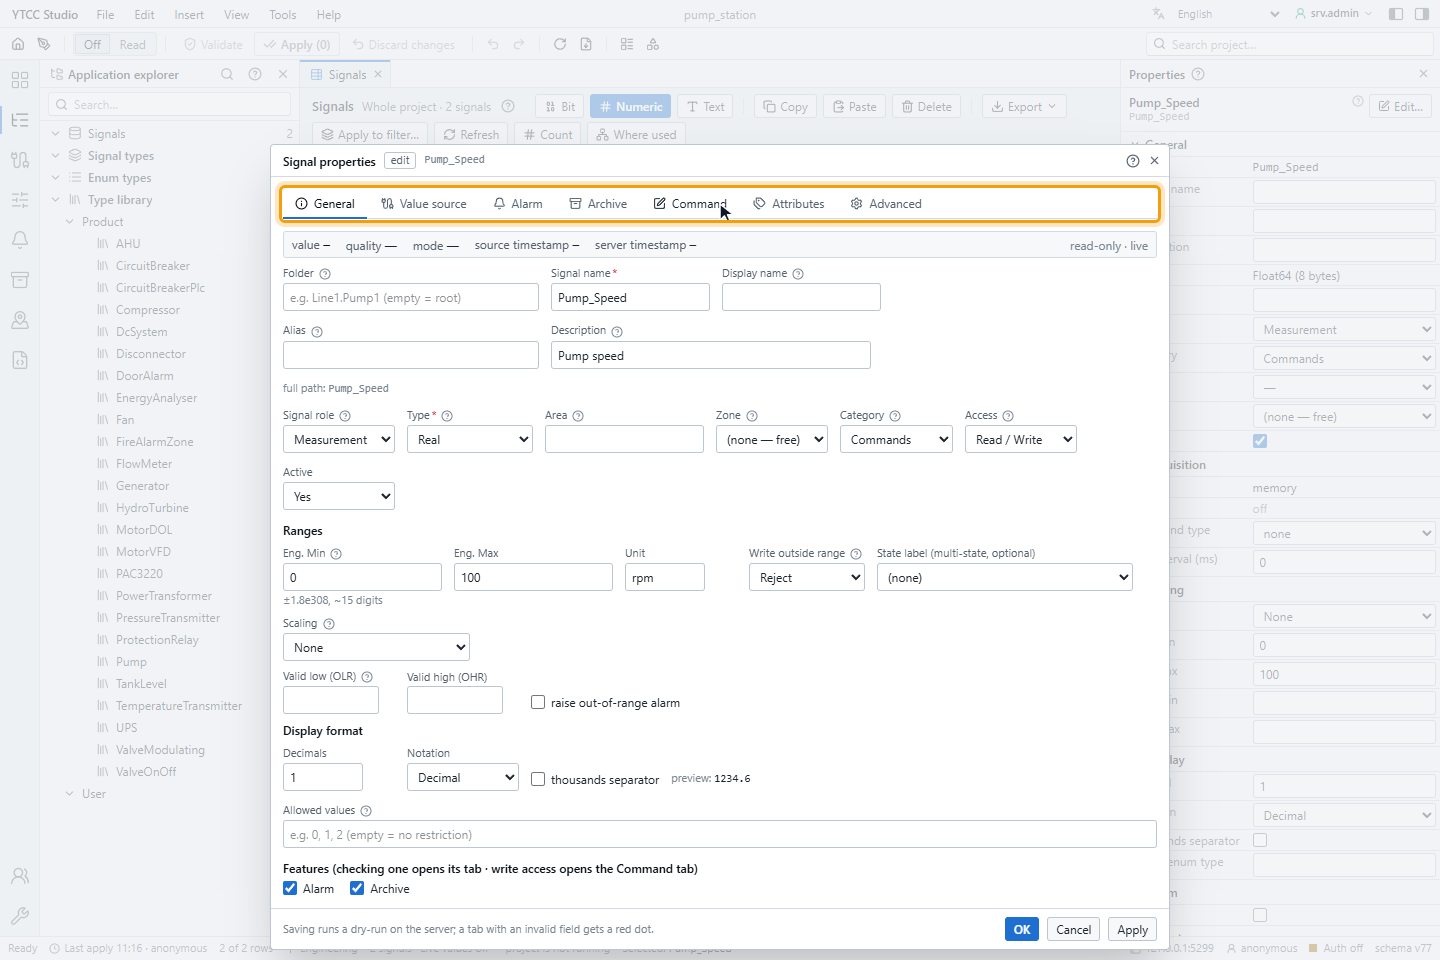
The Attributes tab holds 16 text and 16 bit attributes per signal. Their names are set once for the project under Historian › Attribute names; slots without a name are hidden unless you show them.
6. Check the advanced settings
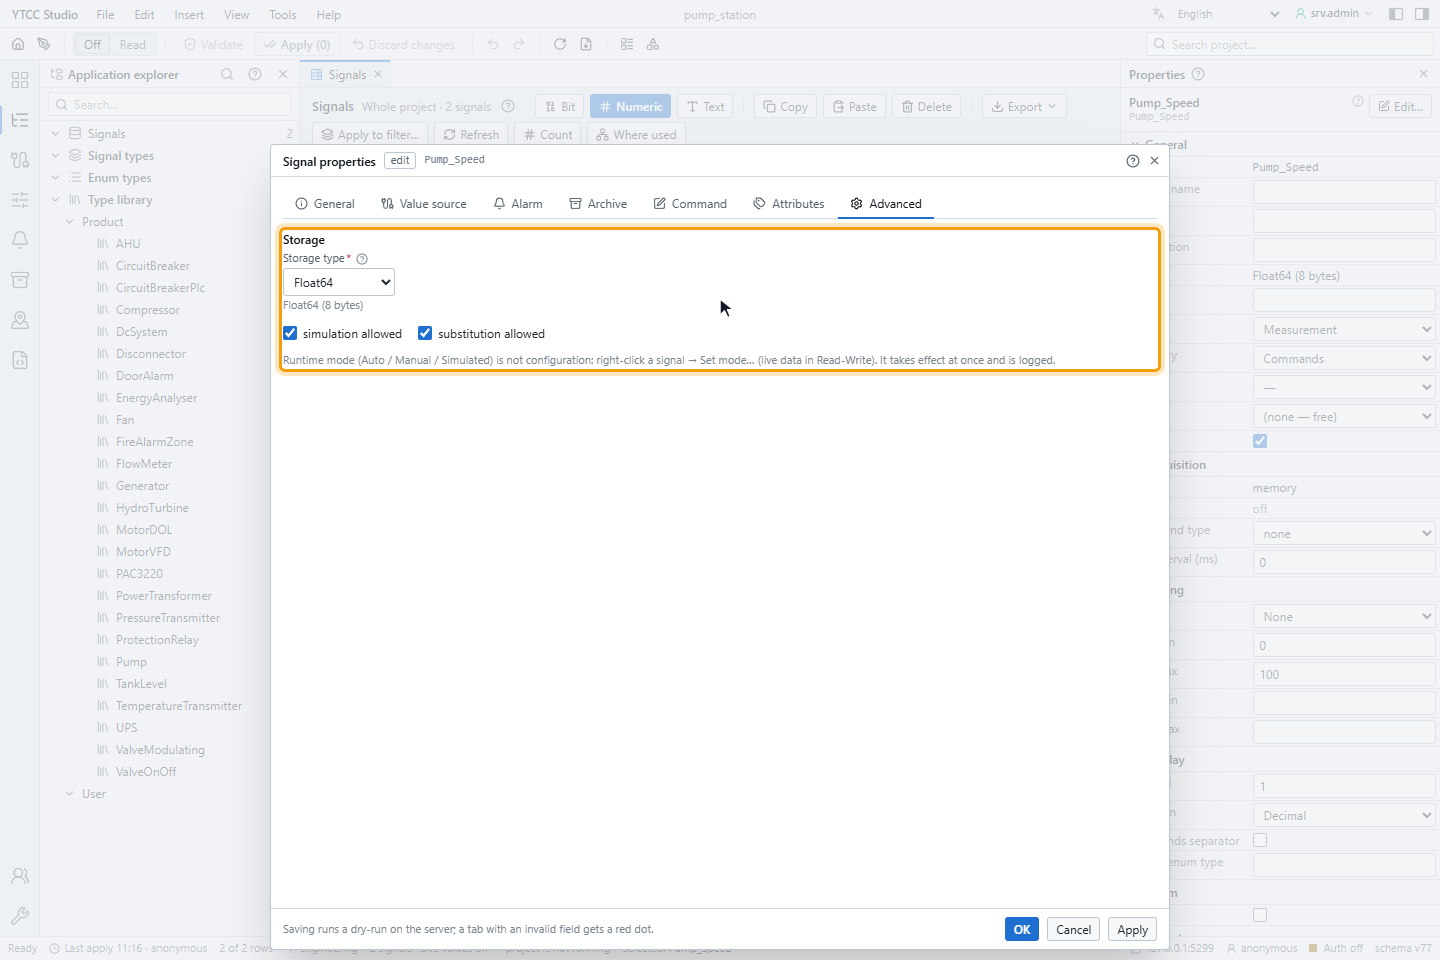
The Advanced tab sets the Storage type of the value, for example Float32 or Float64 for a real number, and whether the signal may be simulated or substituted. The operating mode itself (Auto, Manual, Simulated) is not set here: it is changed at runtime with Set mode… in the right-click menu of the signal.
7. Save and apply
Click OK. YTCC checks the values on the server; a field with an error turns red and its tab gets a red dot. If everything is valid, the window closes and the change waits as a pending change. The Properties panel of the row then shows Unapplied changes with Revert and Apply. Apply in the window footer saves and keeps the window open.
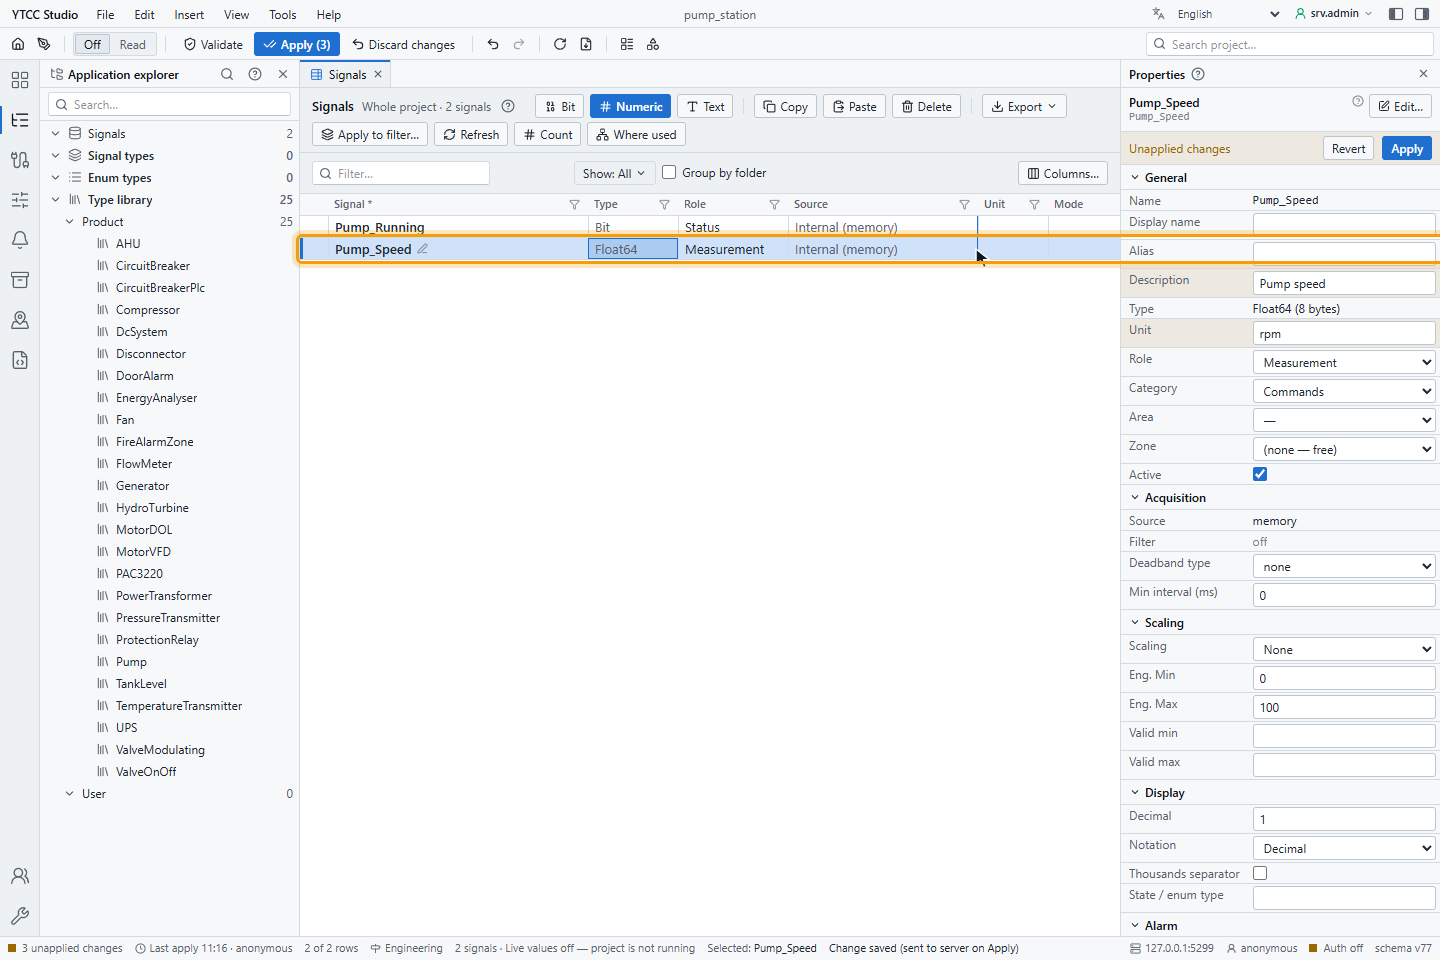
Click Apply (n) in the toolbar and then Apply in Validate changes. All pending changes are saved together.
8. Rename a signal
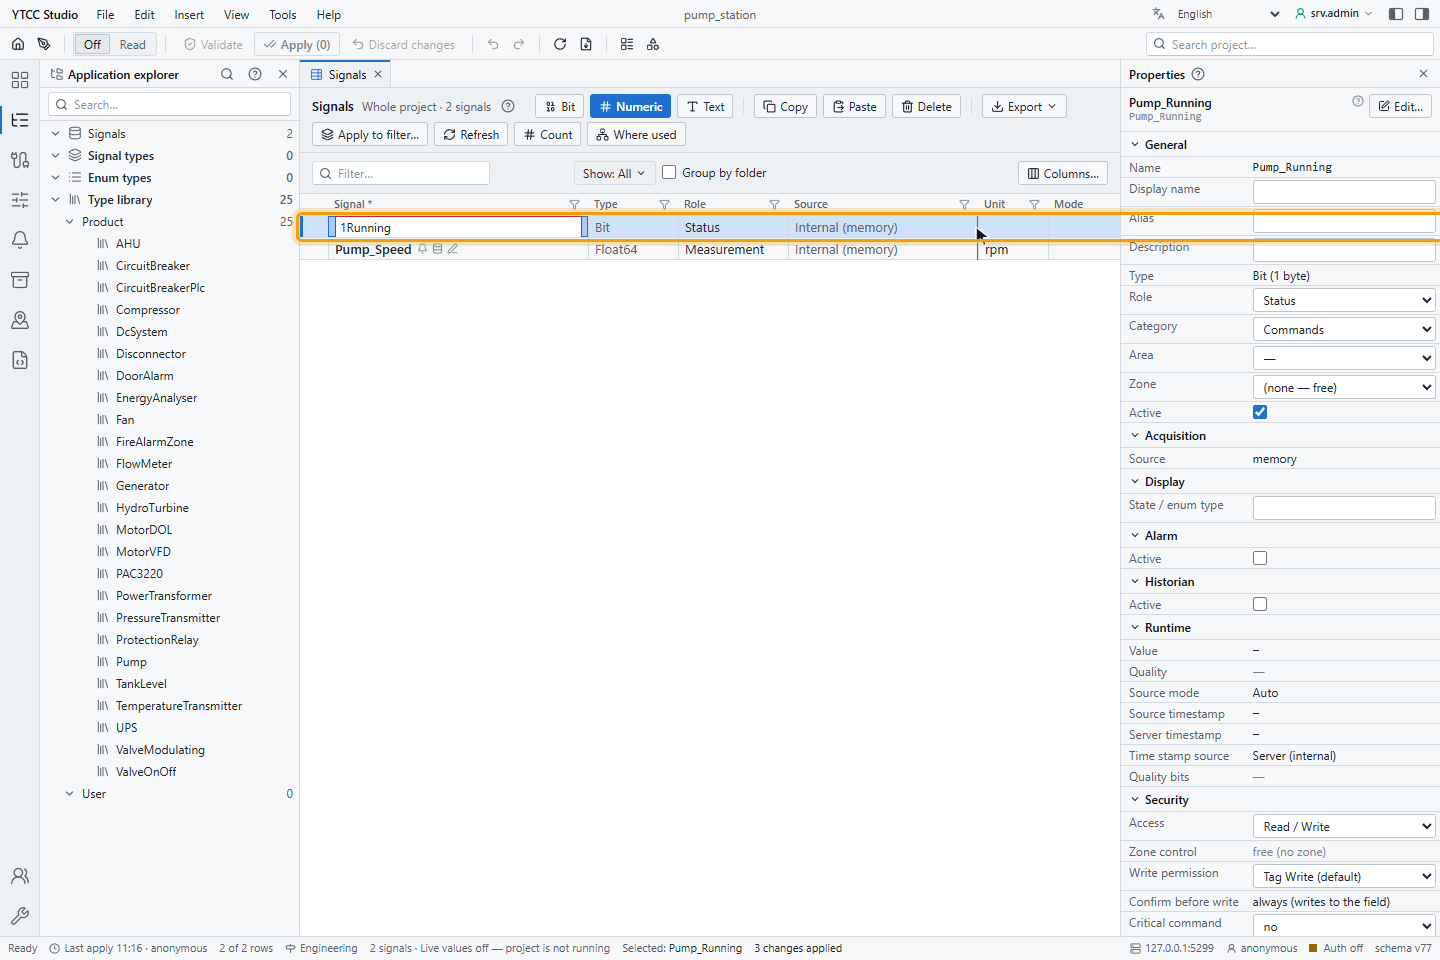
Click the signal's name and press F2, or use Edit › Rename. Type the new name and press
Enter; Esc cancels. A name must start with a letter or _ and may contain only letters, digits and
_; otherwise the editor says Use letters, digits and _ only (start with a letter or _). After a rename,
Details… in the toolbar lists the screens, scripts and other references that use the old name.
9. Delete a signal
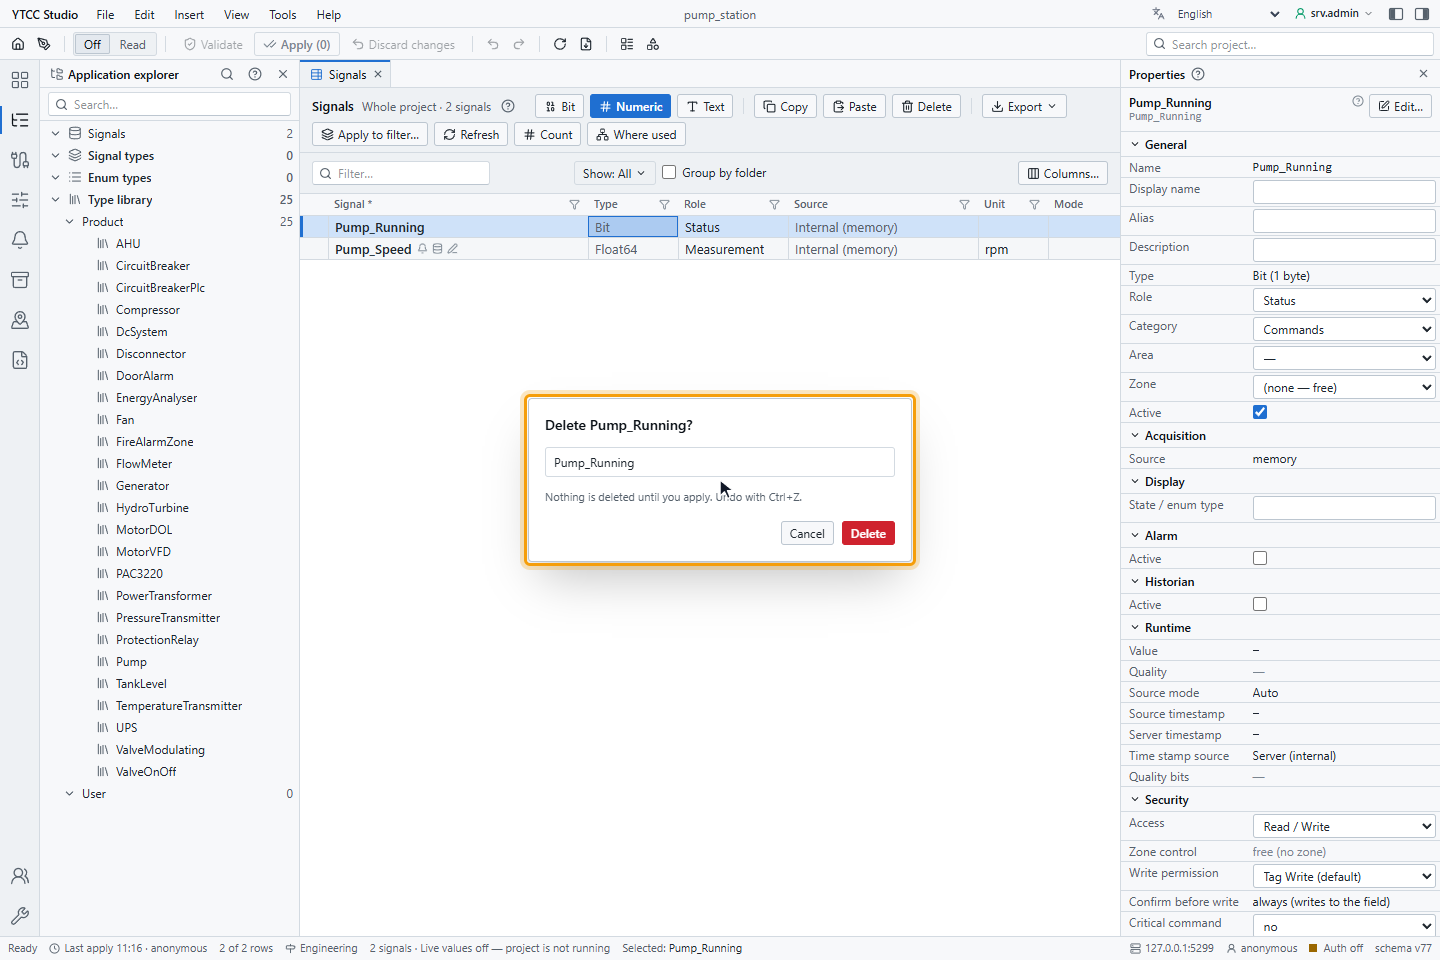
Select the signal and click Delete (Del). The window lists what will be deleted and says Nothing is deleted until you apply. Undo with Ctrl+Z. Click Delete to mark it, or Cancel.
Result
The signals exist in the project with the properties you set.
Copy and duplicate
- Duplicate (Ctrl+Shift+D) adds a copy of the selected signal named
<name>_1with the name ready for typing. - Copy and Paste in the toolbar copy signals; the pasted signal has all properties of the original except the alias.
- Apply to filter… changes a property of every signal that matches the current filter in one step.