Create your first project
By the end of this page you have an empty YTCC project, and the project is open in the screen editor with its first page.
Before you begin
- The YTCC interface is open in your browser. See Open the interface and choose the language.
- You know the user name and password of the root account, the system administrator created in the first-run setup. Creating and designing projects belongs to root; see Root, the system administrator.
Steps
1. Open the New Project window
On the home page, the Projects tab is open. Click New Project in the upper right. If the server has no projects yet, the Create new project button in the middle of the list does the same.
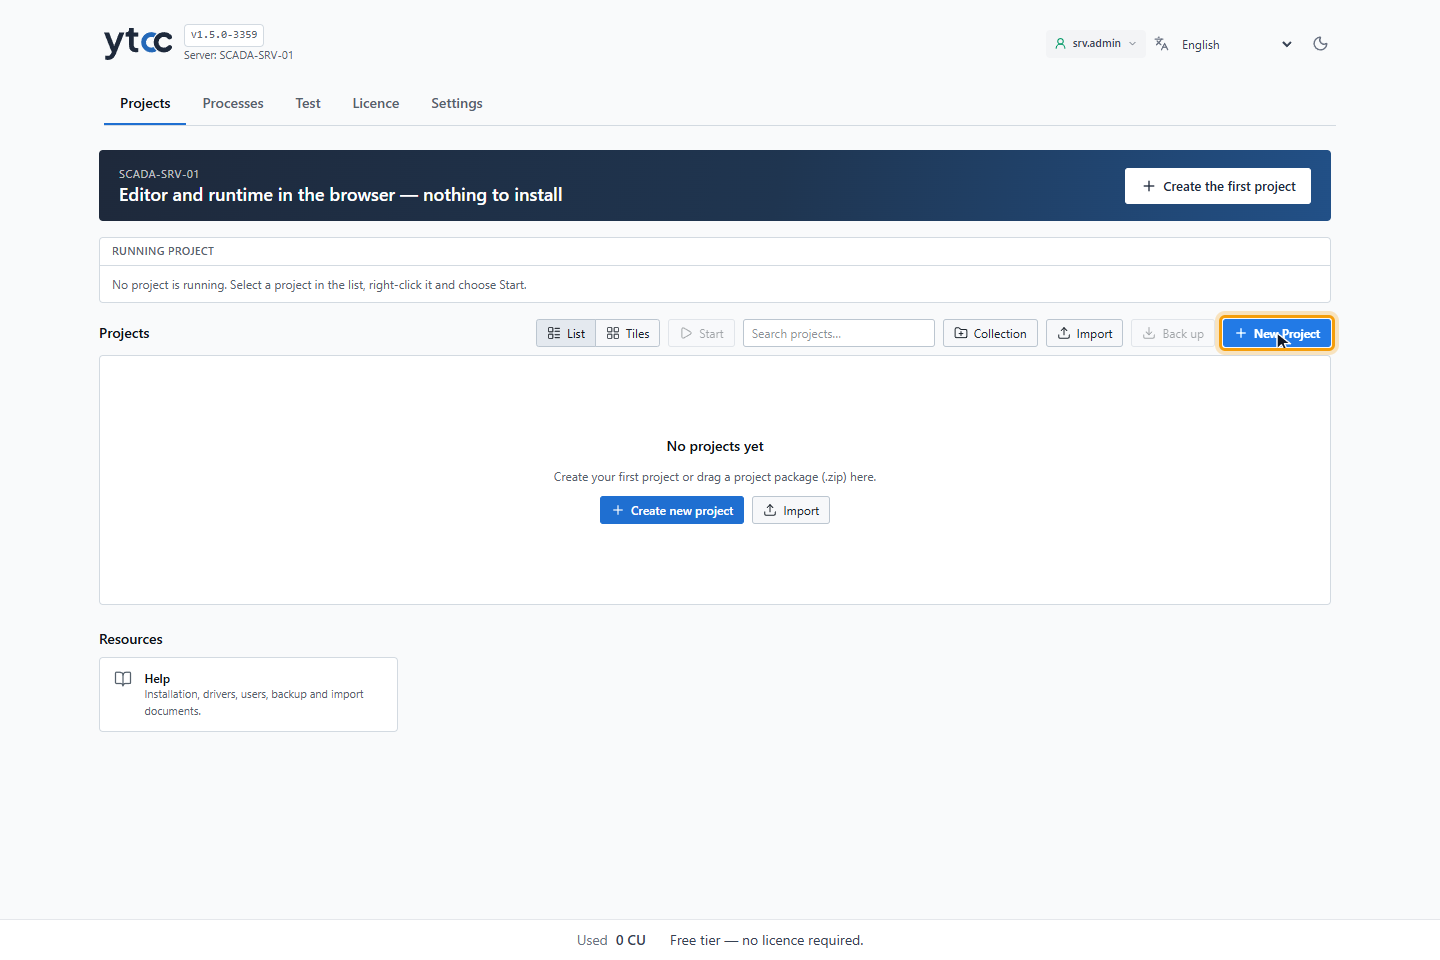
New Project is shown only while root is signed in. If you do not see it, click the session button at the top right (Not signed in), then Login, and sign in as root in the Login Required window. The button then appears, and the editors you open from this browser do not ask for a sign-in again.
2. Enter the title and the name
In Title, type Pump Station. The title is what the project list and the sign-in window show. While you type, YTCC
proposes the Name pump_station.
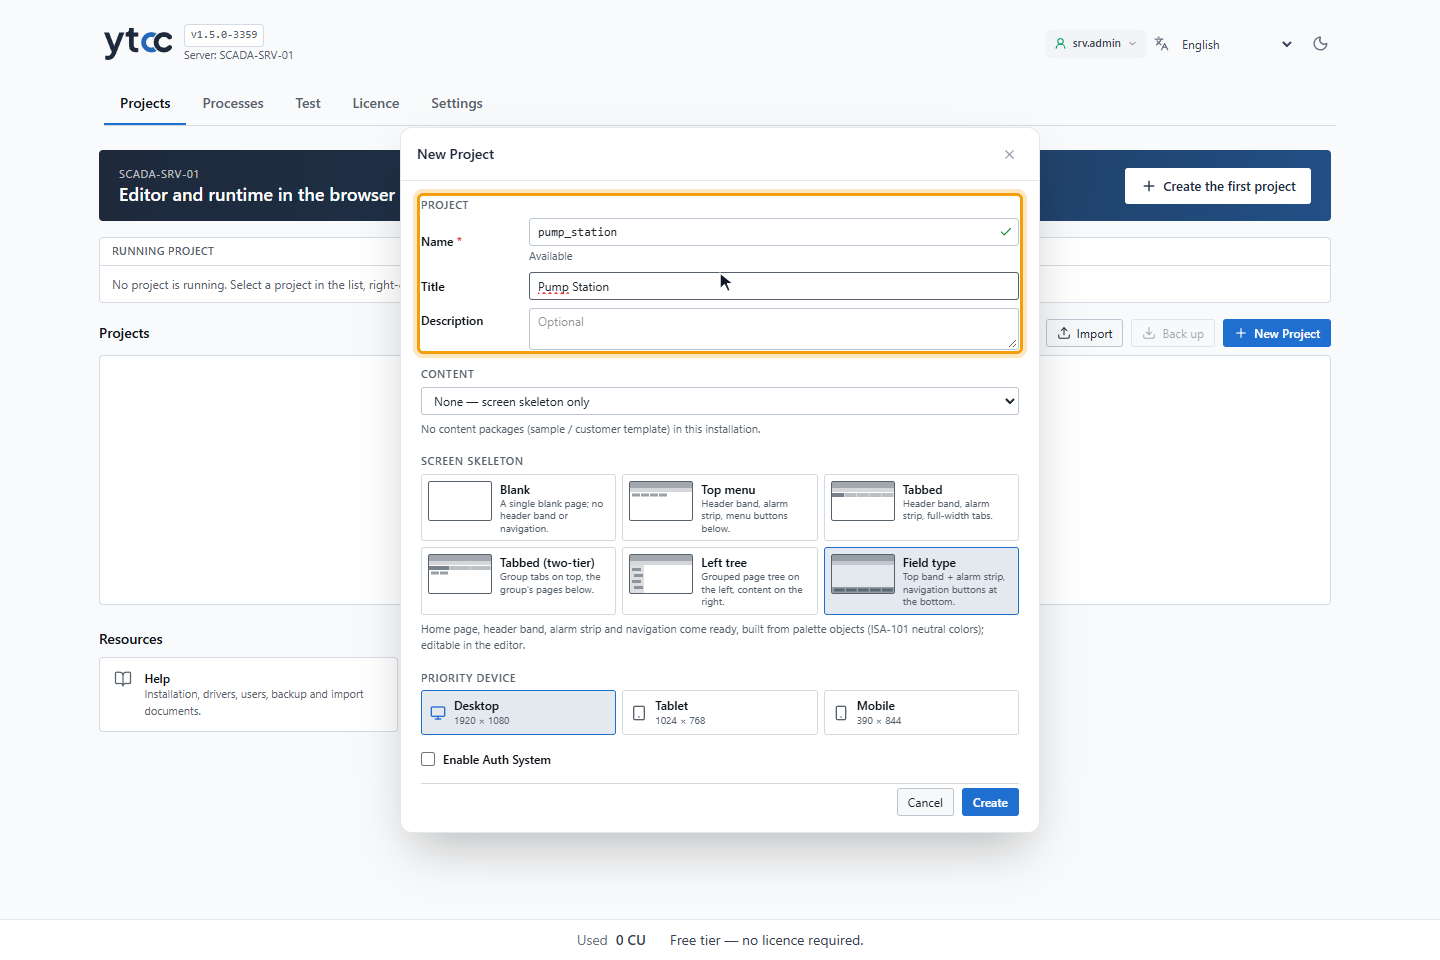
The name identifies the project: the project's database and folder are named after it. YTCC checks it while you type and shows the result below the field:
| Shown | Meaning |
|---|---|
| Check mark and Available | The name can be used. |
| Available (database unreachable; checked again on create) | The local records allow the name; the database is checked again when you click Create. |
| Cross and This name is in use | Another project already uses the name, or a database left from an earlier project does. |
| Cross and Must start with a lowercase letter (a–z), Only lowercase letters, digits and underscore (_) or At most 51 characters | The name does not meet the rules. |
As soon as you change the Name yourself, YTCC stops proposing it from the title. Description is optional; the sign-in window shows it below the title. The title can have up to 80 characters and the description up to 500.
3. Choose the screen skeleton and the priority device
Leave Content at None — screen skeleton only. Under Screen skeleton, choose Blank for this tutorial: the project then starts with one empty page. The other skeletons are described in Other choices in the New Project window.
Under Priority Device, choose the device the screens will mostly be viewed on: Desktop, Tablet or Mobile. For a control room or an operator station, choose Desktop.
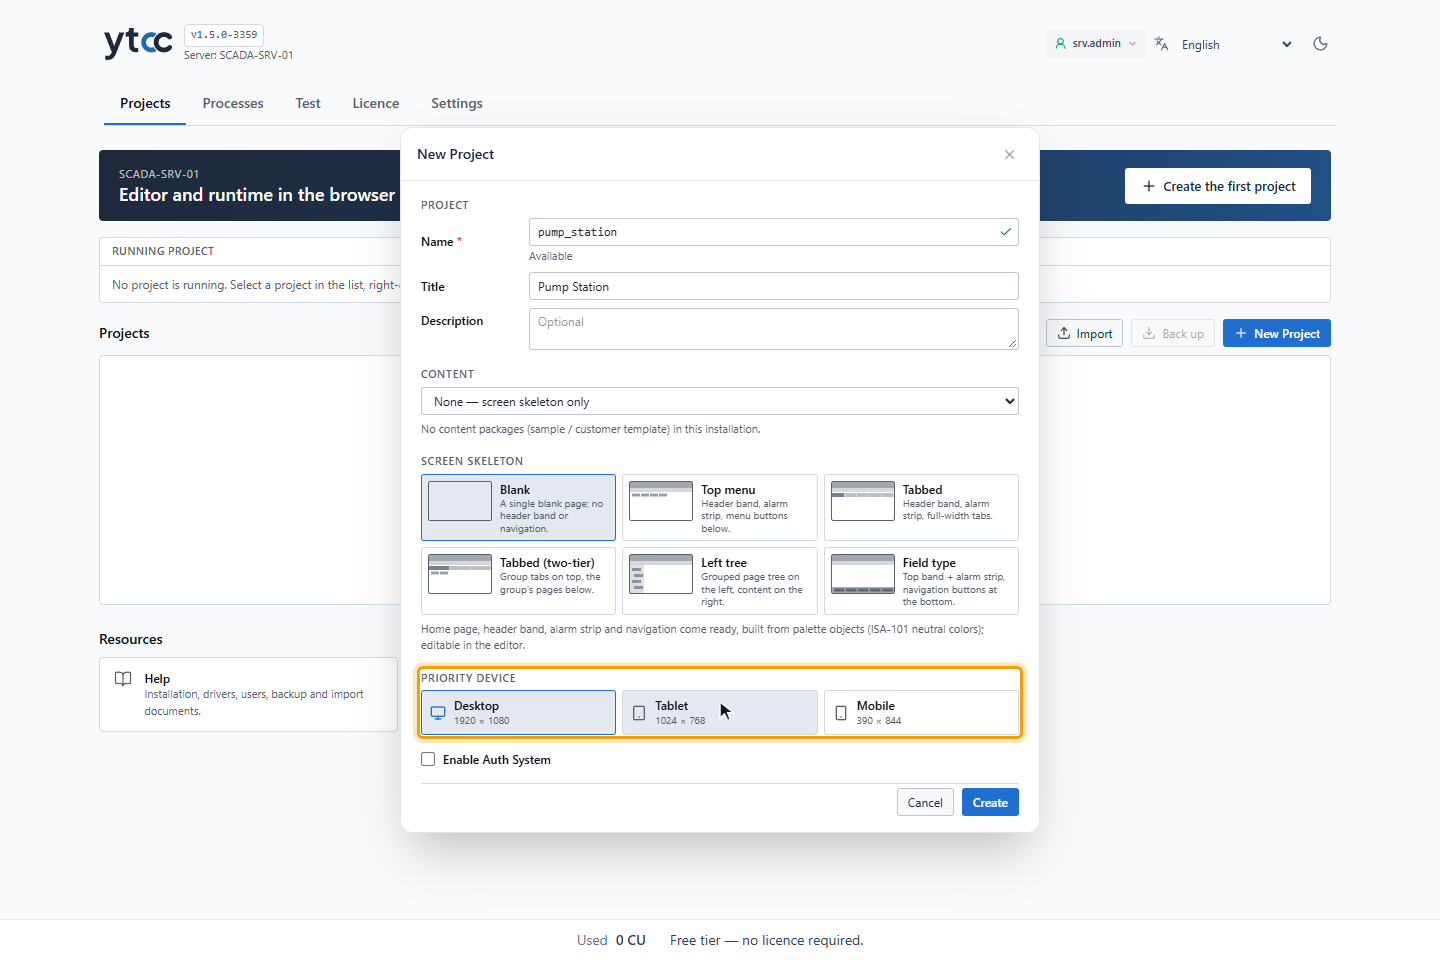
The choice is saved with the project and shown on the project card in the Tiles view. The first page opens at 1920 × 1080. To use another size, change Width and Height in the page properties (step 5).
4. Turn on user login (optional)
If you skip this step, the project is created without user login. You can skip it for a first test project.
To protect the project with user login, select Enable Auth System. The First admin user fields appear. This user is a user of this project, not a server account, and becomes the first administrator of the project. Like every project user, it operates the project on the runtime screen; designing stays with root:
- Username: at least 3 characters. The field starts with
admin. - Password: at least 8 characters. The eye button in the field (Show password) shows what you typed.
- Repeat Password, the second box next to Password: must match the password.
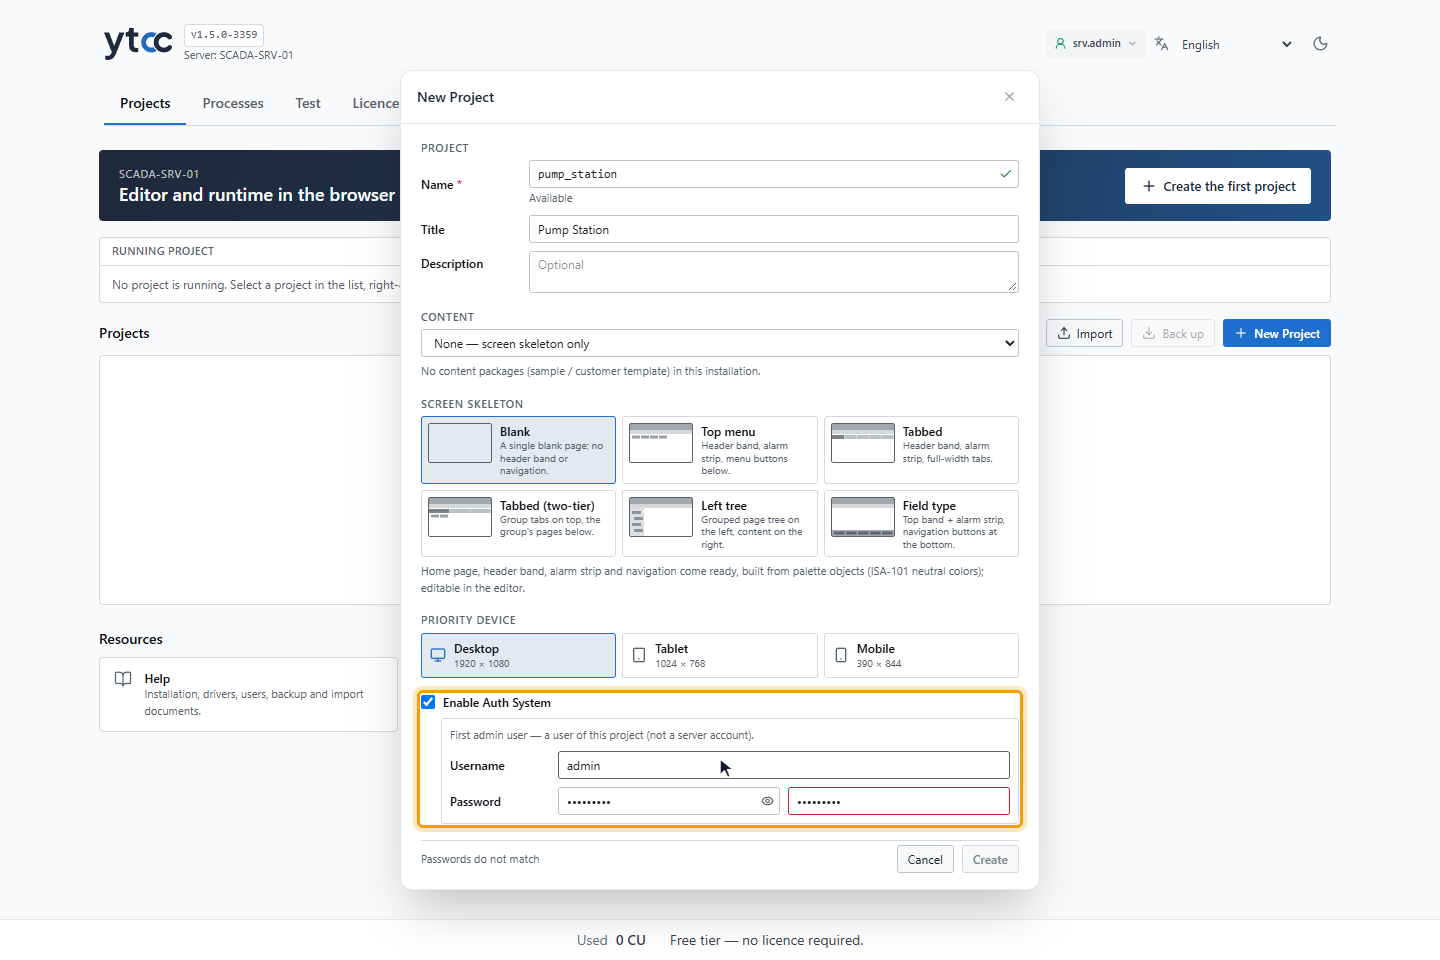
Create stays unavailable until these conditions are met, and the text next to it says what is missing, for example Passwords do not match. In the example on this page, the box is cleared again and the project is created without user login.
5. Create the project
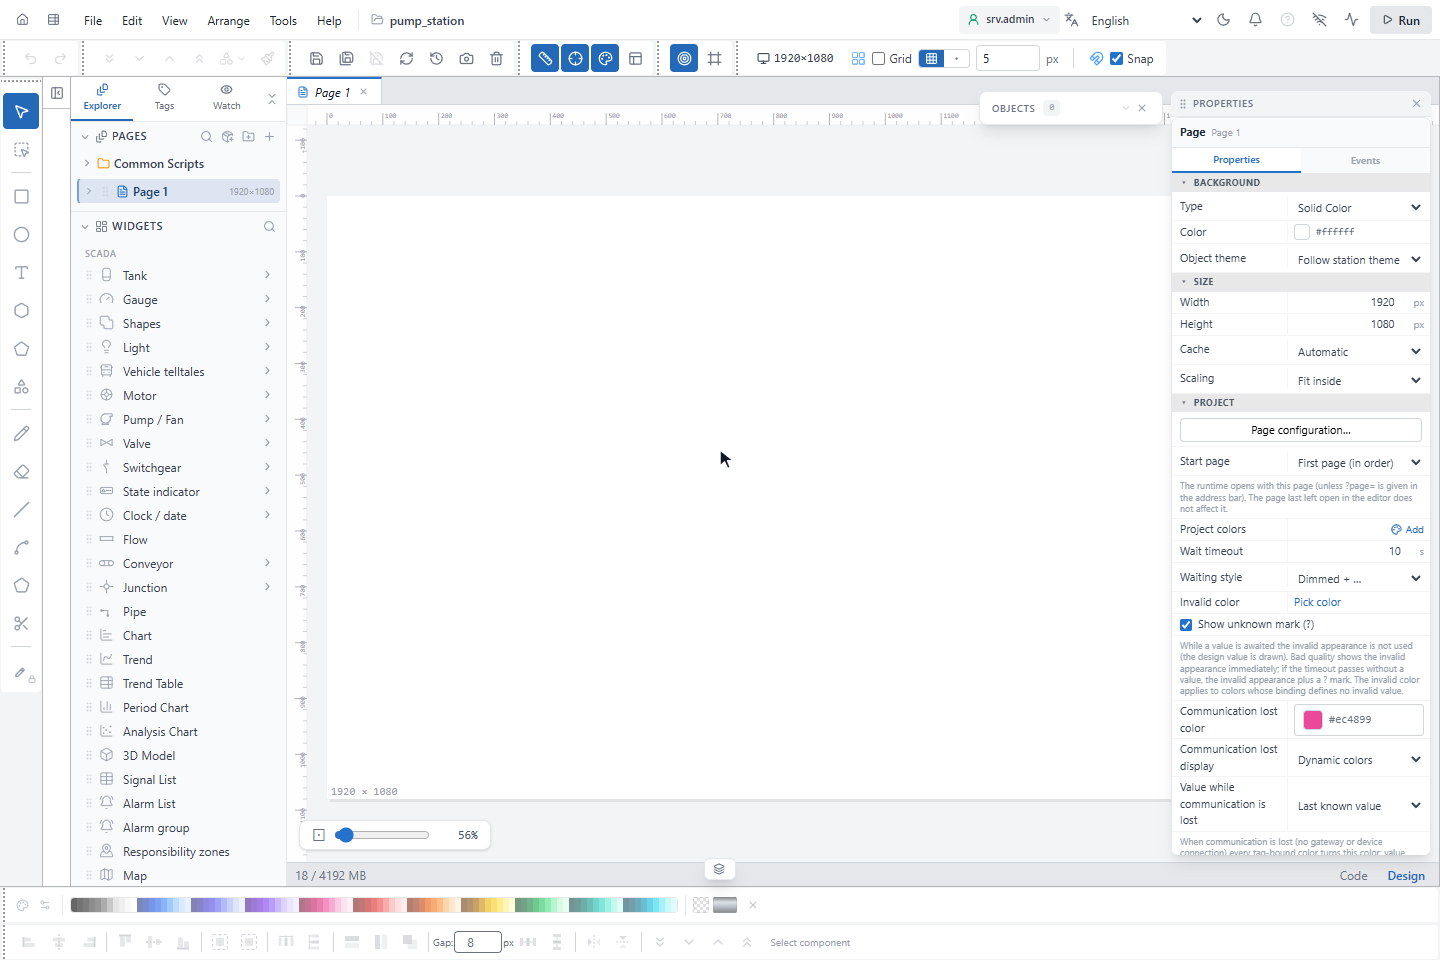
Click Create. The text next to the button shows the progress, such as Creating project…. YTCC creates the project and opens it in the screen editor. The first time, the editor asks for an interface profile in Choose your working layout; click Continue with default. See Menus, toolbars and interface profiles.
In the editor:
- The left panel lists the project's pages under PAGES. The project starts with one empty page.
- The page is in the middle, and the toolbar shows its size,
1920×1080. - The PROPERTIES panel on the right shows the page properties while no object is selected. Width and Height under SIZE are the page size.
6. Find the project in the list
Click the home icon (Back to Home) at the top left of the editor. Pump Station appears in the Projects list.
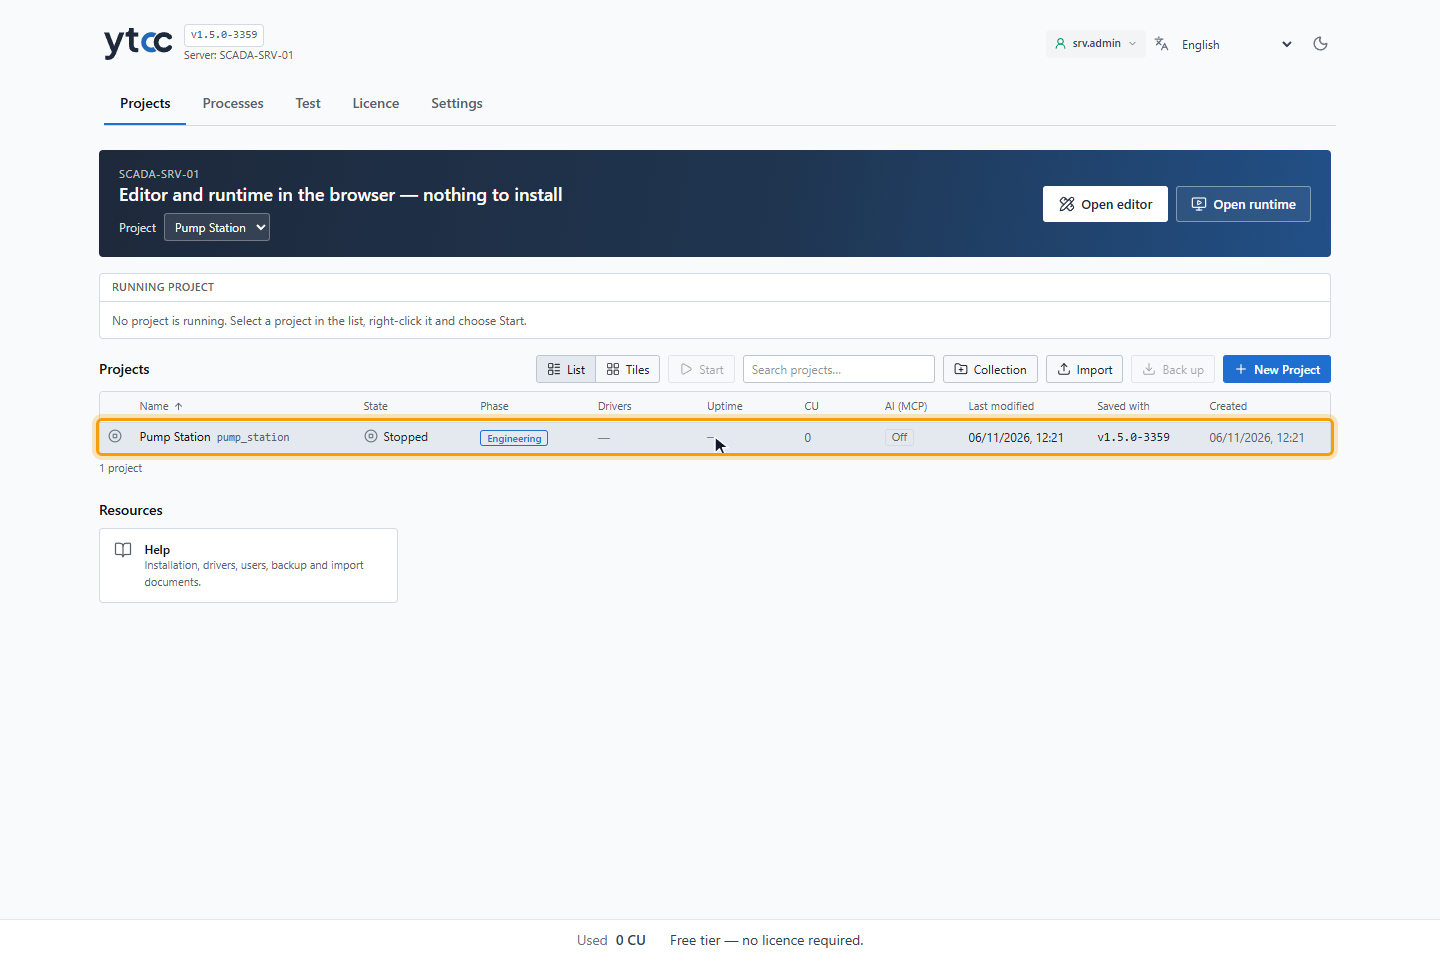
To open the project again, double-click it in the list.
Result
The project pump_station, titled Pump Station, is saved on the server and appears in the Projects list. It starts
with one empty page and has no drivers, signals or alarms yet.
Other choices in the New Project window
Screen skeleton prepares the pages of a new project from palette objects, in ISA-101 neutral colors. Every part can be changed in the editor afterwards. All skeletons except Blank put a header band with the project title and a clock and an alarm strip on every page, and add the pages Overview, Detail, Alarms, Events and Command log, sized for the priority device. Field type is preselected.
| Skeleton | Navigation |
|---|---|
| Blank | A single blank page; no header band or navigation. |
| Top menu | Menu buttons below the header band and the alarm strip. |
| Tabbed | Full-width tabs below the alarm strip. |
| Tabbed (two-tier) | Group tabs on top, the group's pages below. |
| Left tree | Grouped page tree on the left, content on the right. |
| Field type | Navigation buttons at the bottom. |
Content installs a content package that comes with the installation: a sample project (Example) or a Customer template. The project then uses the package's own screens, so Screen skeleton and Priority Device are unavailable. If the package contains users, they are imported with their roles and passwords, and Enable Auth System is not offered. When the installation has no content packages, the window says No content packages (sample / customer template) in this installation.
Troubleshooting
| Symptom | Cause | Solution |
|---|---|---|
| Create is dimmed | A field does not meet its rule. The text next to the button names the first problem, for example Project name is required or Title can be at most 80 characters. | Correct the field it names. |
| A Login Required window opens while you type the name | The root session of this browser has ended, for example after 30 minutes without activity or after Exit in another tab. | Sign in as root. The name is checked again. |
| An error message appears in the window and the project is not created | The name was taken in the meantime, or the database rejected it. | Type a different name, or open the existing project from the list. |