Edit signals in the grid
The signal list of the configuration editor is a grid that works with any number of signals: it loads only the rows you see and filters and sorts on the server. You edit cells with the keyboard, paste from Excel and change thousands of signals with one bulk change.
Before you begin
- The configuration editor is open on the Signals view.
Steps
1. Filter a column
Click the funnel in a column header. The list shows each value of the column with its count, for example the data types Bit and Float64 with their number of signals. Tick the values to show and click OK; Sort A to Z, Sort Z to A and Clear filter from "…" are at the top.
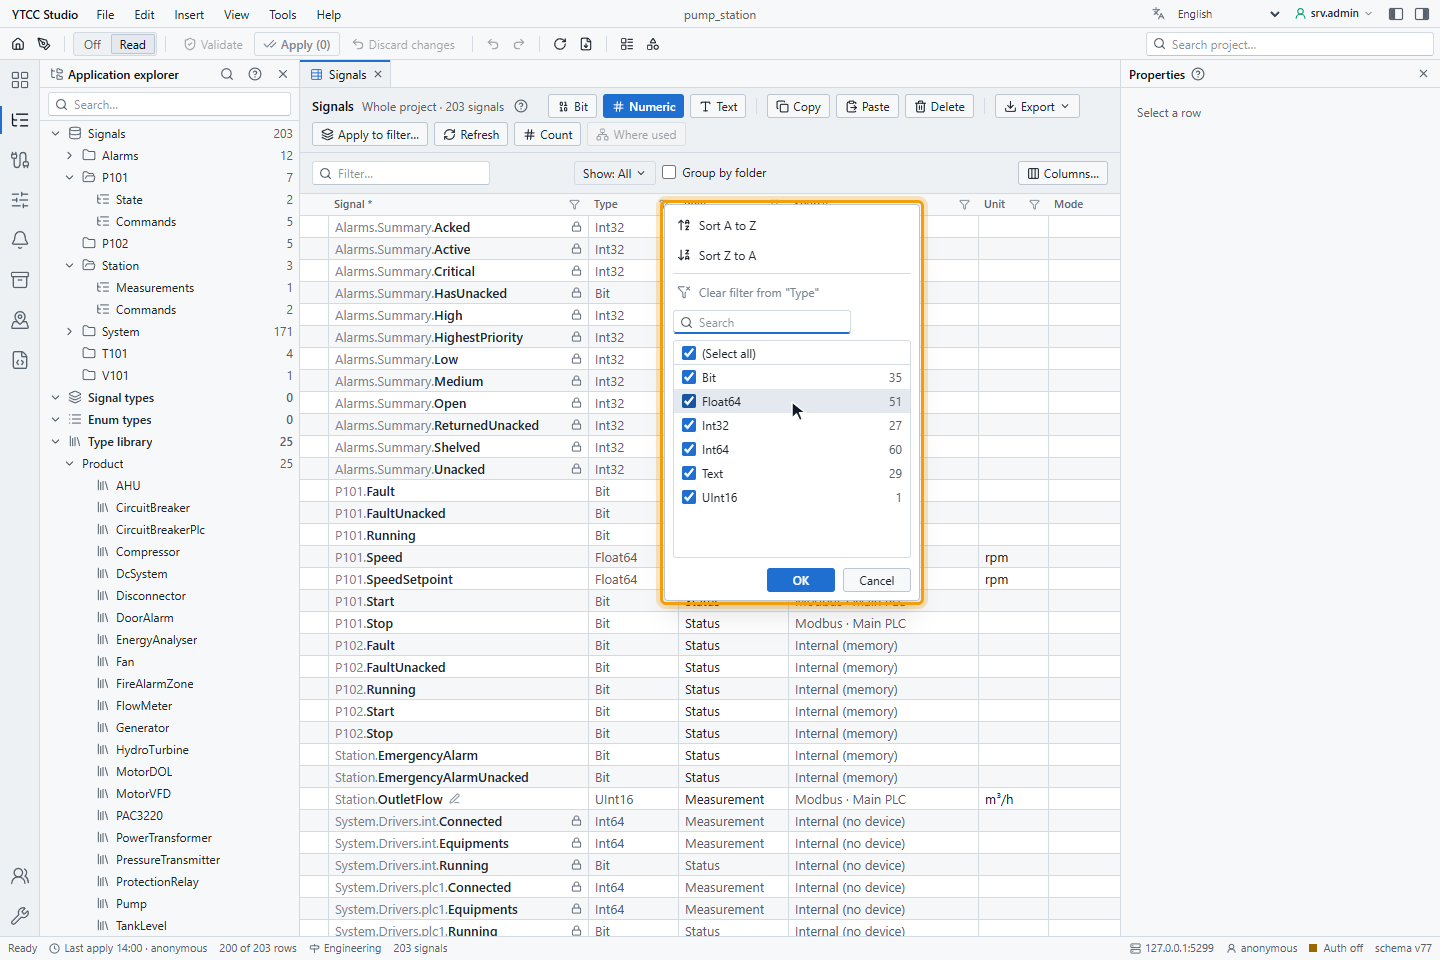
The list offers the first 500 values; use its search box to narrow it. Columns… chooses and orders the columns, and Show offers ready filters, for example Not in Auto. Your layout is saved for you.
The Source, Device, Alarm and Archive columns are filtered on the server too, so their filter covers all signals of the project and not only the loaded rows. For example, tick a device under Device to list all its signals, or (blank) to list the signals without a device.
2. Search and edit cells
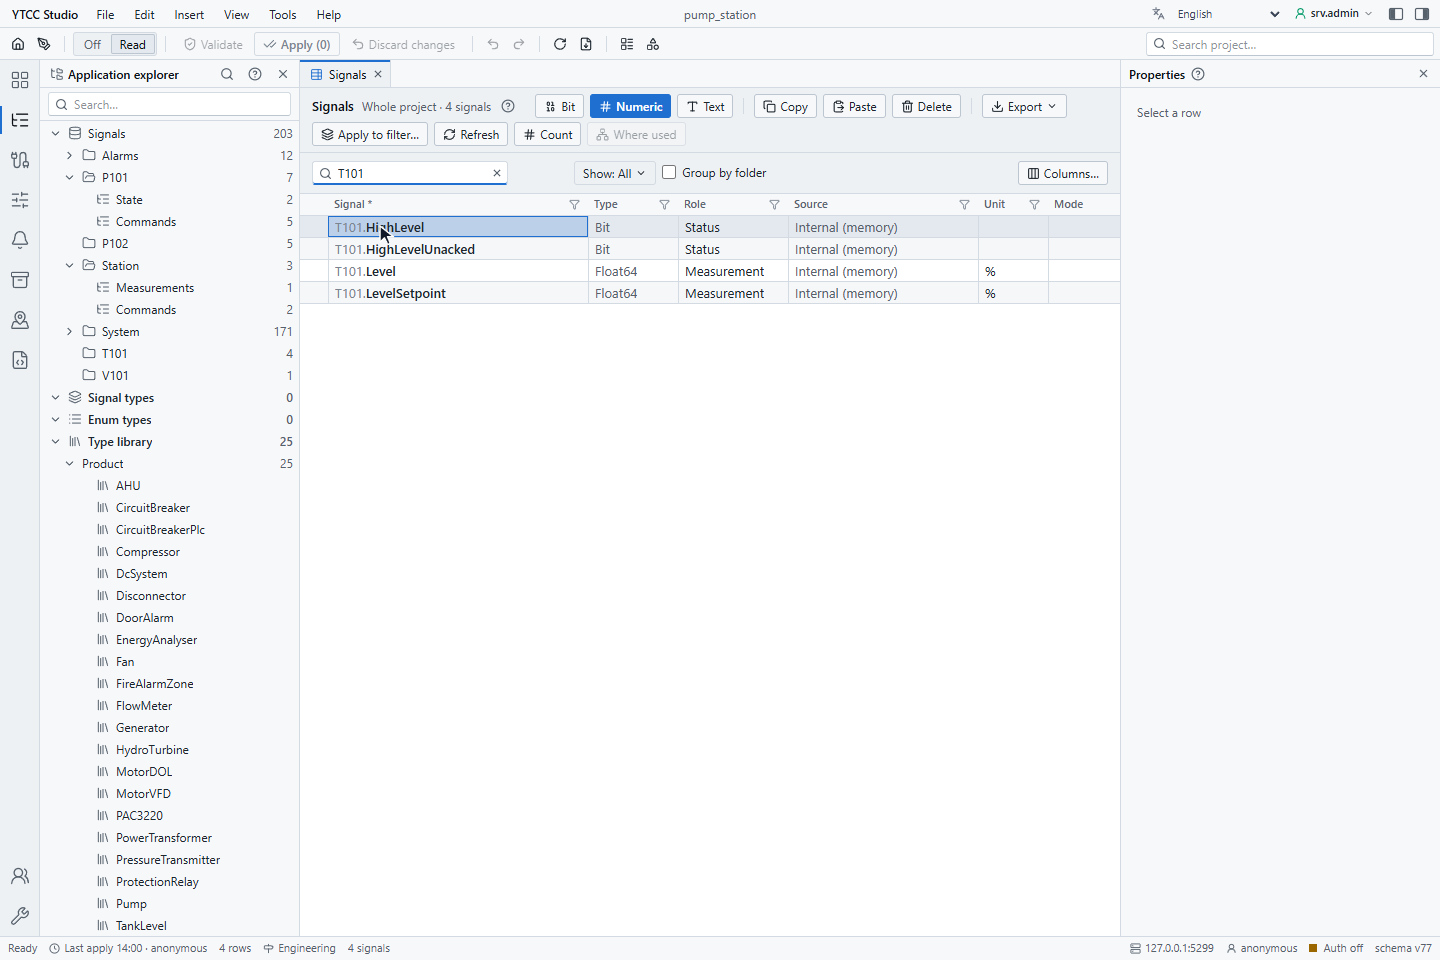
Type in the search box above the grid, here T101, to show matching signals. Then edit with the keyboard:
| Key | Action |
|---|---|
| F2 | Edit the cell under the mouse or the focus cell |
| Enter | In the editor: save and go down. Outside: open the signal window |
| Ctrl+Enter | In the editor: write the value to all selected rows |
| Tab, Shift+Tab | Save and go right or left |
| Esc | Cancel the edit; outside the editor, clear the selection |
| Ctrl+C, Ctrl+V | Copy and paste rows or cells, also to and from Excel |
| Ctrl+D | Fill down |
| Ctrl+Shift+D | Duplicate the row |
| Delete, Backspace | Delete rows (with confirmation), clear cells |
| Ctrl+A | Select all rows |
| Ctrl+Z, Ctrl+Y | Undo, redo |
Pasting from Excel writes the copied block from the top-left selected cell; read-only cells, invalid values and rows not loaded are skipped and counted. All edits stay pending until you apply; see Validate and apply.
3. Apply to filter in bulk
To change many signals at once, filter or search the list and click Apply to filter…. The window Apply to filter in bulk shows the filter, here Full path contains: T101, and lets you choose columns and their new values; Add column adds more. A value box left empty clears that column (Leave empty to clear the value). Dry run shows what will change before you apply.
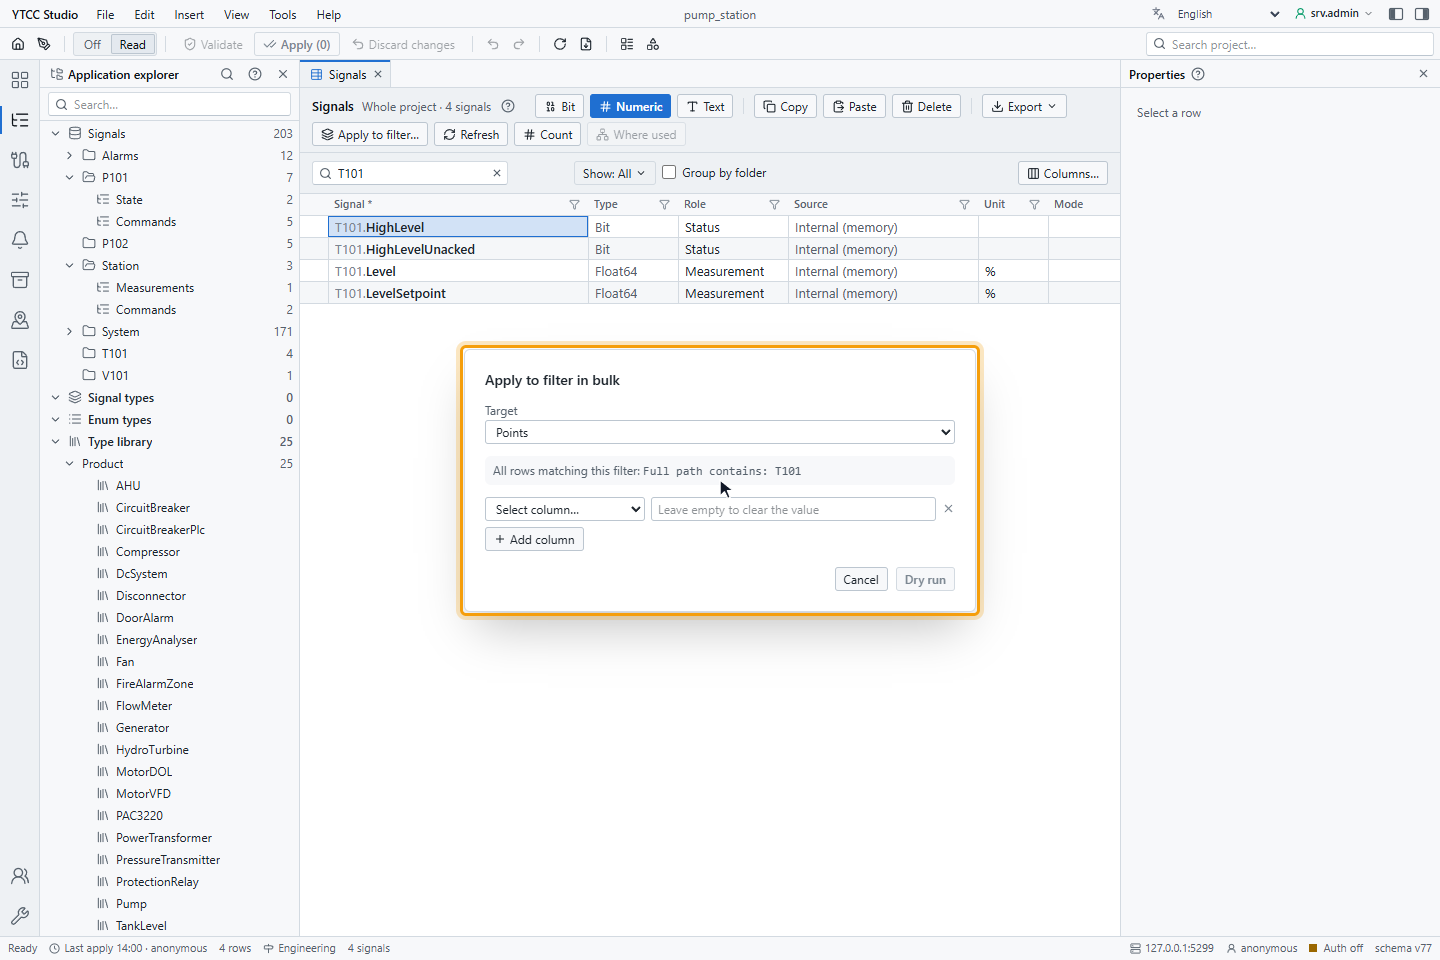
The bulk change is done on the server in one step, without loading the rows, and is recorded as one entry in the configuration audit. Choose the signals with the search box or the explorer folder.
4. Clone a signal
Right-click a signal and choose Clone…. Enter the number of Copies (1 to 1000), the Name pattern ({n}) and the Start number. The preview shows the first names; names that exist are skipped.
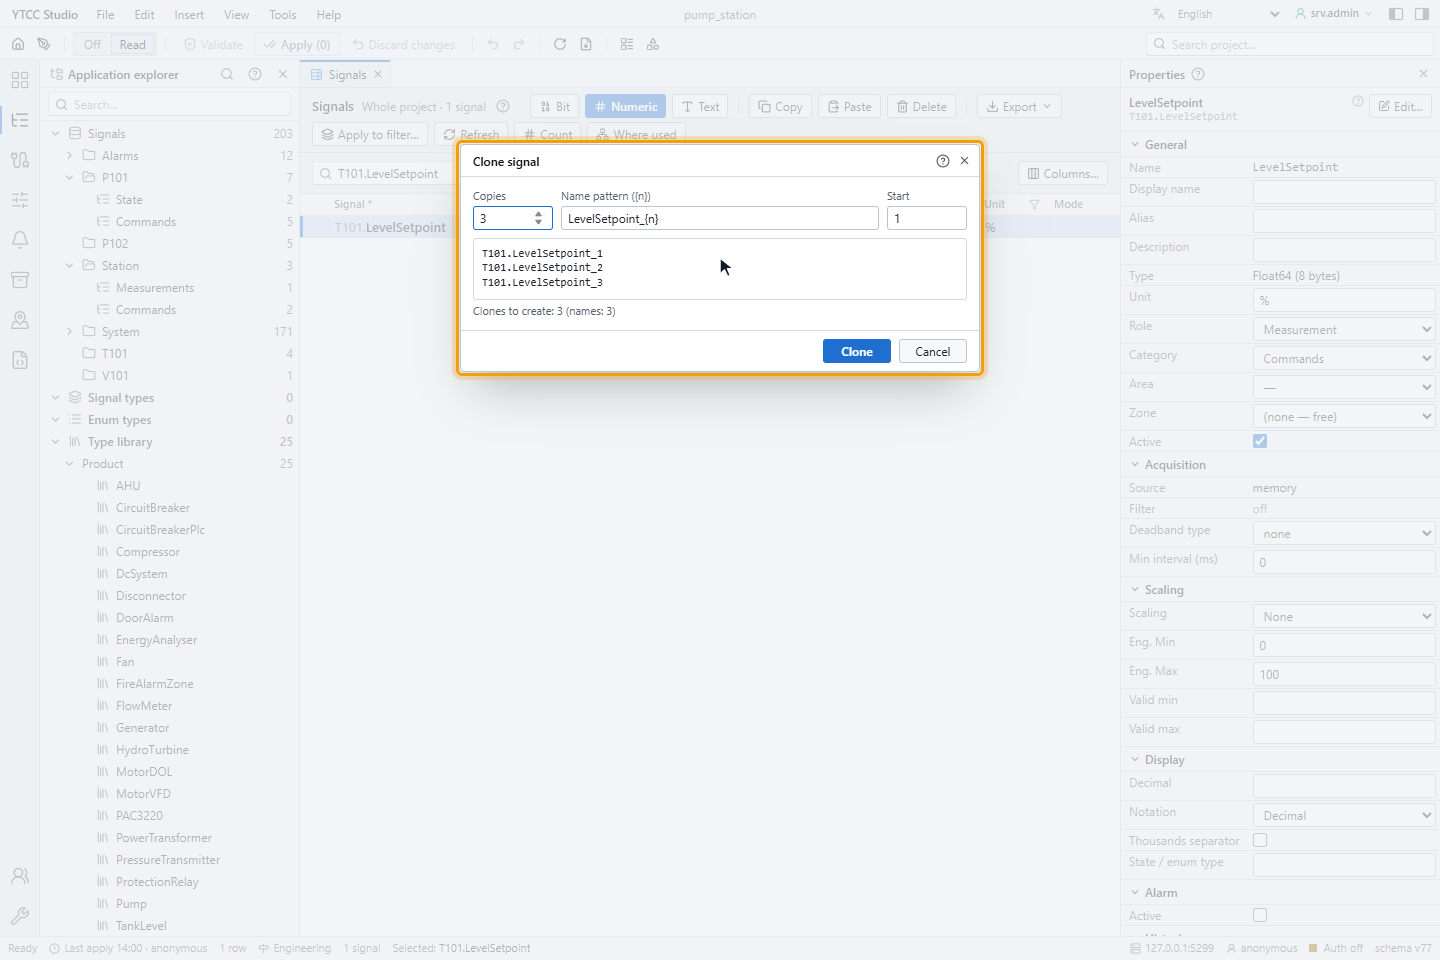
Click Clone and apply. For many pieces of the same equipment, signal types are the better choice; see Signal types and instances.
Status icons next to the name
Small icons at the right of a signal name show its state without opening the signal. Point at an icon to see its text. The amber icons, which come first, mark a signal that is not in its normal state.
| Icon | Text | Meaning |
|---|---|---|
| Hand (amber) | Manual value | The signal runs with a manual value; see Set the run mode of signals |
| Flask (amber) | Simulated | The signal runs in simulation |
| Circular arrows (amber) | Type update pending | The signal type has a newer version that the signal has not taken yet; see Signal types and instances |
| Crossed-out eye | Inactive | The signal is not active; its name is also shown dimmed |
| Bell | Alarm configured | The signal has an alarm |
| Database | Archived | The signal is recorded in the history |
| Pen | n fields overridden from the type | The signal has its own values in n fields instead of those of its type |
| Padlock | Has fields locked by the type | Some fields are locked by the signal type |
Export the list
Open Export in the toolbar of the signal list and choose XLSX or CSV. The browser downloads
<project>_signal_list.xlsx or <project>_signal_list.csv. The file holds what the list shows:
- the signals of the current search and column filters, for all of the project and not only the loaded rows;
- in the order in which the list is sorted;
- with the visible columns, in their order.
Export signals (XLSX)… and Export signals (CSV)… in the Export menu of the editor toolbar do the same and open the Signals view first if it is not open.
The file holds the applied configuration; pending changes are not in it. The CSV file uses the format of the table export; see Import and export with Excel or CSV.
Good to know
- A selection of more than 10 000 rows can only be changed with Apply to filter….
- Count counts the rows of the current filter on the server.
- Where used in the toolbar lists the screens, scripts and settings that use the selected signal; see Find where a signal is used.