Import and export with Excel or CSV
Large configurations are easier to prepare in a spreadsheet. YTCC exports its configuration tables to Excel (XLSX) or CSV and imports them back. An import never writes directly: it becomes pending changes that you check and apply like any other change.
There are two ways to import:
| Way | For | Opened from |
|---|---|---|
| Import wizard | Signals, devices and the alarm settings of existing signals, from any file whose columns you map | File › Import…, or Import with column mapping… |
| Table import | Any configuration table, from a file in YTCC's export format | File › Import / export, section Import |
Before you begin
- With authentication on, importing needs the configuration editing permission: Import requires the configuration edit permission.
- Only one import can run in a project at a time.
Steps
1. Export configuration tables
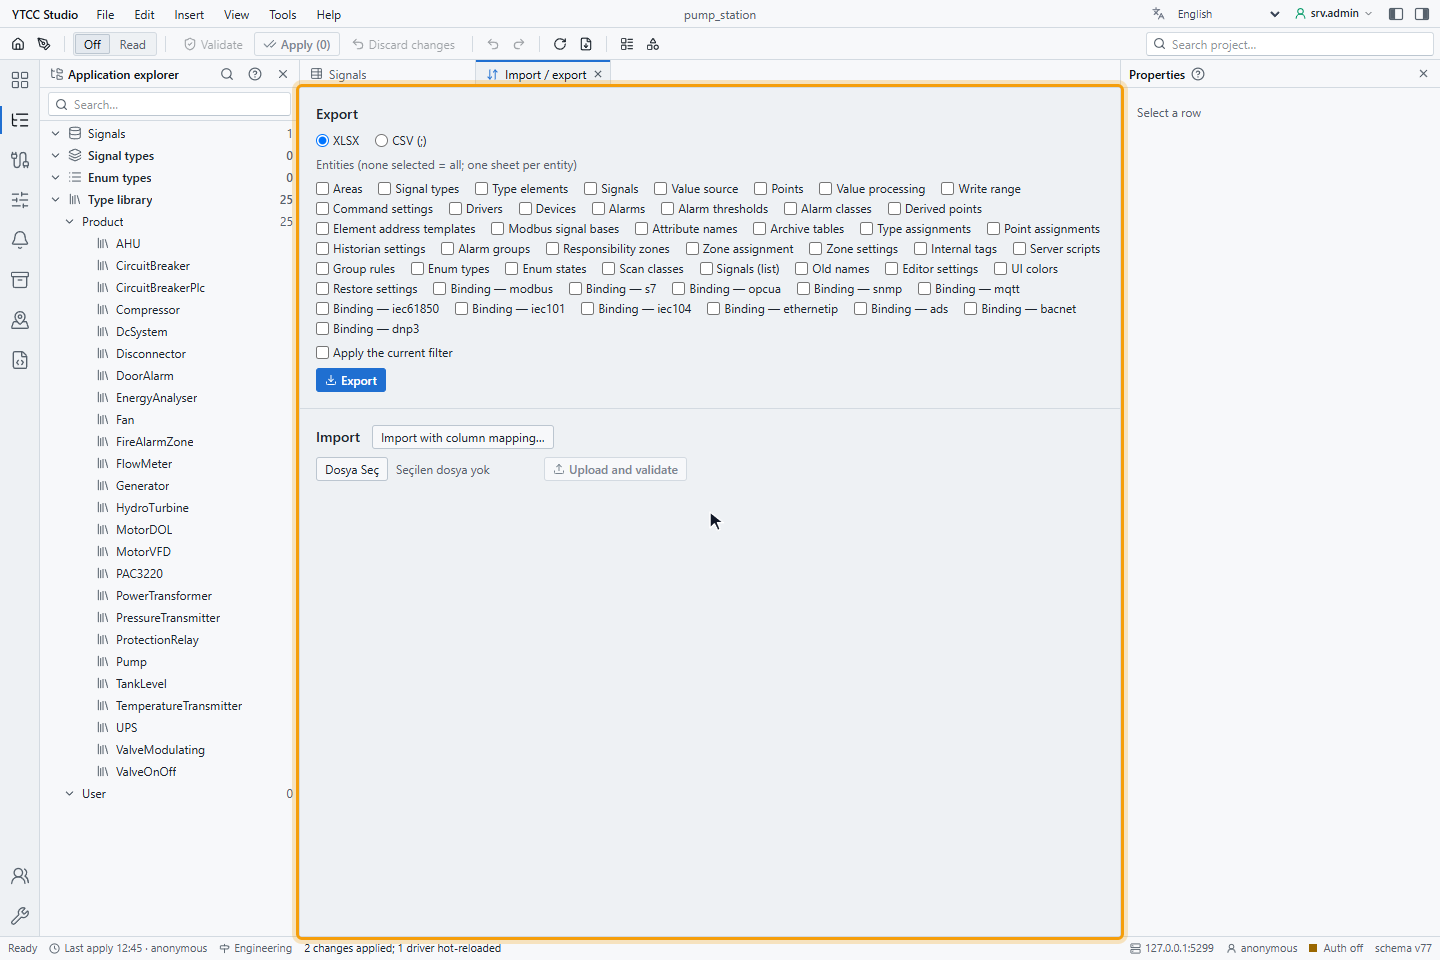
Choose File › Import / export. Under Export, choose XLSX or CSV (;) and tick the tables (entities) to
export, for example Signals, Drivers, Devices, Alarm thresholds or Binding — modbus. With XLSX,
each table goes to its own sheet, and no selection means all tables; CSV holds one table. Apply the current filter
limits signal-related tables to the filter of the signal list. Click Export; the browser downloads the file, for
example pump_station_all.xlsx.
2. Get the signal import template
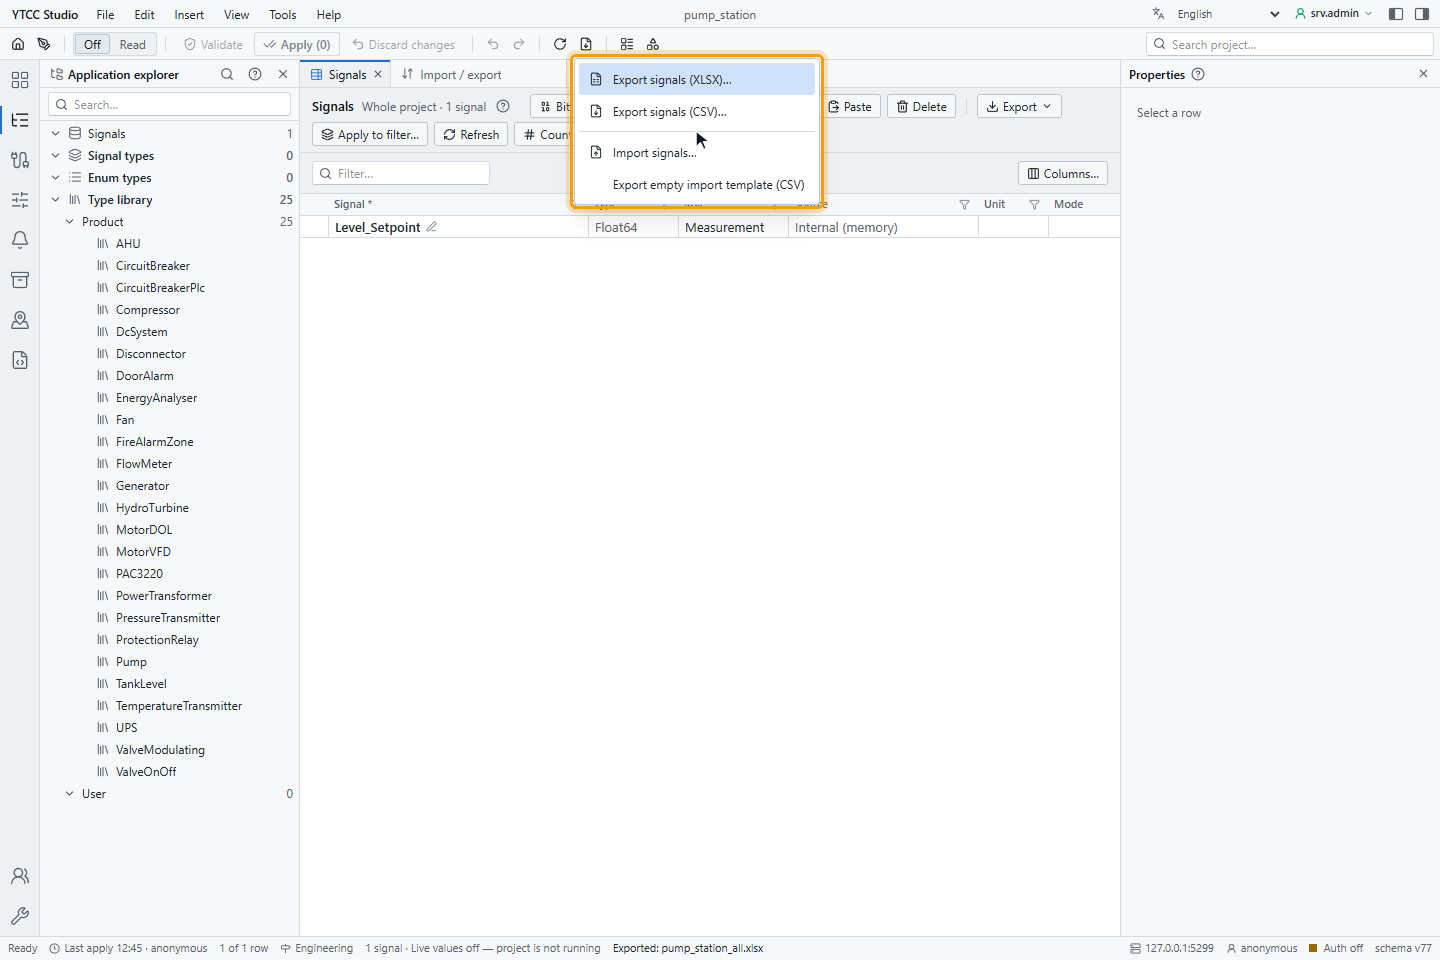
In the signal list, open Export in the toolbar. It offers Export signals (XLSX)…, Export signals (CSV)…,
Import signals… and Export empty import template (CSV). The template import-template-signals.csv has the
columns of the import wizard:
path;folder;name;data_type;description;display_name;alias;unit;device;address;min;max;al_h;al_hh;al_l;al_ll;has_arch;signal_role;category;access
Fill in one signal per row. For example, Tank1.Level;Tank1;Level;float64;Tank level;;;%;;;0;100;80;95;;;;measurement;;ro
adds a numeric signal in the folder Tank1 with the unit %, the range 0–100, and 80 and 95 in the columns that the
wizard maps to Alarm H and Alarm HH.
3. Choose the file to import
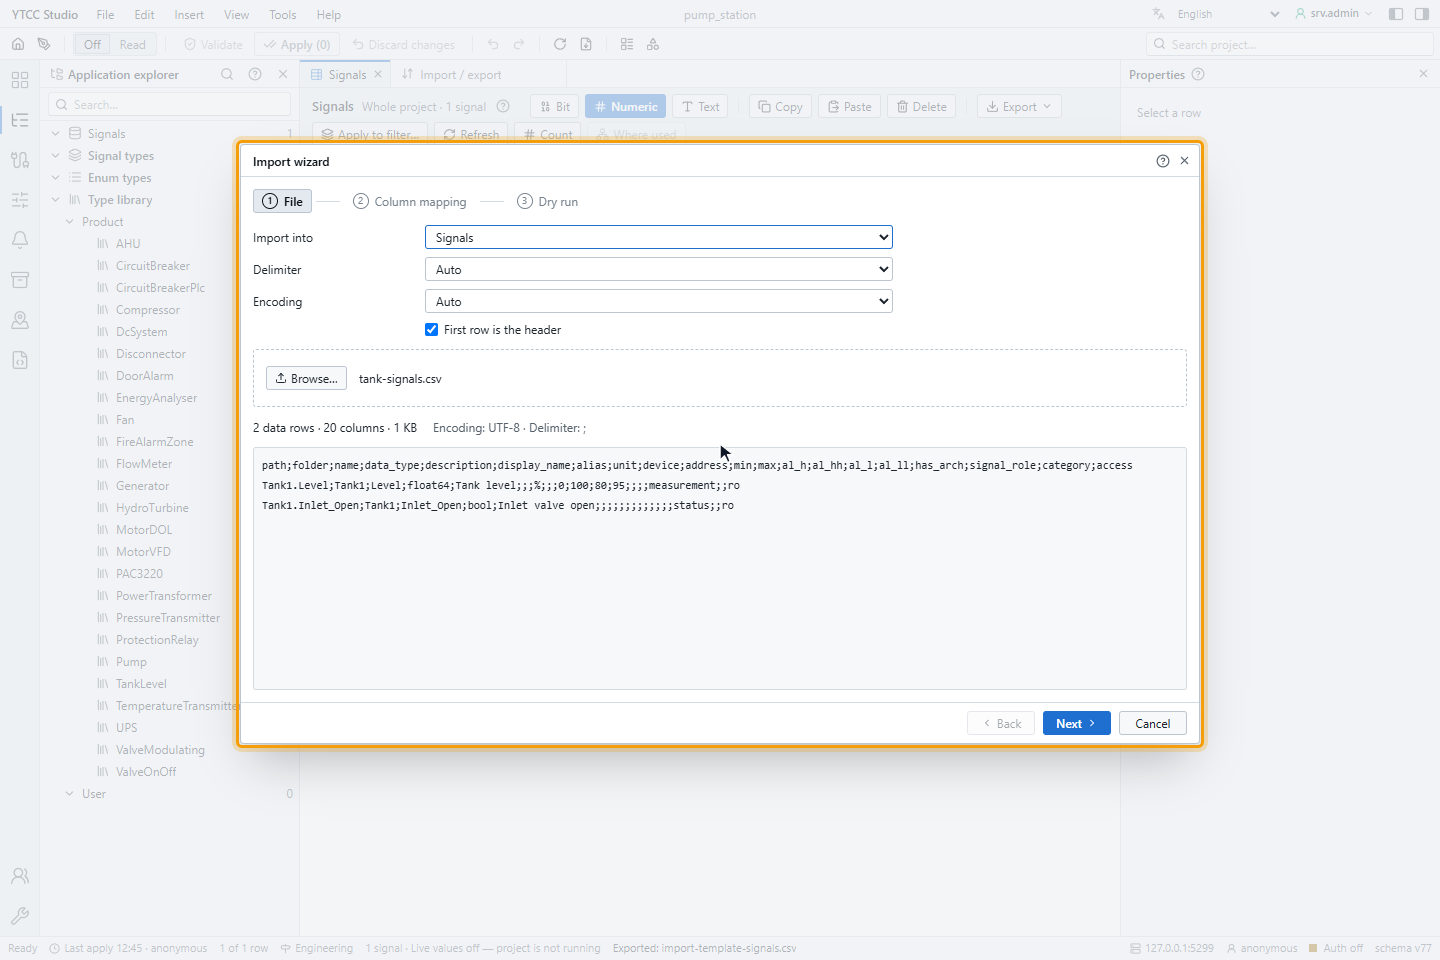
Choose File › Import…. Step 1 of the Import wizard, File, asks for:
- Import into: Signals, Devices or Alarm settings of existing signals.
- Delimiter (Auto,
;,,or Tab), Encoding (Auto, UTF-8 or Windows-1254 (Turkish)) and First row is the header.
Click Browse… or drop a .csv or .xlsx file. The wizard shows what it found, for example 2 data rows · 20
columns and Encoding: UTF-8 · Delimiter: ;, with the first lines of the file. Click Next.
4. Check the column mapping
Step 2, Column mapping, lists each Column in file with a Sample value, the field it is imported as (Import as) and how it was matched. Columns whose header matches a field are matched automatically (auto (header name)). Change Import as to map a column by hand, or choose (do not import).
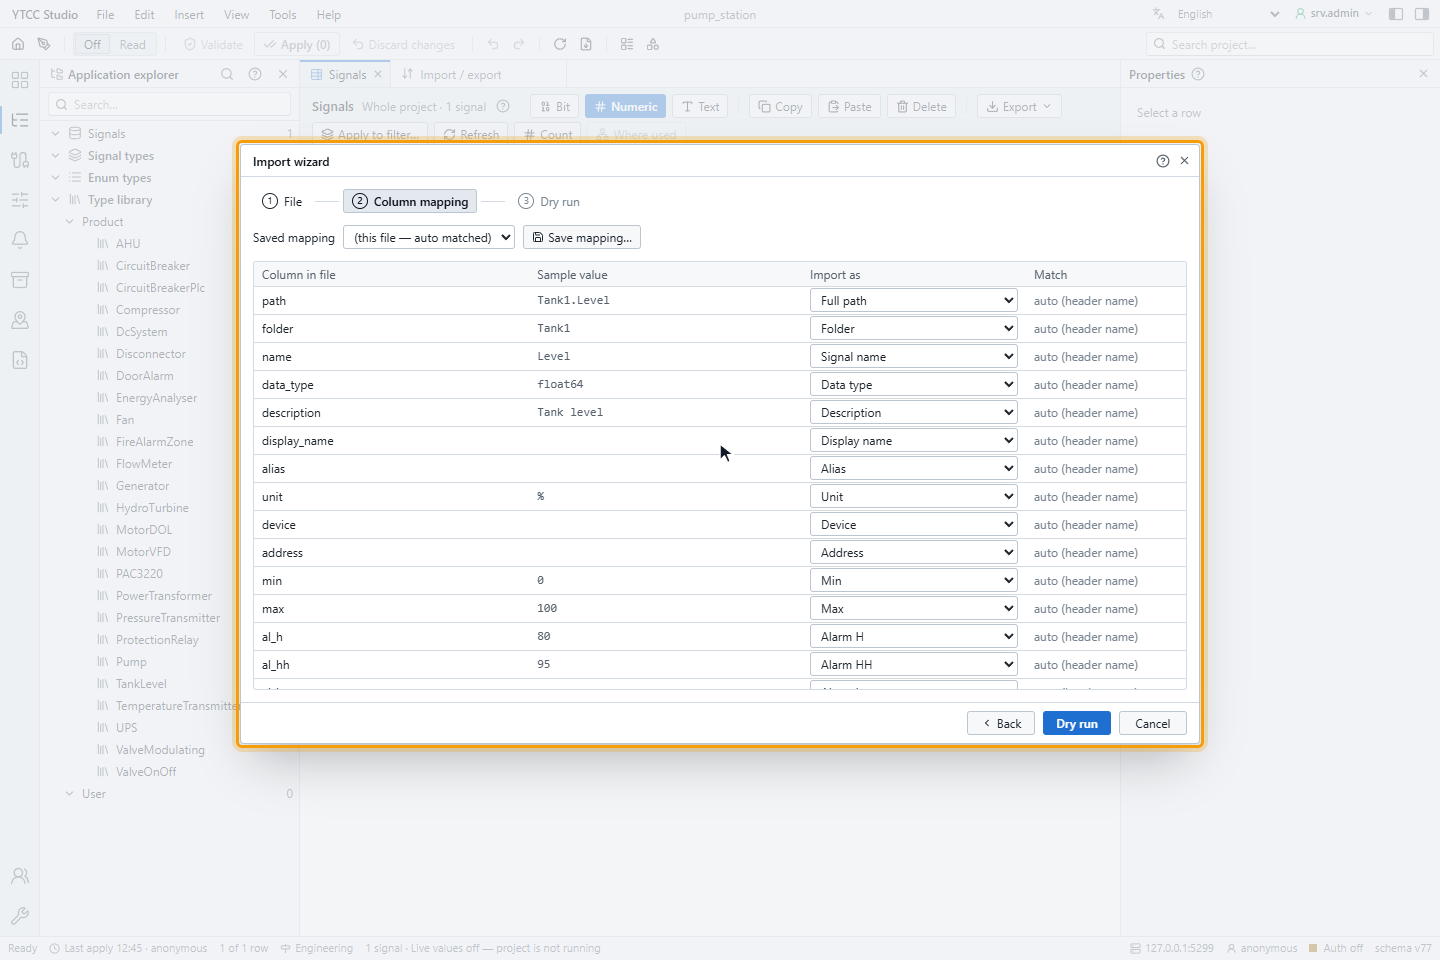
Save mapping… stores the mapping under a name; next time choose it under Saved mapping. Click Dry run.
5. Run the dry run
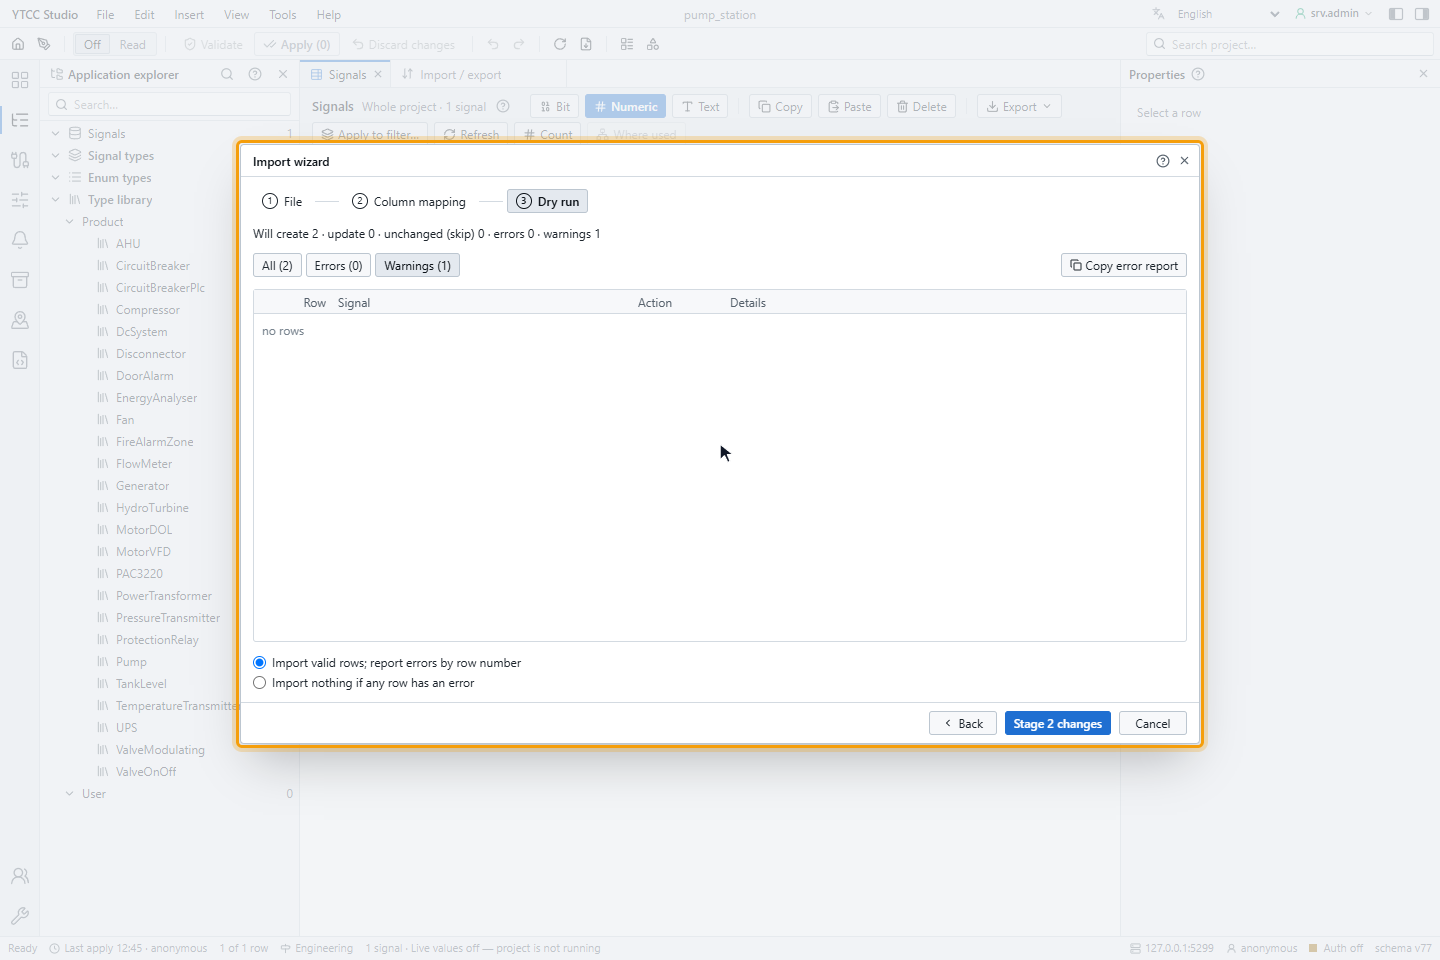
Step 3, Dry run, checks every row without saving anything and counts what would happen, for example Will create 2 · update 0 · unchanged (skip) 0 · errors 0 · warnings 1. The tabs All, Errors and Warnings list the rows, with the Row number in the file, the Signal, the Action and the Details. Copy error report copies the list for correcting the file.
Choose how to handle errors:
- Import valid rows; report errors by row number, or
- Import nothing if any row has an error.
6. Stage and apply the import
Click Stage n changes. The import is added to the pending changes: Import staged: 2 new, 0 updated — press Apply to commit. Press Ctrl+S: Validate changes lists it under Staged operations as Import: tank-signals.csv, with the number of signals it affects. Click Apply, then OK.
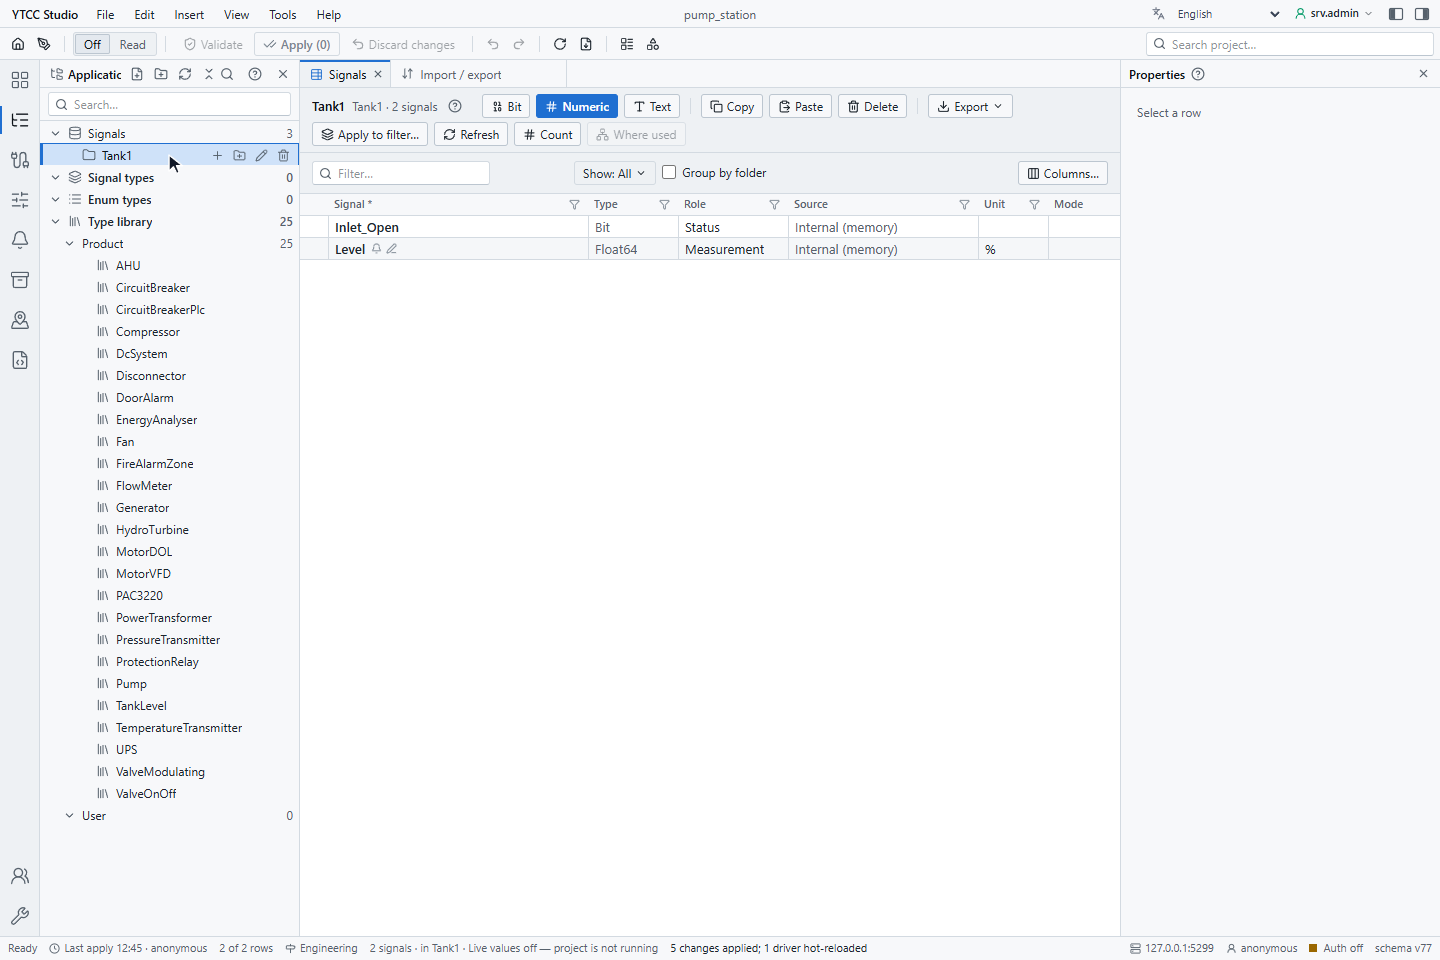
Discard changes before Apply drops the staged import. A staged import that is not applied within 24 hours is deleted when the next import starts.
Result
The signals of the file are in the project, in the folders given by the path and folder columns.
File format of the table import
The Import section of File › Import / export reads files in the format that Export writes. Choose the file and click Upload and validate; the server runs a dry run and lists the rows by status, errors first. If there are errors, correct the file and upload it again.
- The first column is
_action: empty means insert or update,deletedeletes the row. - In binding tables, the protocol parameters are
p.<name>columns. On the driver and device sheets,paramsis one JSON cell. - An empty cell clears the value. In a
p.*column an empty cell means that the parameter is absent; writenullto set it to null. - A column that is missing from the file is not changed, so a file with a few columns updates only those.
- Information columns such as
idare not exported and are ignored on import. - CSV uses
;as delimiter and UTF-8 with BOM. Text starting with=,+,-or@gets a leading', which the import removes again. - An XLSX sheet holds at most 1,000,000 rows; more rows continue on
<table>_2and so on. - Limits: XLSX 64 MiB, CSV 1 GiB by default. An upload that sends no data for 60 seconds is cancelled.
Existing records and deleted signals
After the dry run of a table import, Existing records sets what the import does with records that are already in the project:
| Option | What Apply writes |
|---|---|
| Update and add (recommended) | The default. New records are added; the columns that are in the file are updated in existing records, and rows with _action delete are deleted. Columns and records that are not in the file stay unchanged. |
| Add new only | Only the new records. The existing records are not touched and nothing is deleted; the option shows how many existing records it leaves alone. |
| Write nothing if an existing record would change | Everything, but only if no existing record changes. If the file updates or deletes existing records, Apply is unavailable and the window says how many: The file changes or deletes n existing records — it cannot be applied with this rule. |
When the file deletes signals, YTCC checks before you apply whether the screens, server scripts, calculated signals or
alarm group rules use them. Signals that are used are listed under n signals to be deleted are used elsewhere —
deleting them breaks these references, each with the places that use it, for example screen Overview or
script ShiftReport. The first 50 deleted signals are checked; with more, the window says Only the first 50
deletions were checked. If the check fails, it says Could not check where the signals to be deleted are used.
The warning does not stop Apply. For the full list of one signal, including bindings and other linked settings, see
Find where a signal is used.