Set the run mode of signals
During commissioning or a test you often want a signal to show a chosen or generated value instead of the value of its source: a flow display that should move, an alarm that should be triggered without touching the plant. In the configuration editor you set the run mode of one signal, of a selection or of all signals matching a filter. Operators set a manual value on the run screen instead; see Enter a manual value.
| Mode | The signal shows |
|---|---|
| Auto | The value of its source (device, calculation, memory) |
| Manual [SCADA] | A value entered here; the source is ignored |
| Simulated | A generated test value; alarms and history mark it as simulated, and commands to the signal are refused |
Manual and simulated values reach operator screens, alarms and history of the running project. The field device is not affected. Return the signals to Auto when you are done.
Before you begin
- The project is running, and your profile has the Signal run mode permission.
- The signal allows the mode: on the Advanced tab of the signal, simulation allowed and substitution allowed (manual value) are on by default.
Steps
1. Open Set mode
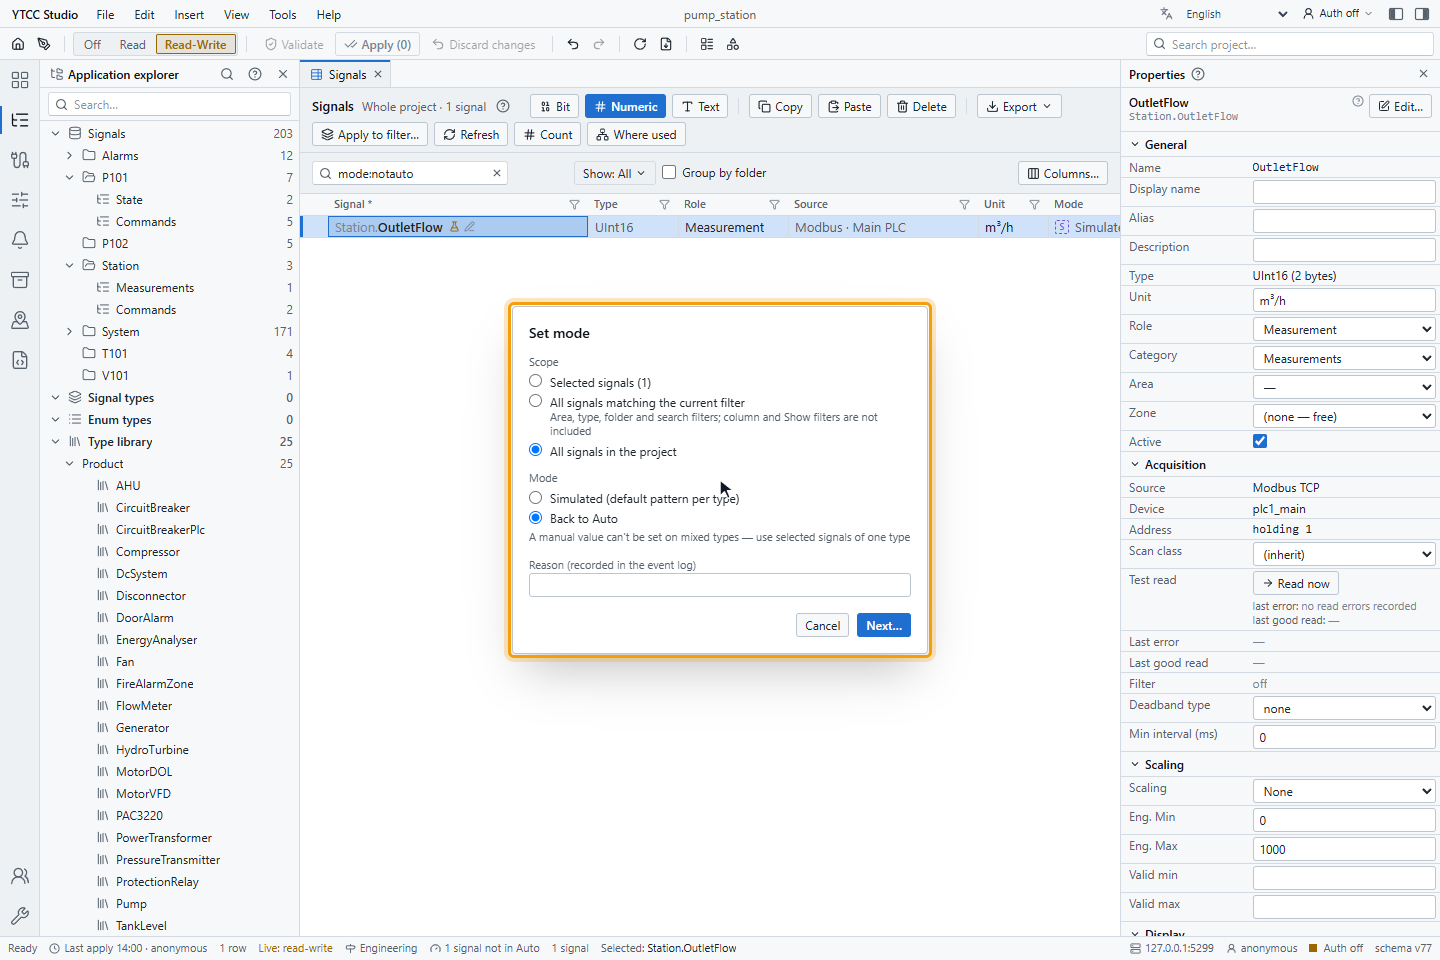
Right-click a signal, or a selection, and choose Set mode…; the toolbar of the signal list has the same button. The window Set mode asks for the Scope: Selected signals (N), All signals matching the current filter or All signals in the project.
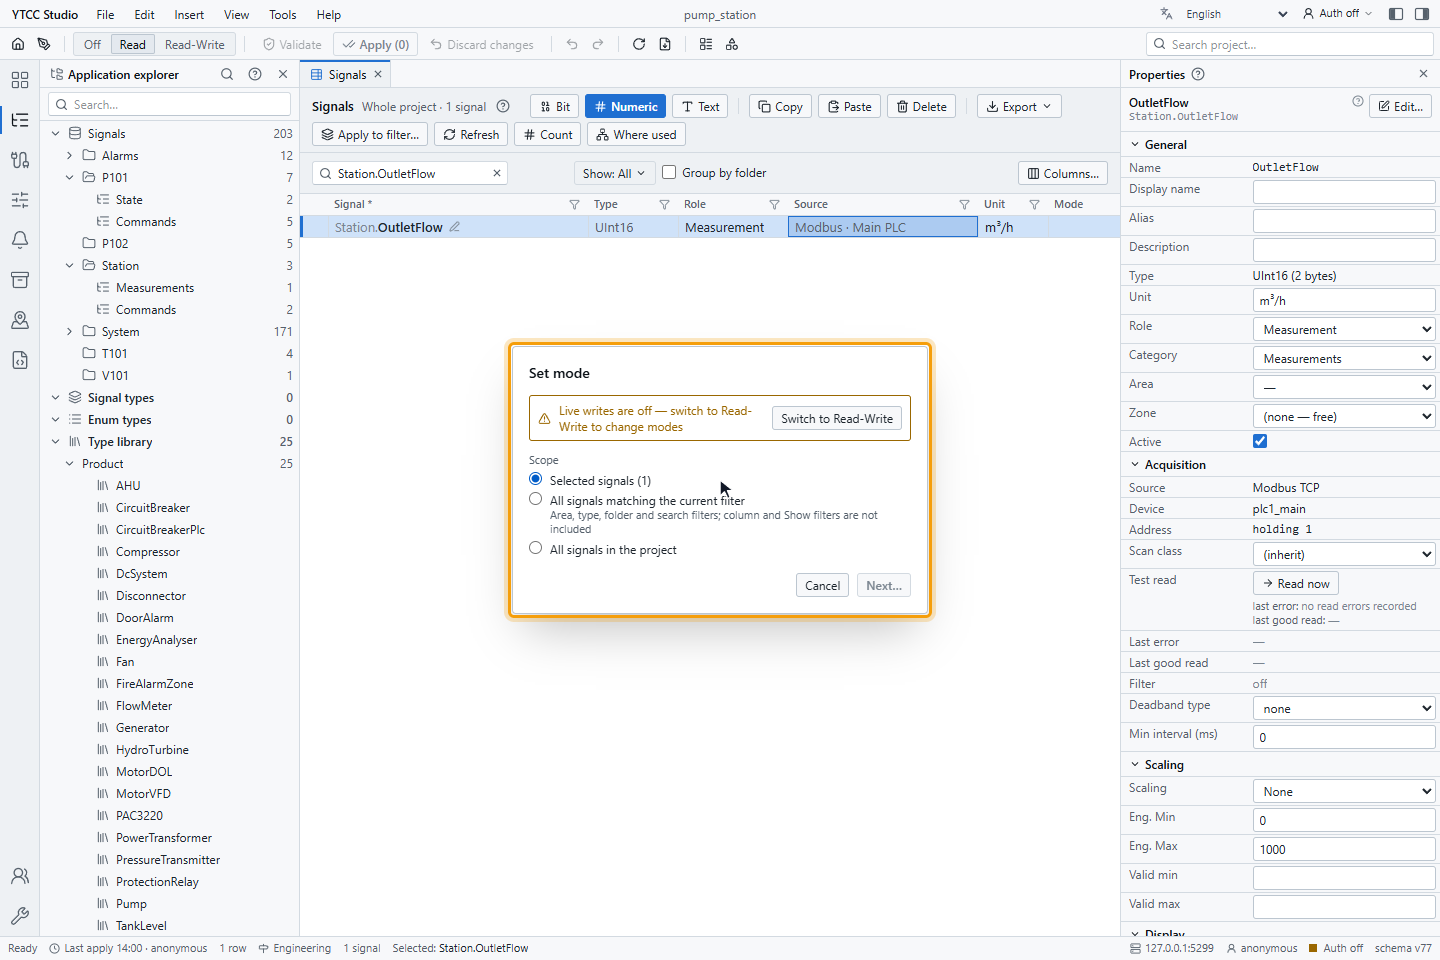
Mode changes write to the running project, so the live data switch in the toolbar must be on Read-Write. Otherwise the window shows Live writes are off — switch to Read-Write to change modes; click Switch to Read-Write.
2. Simulate a signal
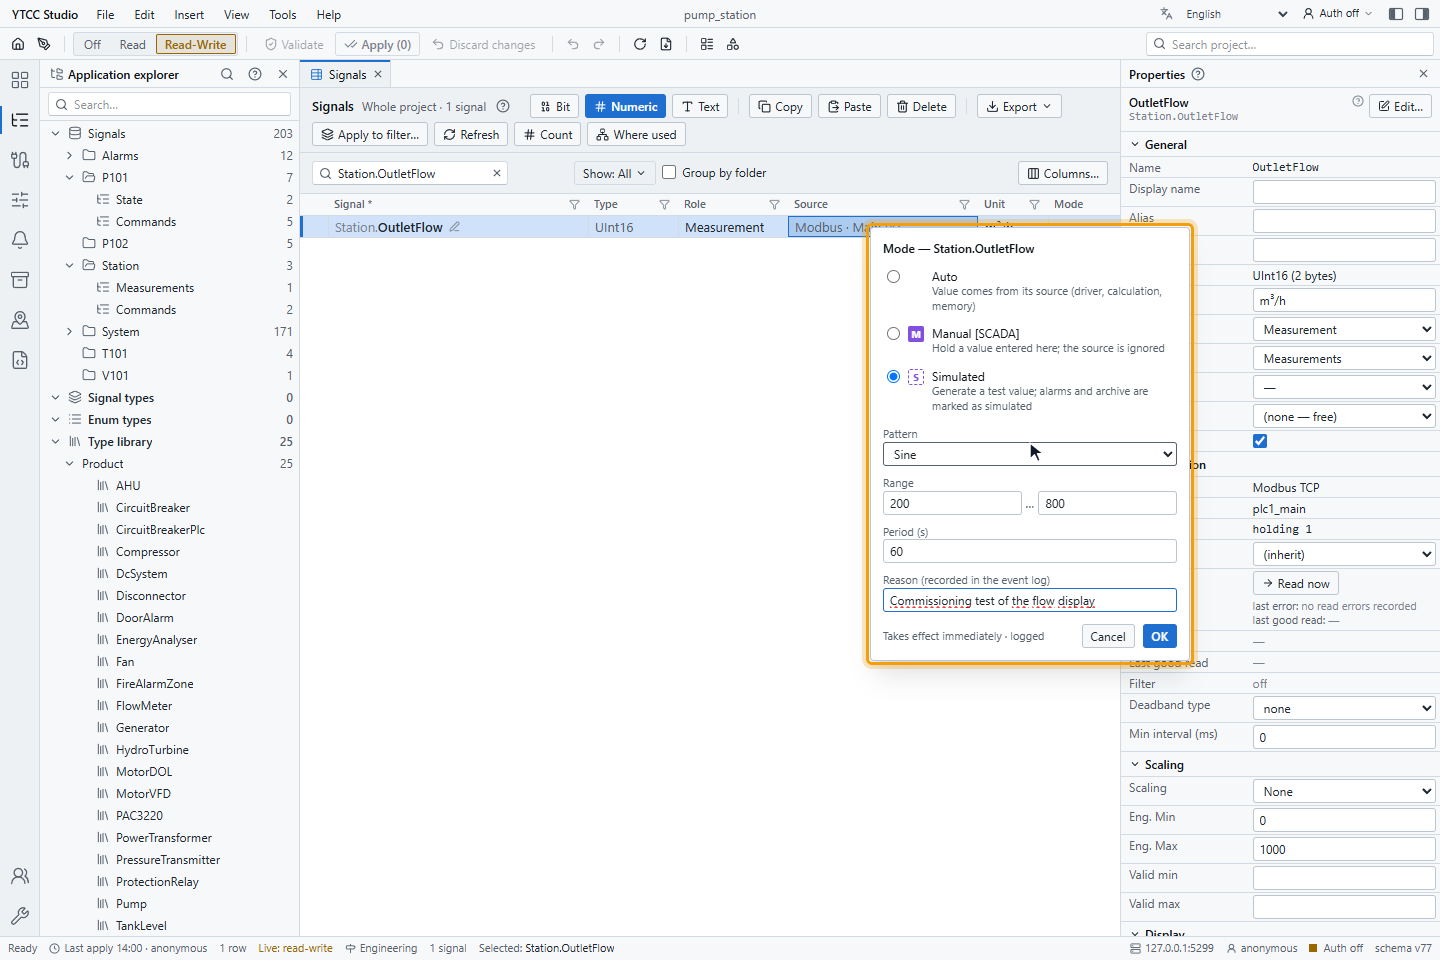
With Selected signals, click Next…. In the window Mode — <signal> choose Simulated, the Pattern, the Range and the Period (s), and enter a Reason (recorded in the event log).
| Data type | Patterns |
|---|---|
| Numbers | Sine (default), Ramp, Square, Random, Constant |
| Bool | Toggle, Constant |
| Enum | Cycle, Constant |
| Text | Constant |
The range is by default the engineering range of the signal; the period is 1 second to 1 day, 30 seconds by default. For Manual [SCADA] enter the Value instead; it must fit the data type and the range.
3. Confirm the mode change
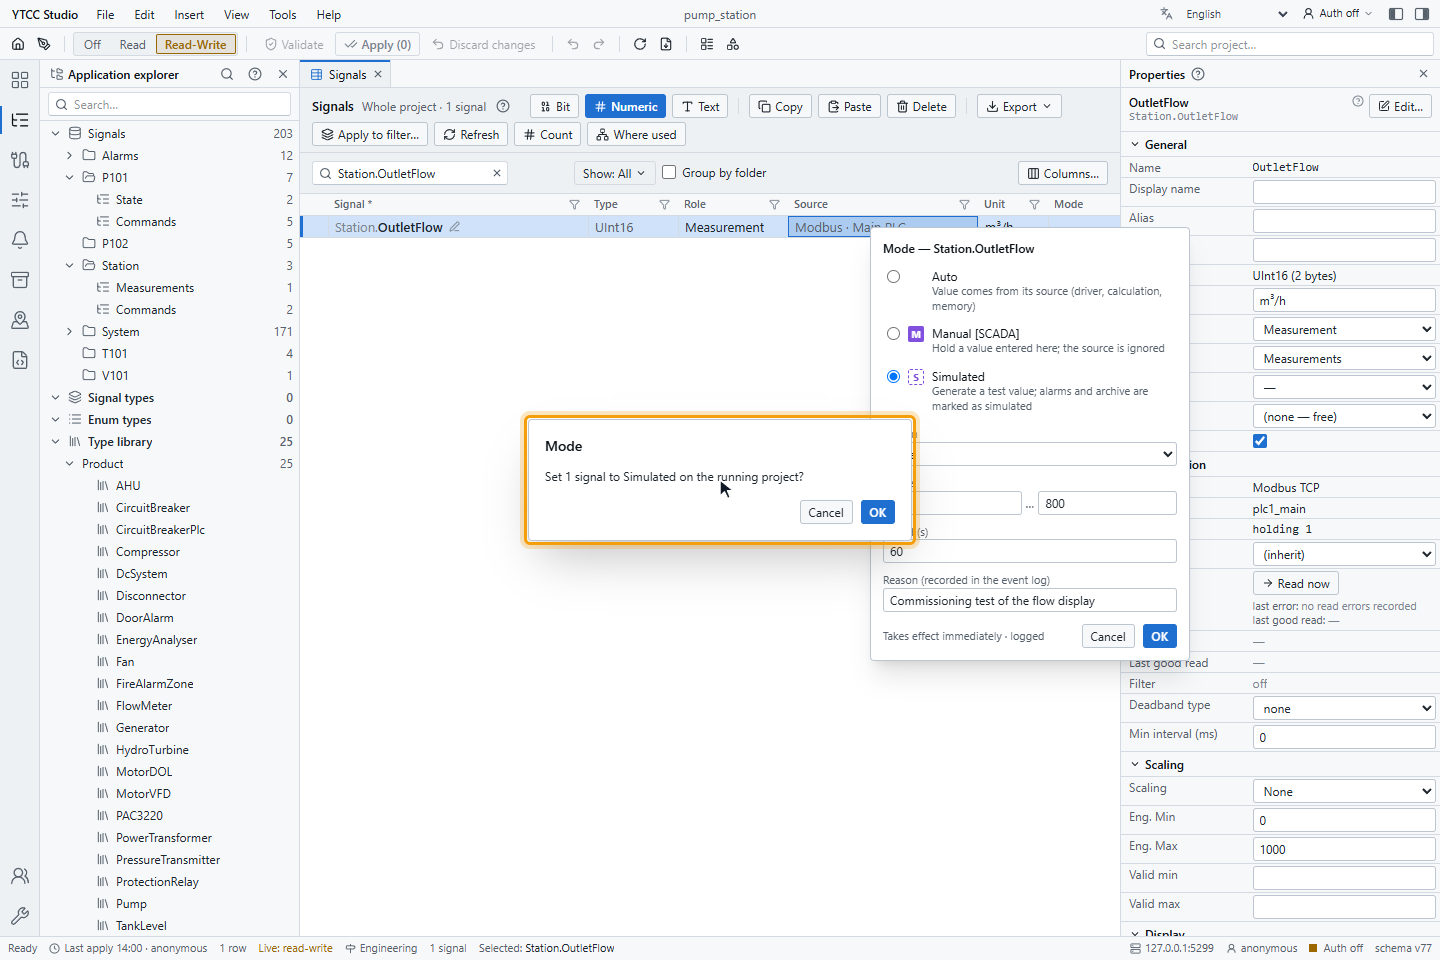
Click OK. YTCC asks, for example, Set 1 signal to Simulated on the running project? Click OK. The change applies at once and is written to the event list with your name and the reason.
4. See which signals are not in Auto
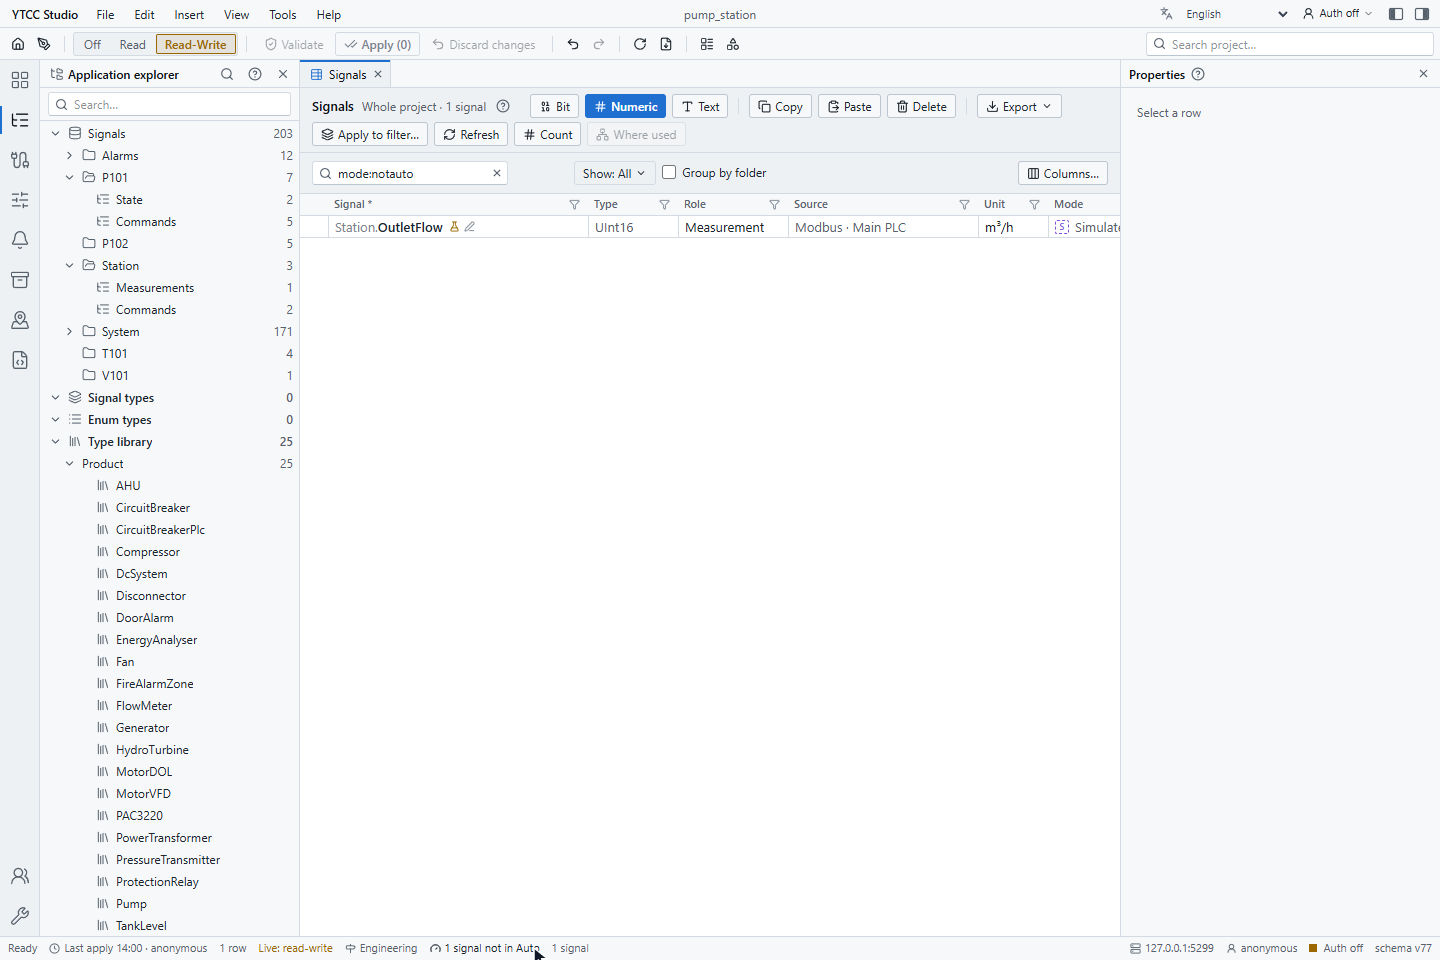
The status bar shows 1 signal not in Auto (or N signals not in Auto). Click it to list these signals. The Mode column shows a filled M for manual, a dashed S for simulated; it is empty for Auto. The Show filter offers Not in Auto (manual / simulated) as well.
5. Return the signals to Auto
Open Set mode… again, choose the scope, here All signals in the project, and Back to Auto, then Next… and confirm Return 1 signal to Auto on the running project? The live values from the sources return immediately.
Set the mode of a folder or a type
To simulate a whole part of the plant, for example during commissioning or training, right-click a folder or a signal type in the explorer and choose Set mode…. The window opens with the scope All signals matching the current filter, limited to the signals in that folder or to the instances of that type. The server selects the signals, so the number of signals does not matter. The same rules as for any filter scope apply: only Simulated (default pattern per type) and Back to Auto are offered, and the change is confirmed and recorded in the same way.
Good to know
- With the scope All signals matching the current filter or All signals in the project, only Simulated (default pattern per type) and Back to Auto are offered; a manual value needs selected signals of one type.
- A selection can have up to 10 000 signals; for more use the filter scope.
- Signals outside your responsibility zones, signals that do not allow the mode and write-only signals are left out; the confirmation says how many.
- The mode survives a restart of the project. If the driver of a signal is not running, the mode is applied when it starts.
- Undo (Ctrl+Z) sends the previous mode back to the running project.